All purchases in EPSS need to be submitted through the EPSS orders app. Doing this helps the purchasing team keep track of the orders that are placed, and lets us email you when the order is completed.
To access the orders app, you need an EPSS Account which is separate and different than your UCLA Logon ID used for most campus services.
Faculty, staff, researchers, and postdocs have EPSS accounts automatically created for them when they are hired.
If you are a graduate student who needs to place orders for your lab, please have your PI email helpdesk@epss.ucla.edu to request you be added to the app.
Along with this request, you need to include:
Your Name
An email address (UCLA email if you have one)
Your 9 digit UID# (the number on your student id)
Once we have added you, you can login and place orders. The app is only accessible from campus, or over the UCLA VPN
This guide will provide a basic overview of how to create and submit an order as a department member in EPSS. Other guides cover usage as Supervisor, Fund-Manager and Administrator roles.
Once you have logged in, you will see some variation of this screen:
STEP 1a: If this is your first time logging in before you place an order, please click on “preferences” in the top menu, and set your account details.
The “Room Number” and “Phone” fields are required to have an order placed, so the orders team knows where your order is going, and who to call about it.
Please leave all notifications on until you have placed an order and you are certain that email notification works for you.
STEP 2: Once you have set the preferences, you can click on “Home” in the top menu to return to the landing page. Please Select “Create New Order” to start your order.
The screen that is now displayed is complex, so we will go through each area one at a time.
STEP 2a: In “Vendor Information” you will fill out information about where you are purchasing from. This may be Fischer, AirGas, or the ASUCLA Computer store, but the important thing to know is that each “order” can have only one vendor. (if you need to order supplies from more than one vendor or seller, you will have to create multiple orders)
STEP 2b: Under “Delivery Information”, you should fill out the information of the person who will receive this order physically (or electronically, where applicable). There is an area to specify a contact for the order separately, in case the person who is receiving the order cant answer questions or doesn’t know details about the order.
Then type: “Order Category is unused at this time” in the box.
STEP 2c: Be sure to check the “notify fund managers” checkbox, so that your fund manager can approve the order and add account information.
Adding Items
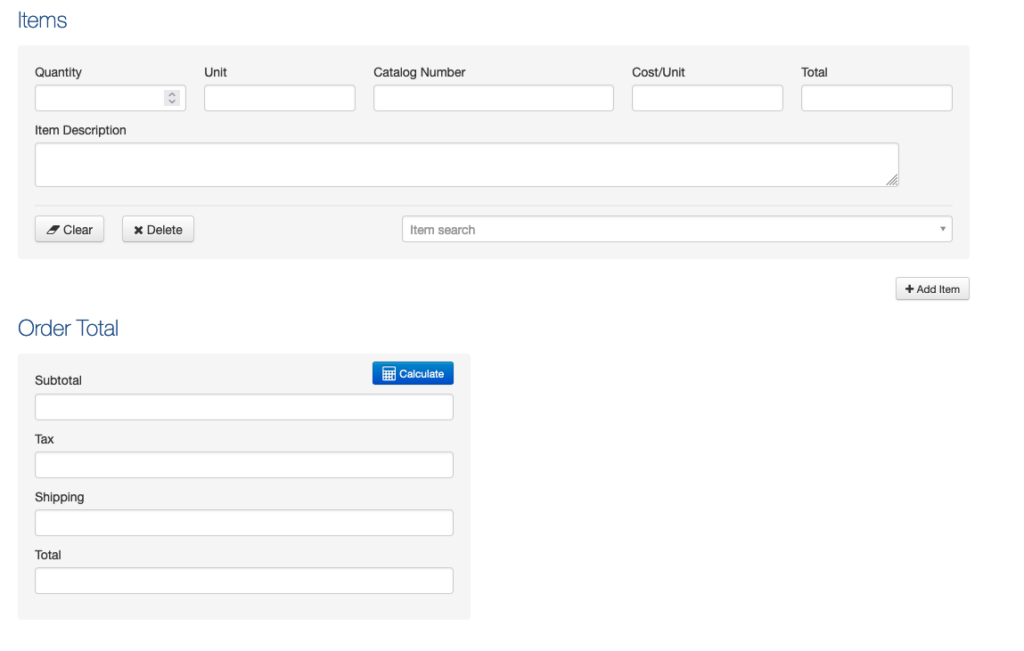
STEP 1: In this section, you add the items to the order you need. if you are ordering from a catalog, you can put the unit, catalog number and price per unit in, or alternately you can put a link to the item on the web in “item description”. the “add item+” button near the lower right corner of this area can be used to add an additional item to the order, if both items come from the same vendor.
Once you have added all items from this vendor to the order, click “Calculate” in the “Order Total” area, and check that everythign looks correct. (* a note: the “total” field per item cannot accept decimals, or thousands digit separators. Example: $4000.00 should be just 4000.)
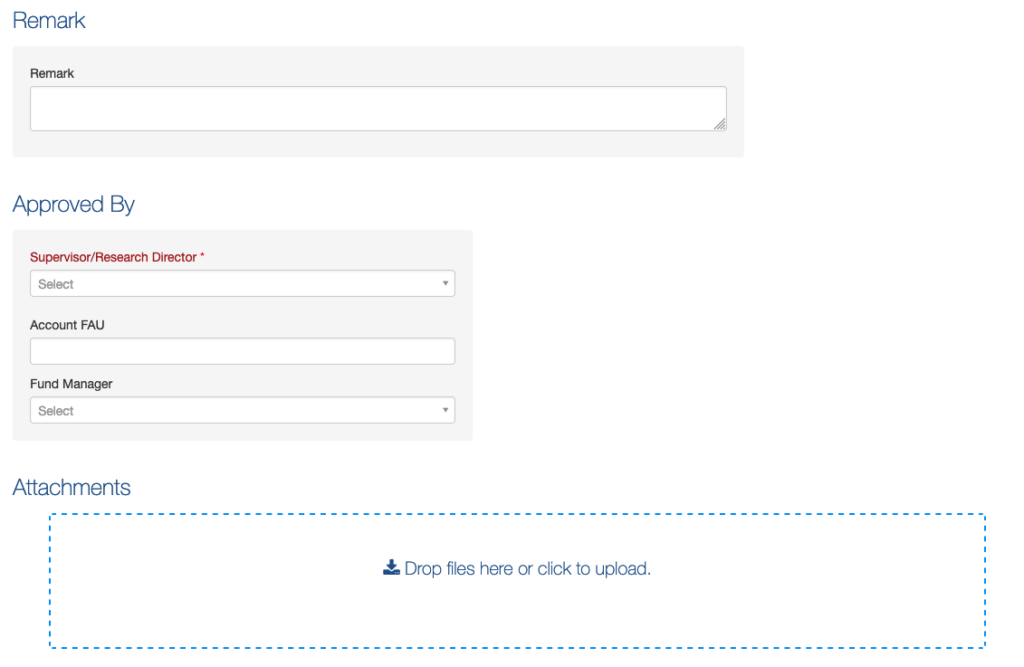
STEP 2: In the “remark section, you can put notes, or clarifications about the order. anything from “color doesn’t matter” to “please purchase this on my new grant”
In “Approved By” you should fill out your supervisor (which may be yourself in some situations) from the drop down list, and select your Fund Manager. If you know the FAU you may add it here, but its fine to leave it blank.
in “Attachments” you can upload images, pdf and other relevant items. Quotes from vendors should be put here.
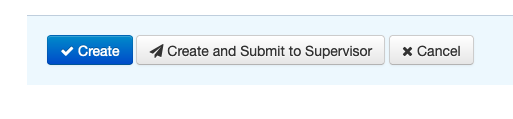
Step 3: Last, click “create” or “create and submit to supervisor”. The first option will save the order, but NOT send it to be processed, which is helpful if you want to take time to put the order together, but not lose your work.
If the order is ready to submit, click “Create and Submit to Supervisor”
Zoom Phone
As of May 15th 2023, EPSS staff have switched from using landline phones to Zoom phone. This change has a number of implications, changing how we make and receive “voice calls”. At this time, only the EPSS Staff have made the switch, and we will update this guide as more information becomes available.
If you have further questions, please contact the helpdesk via email at helpdesk@epss.ucla.edu
About Zoom Phone
Zoom Phone is a VOIP system built into Zoom, which allows UCLA to route calls made to campus phone numbers to individual user’s zoom accounts. Previously, you may have had a phone line assigned to you in your office, which was registered with the building manager. Zoom Phone replaces this line and associates the number to your UCLA Zoom account.
Not all phone lines will be transferred to Zoom Phone. These phone lines will remain on legacy for the time being.
Emergency Lines
Shared Lines
Some Automated Alerting Systems
Many Aspects of this new system are different than the older paradigm of a “land line” including that the phone number is now no longer tied to a physical location, and instead of a desktop phone receiver, the Zoom application is used to make and receive calls.
In most cases, this means that the Phone on your desk will no longer be usable, and you will have to “re-learn” how to make and receive calls using an electronic device, such as your:
Personal Computer
Personal Smartphone
Zoom Phone handset (will provide the closest experience to the old phone handset)
How to Connect to Eduroam Wifi
Eduroam is the preferred secure wireless for general computing in EPSS.
To connect your computer to Eduroam, follow the directions here:
EPSS-NET is the preferred wireless network for EPSS department members. This network uses a Pre-Shared Key (PSK) for authentication, you can email helpdesk@epss.ucla.edu to obtain this passphrase.
For visiting scholars and researchers, We offer two other networks which are available throughout the Geology building and Slichter Hall. You can read more about Eduroam here.
“PhySciOpen” is an open (unauthenticated) network, which is available as a convenience for visitors and students, however, it should not be used for activities involving sensitive data. EPSS IT recommends you do not use this network for any critical activities, such as teaching or conducting meetings.
If you are working in an area with consistently weak wireless reception, please email the helpdesk so we can evaluate and remedy the situation.
Most offices and labs in Geology and Slichter halls have cat5e ethernet jacks which will supply faster speeds than wireless. In most cases, the ports need to be activated on the EPSS network to function properly. If you would like to have network ports in your office or lab activated, please email helpdesk@epss.ucla.edu or stop by Geology 4687.
Off Campus Access
To access EPSS resources from off campus, please use the BruinOnline VPN
Connecting to Eduroam Wifi
Eduroam is the preferred secure wireless for general computing in EPSS.
To connect your computer to Eduroam, follow the directions here:
In order to ensure the best possible experience for Visiting lecturers and speakers in EPSS, EPSS IT has prepared the following list of device requirements. We are not able to support connection from iOS devices such as iPad/iPhone at this time.
Zoom client application installed, or ability to install it. (Get it here: https://ucla.zoom.us)
To project your video your device will need:
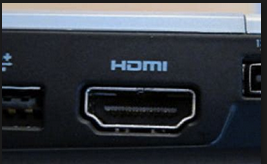
Choose ONE Port or ONE Adapter
Ports
HDMI port
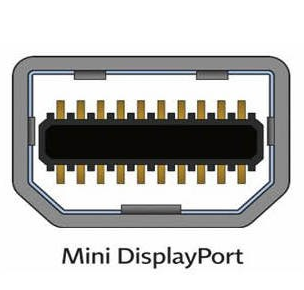
Adapters
Mini-DisplayPort to HDMI
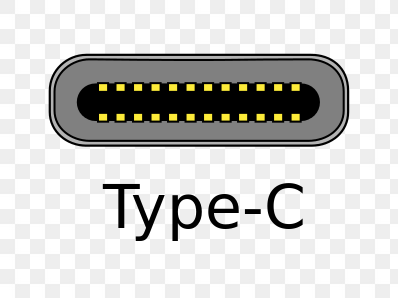
USB-C to HDMI
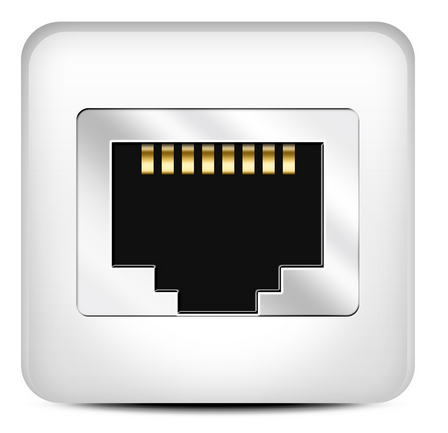
To connect to the network (Wireless NOT available in presentation space):
Choose ONE Port or ONE Adapter
Ports
Ethernet RJ-45 port
Adapters
USB-A to Ethernet adapter
USB-C to Ethernet adapter
Other Requirements
EPSS IT staff can help you connect to the network in the presentation room, and join the zoom meeting/conference camera.
If you plan to use our adapters, please be sure your computer has enough USB ports to support connection to both adapters and your power supply. If your device doesn’t meet these criteria, please let us know before you arrive, and we can arrange to provide a laptop to present. We assume you will use Microsoft PowerPoint, but if you need other software (Keynote, etc.) please let us know ahead of time, and we will do our best to accommodate you.
Computer Labs
Using the Lab
EPSS maintains two computer labs for student use. A door code is required to use the labs, which can be obtained at the IT Operations Office in Geology 4687.
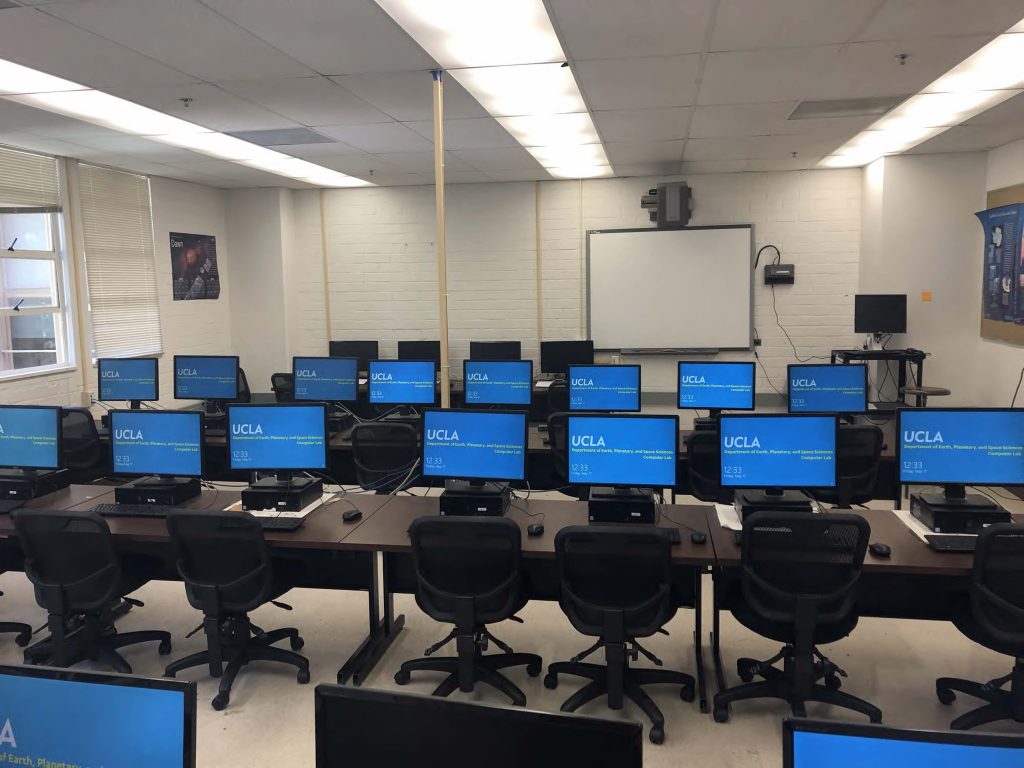
Geology 4691
This is the department’s primary educational computer lab. It contains 24 desktop computers, 12 of which are dual boot Windows and macOS. The lab also contains a Smartboard projector, and color printer.
Geology B707
This lab contains 22 machines which are dual boot Windows 10 and Ubuntu Linux. The lab also contains a 4-screen high definition display, and professional quality color printer. Students can use their EPSS account to log into these computers on the Windows side. To obtain a login for the Linux side of these computers, please contact the Helpdesk
Printing
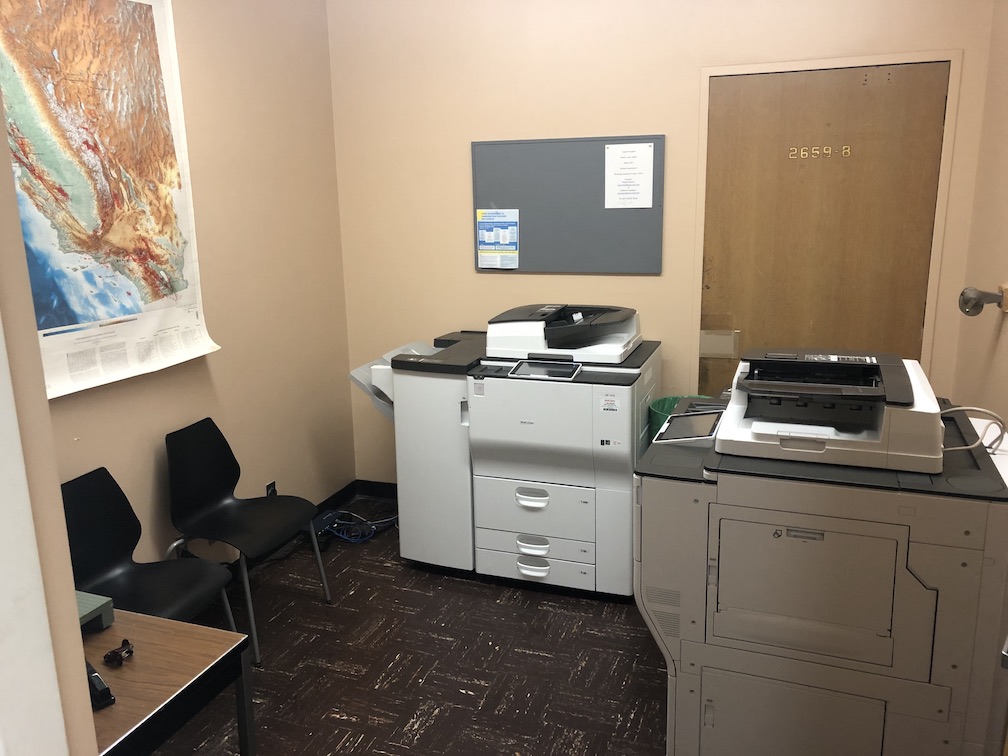
EPSS provides two Ricoh MFD high capacity printers for use in the department. These are located in Geology 3807 (across from the Main Office). The use of these printers is open to all department members, but requires a user code to be used.
Using the Printer
The copiers are located in Geology 3807 (picture of room shown below), and require a job code to use. To obtain a job code for personal use, contact the helpdesk.
If you are a TA for an EPS-SCI course, printing exams, labs, or other materials for a course, you will use a special code which can be obtained from either your TA coordinator or from the helpdesk.
Printer Functionality
Print Black and White
Print Full Color
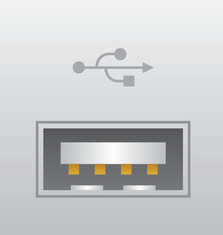
Scan Documents (Email or store in USB drive)
Print files from USB drive (PDF & IMG only)
Installing and Using the Printer
*If you are printing from Linux or do not have a user code, please email the helpdesk
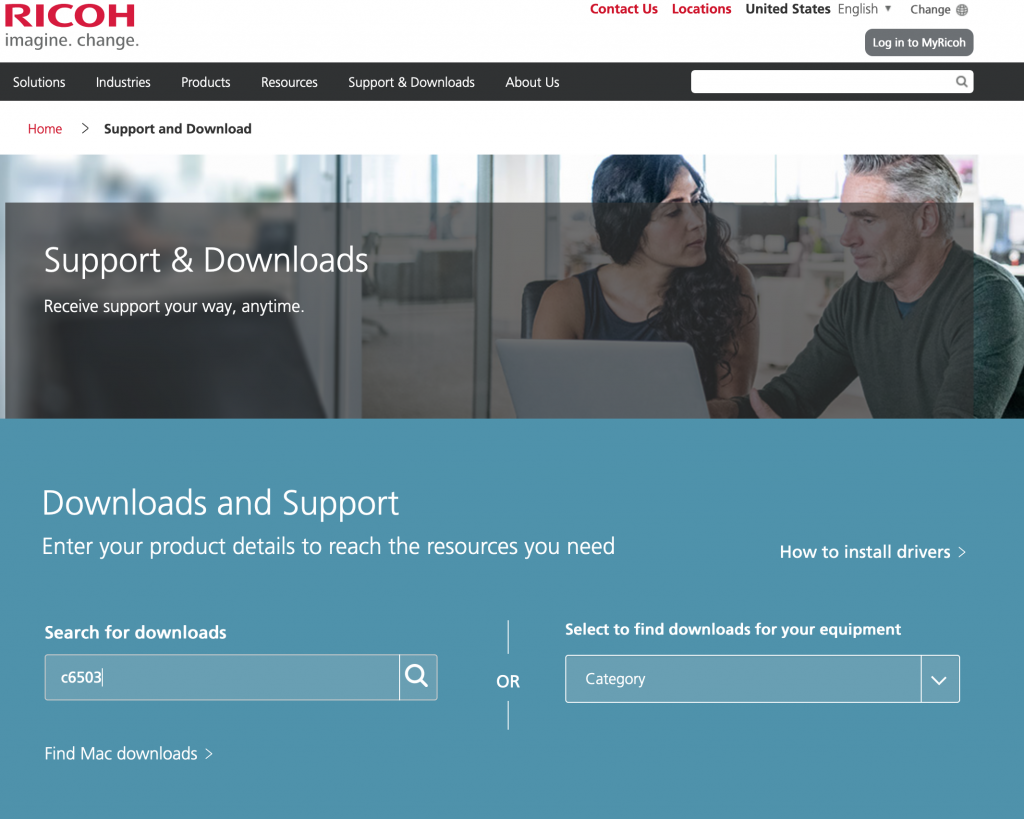
STEP 1: Go to https://ricoh-usa.com and click on support and downloads. Then in the bottom right search box type “c6503”
STEP 2: Click on the name “MP c6503” under the drivers icon to navigate to the download page. You will be asked to agree to the Ricoh terms of service, please click yes.
MacOS computers: select the one PS driver option.
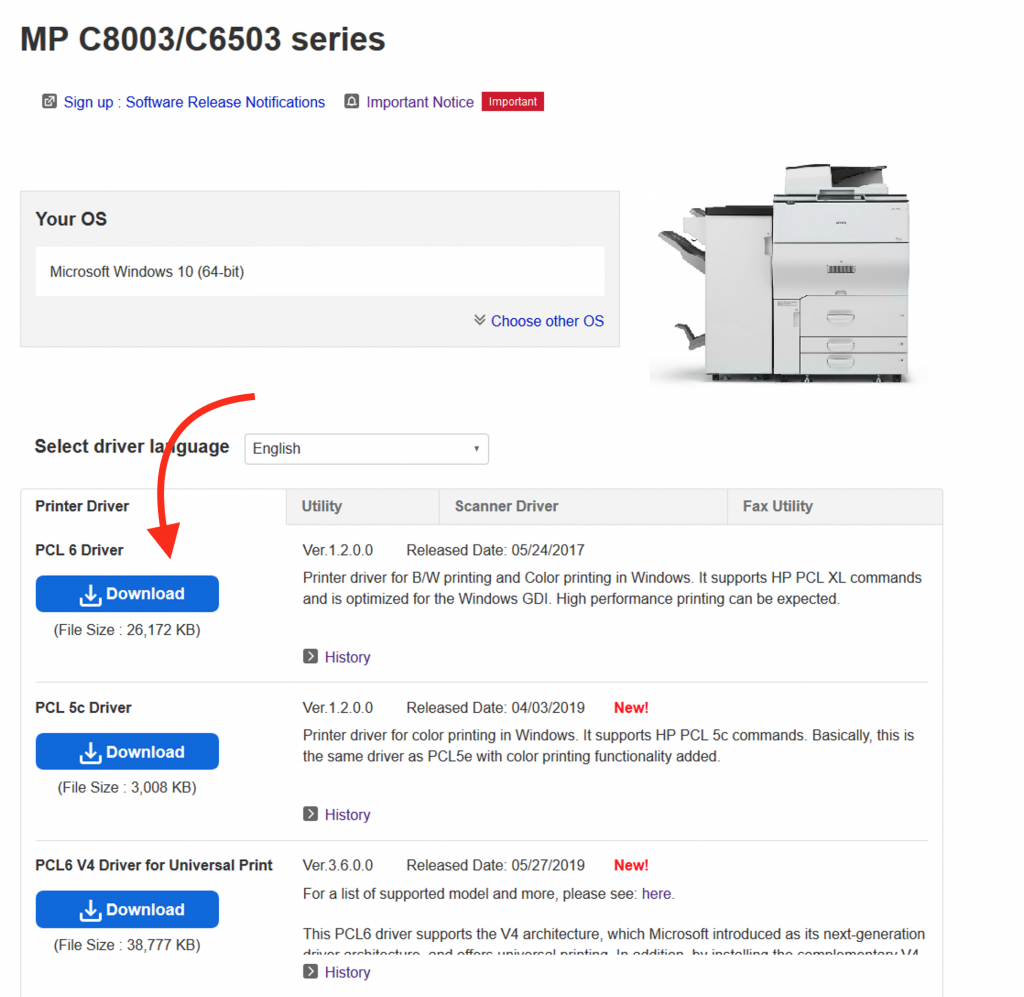
Windows machines: select the PCL6 driver, once this has downloaded, install the driver.
*To add the printers to your computer, you will need to be connected to EPSS ethernet network, (wall jacks) or connected to EduRoam (wireless), in the Geology/Slichter building. If you have trouble, email the helpdesk for assistance.
STEP 3: Download the driver as above, but for the windows 10 machines, select the PCL 6 driver.
STEP 4: Download the driver installer. (if you are given a security warning, its ok to continue)
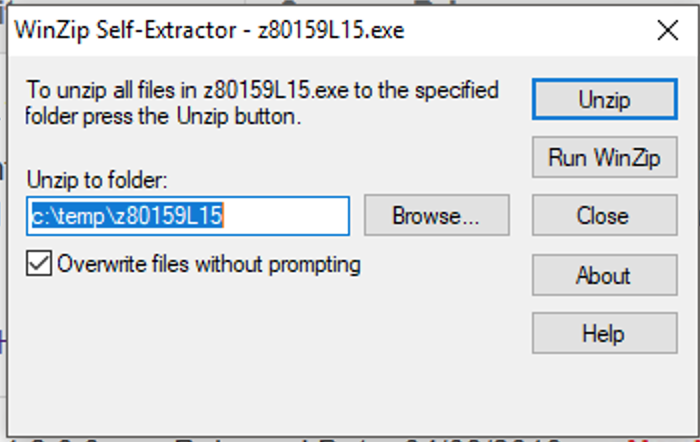
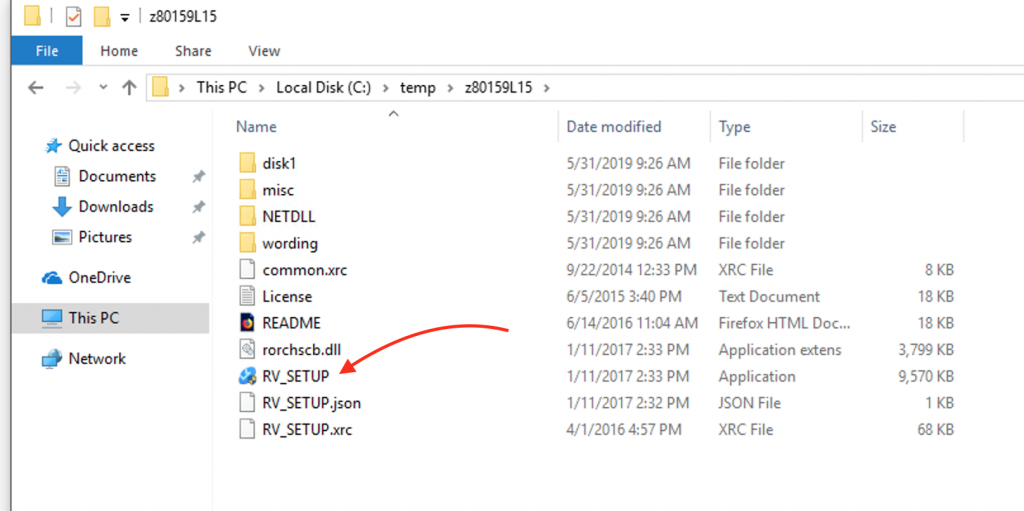
Click unzip, and when the process is complete, copy the highlighted text from the box and paste into a file browser.
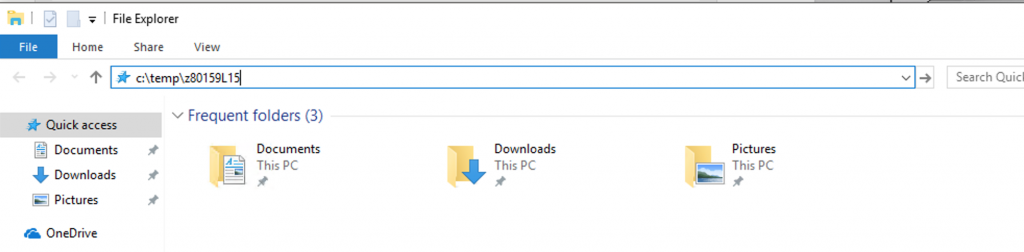
STEP 5: In this example, we would copy “c:/temp/z80159L15” into the file browser, then hit enter to navigate to the folder
STEP 6: This should bring you to the temp folder, click on “RV Setup” to launch the driver installer.
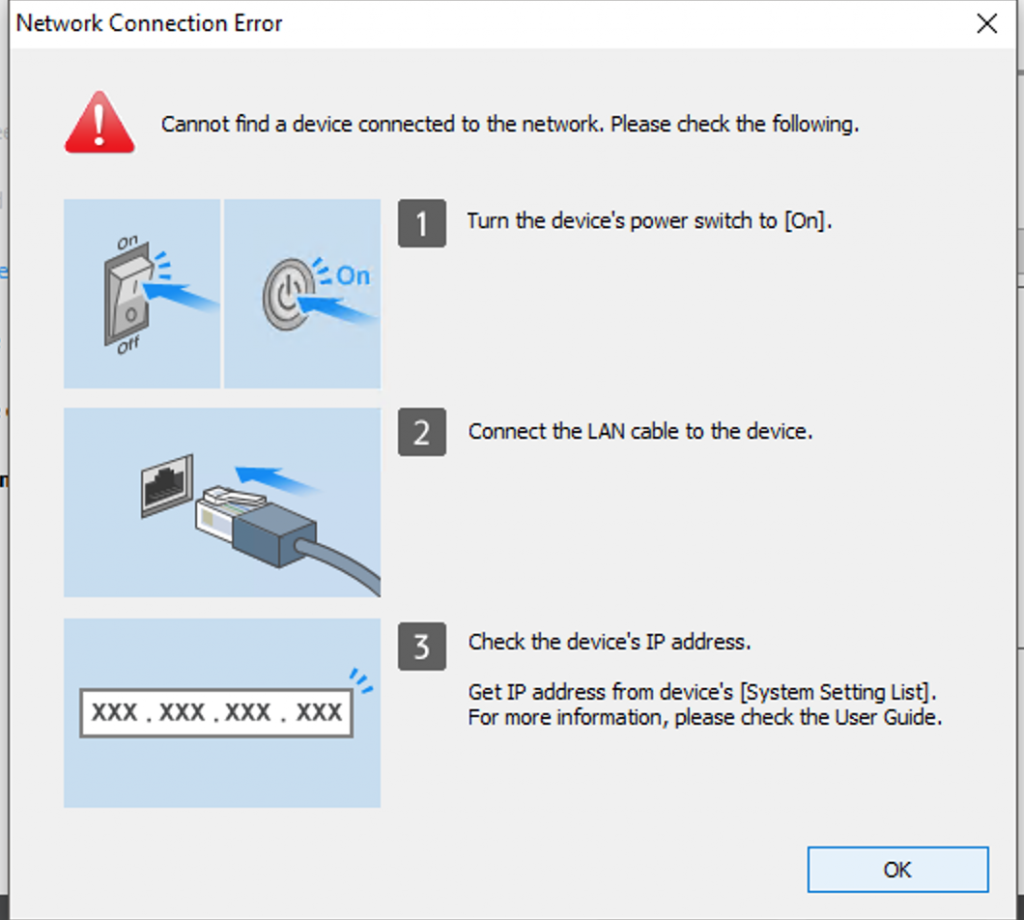
STEP 7: When the dialog box appears to ask if you want to allow the program to make changes click ‘yes‘. You will be prompted to answer a few questions by the installer, answer ‘yes‘ to the first question and then select ‘network‘. The installer will try to find the printer on its own. If you see the Ricoh printer in the list, please select it and continue to “STEP 10” below.
If you get this error message, click ‘OK‘
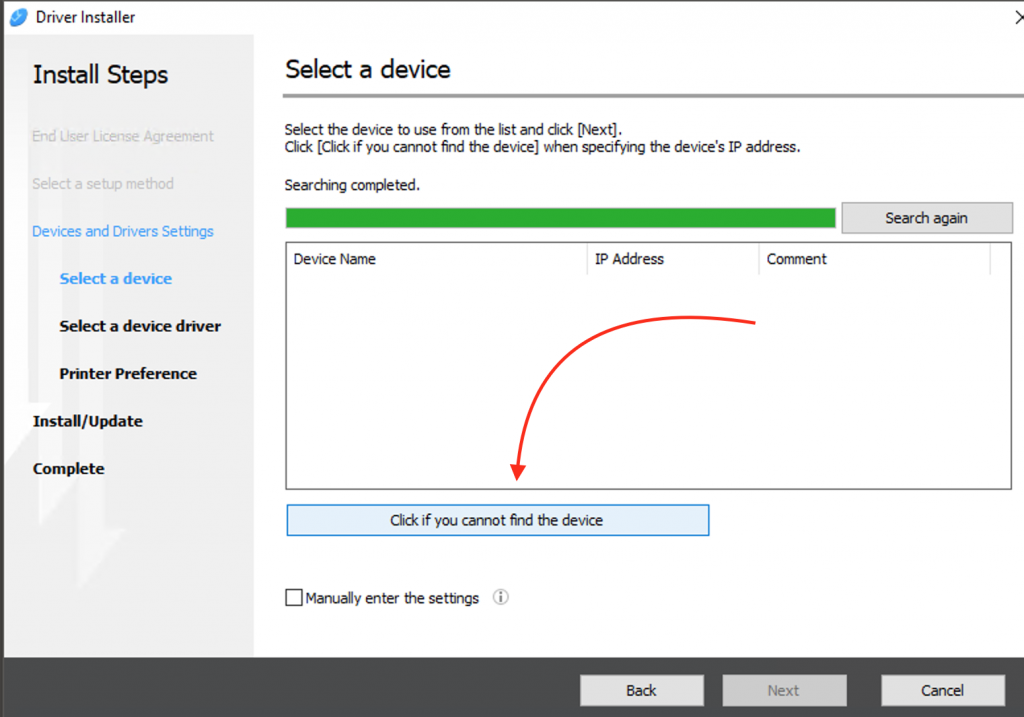
STEP 8a: Click on the “Click if you cannot find the device” button.
STEP 8b: Click on the “Specify device IP address” button. Then click on the “Next” button.
STEP 9: Now you can enter the IP of the printer manually.
If you are installing the c6503 driver for the color printer you must use 128.97.31.249 as the IP address.
For the MP 7503 black and white printer, use 128.97.31.241
If everything goes correctly, you should see the printer in the list, and can install it!
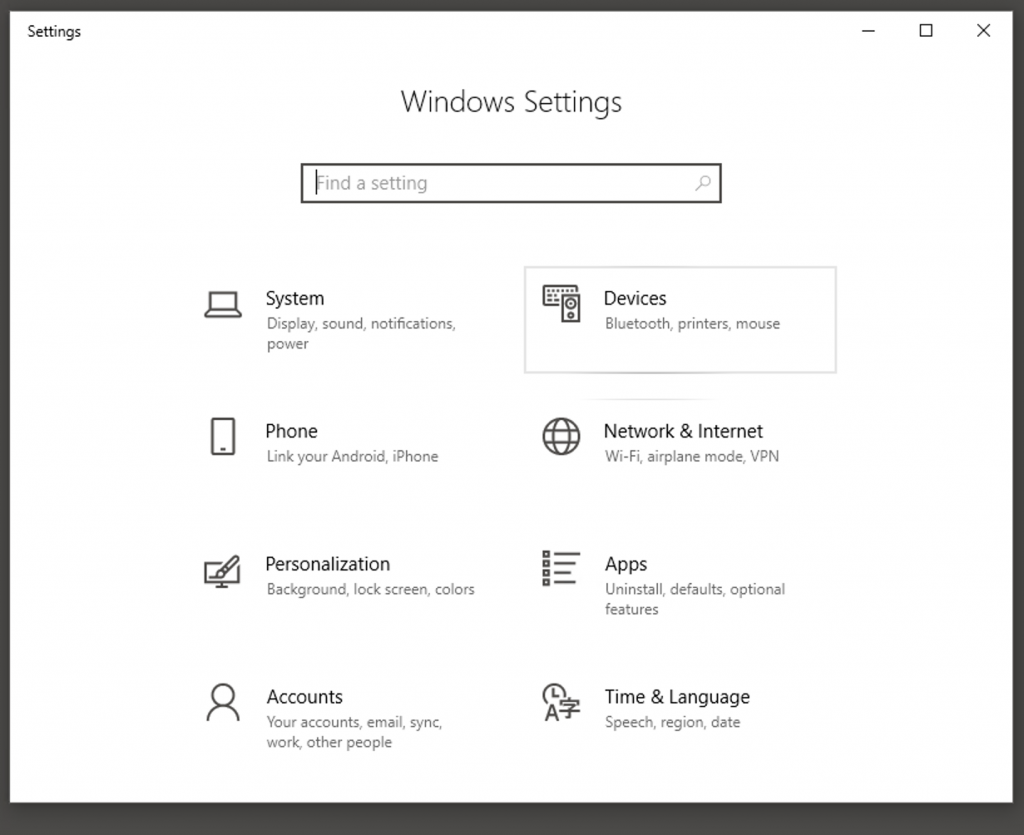
STEP 10: Once you have installed the printer, you need to add your job code to the printer dialog, otherwise your jobs will all be discarded by the printer.
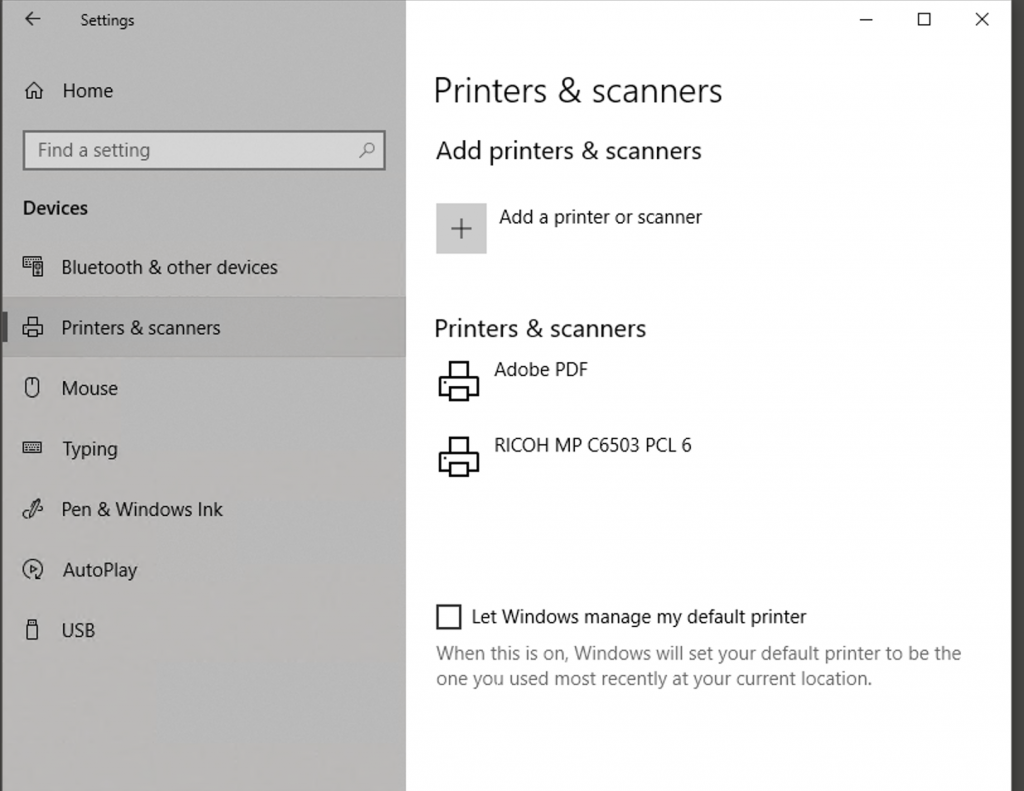
Go to: Start menu >> Settings >> Devices >> Printers and Scanners
STEP 11: After STEP 10 you should end up on this page
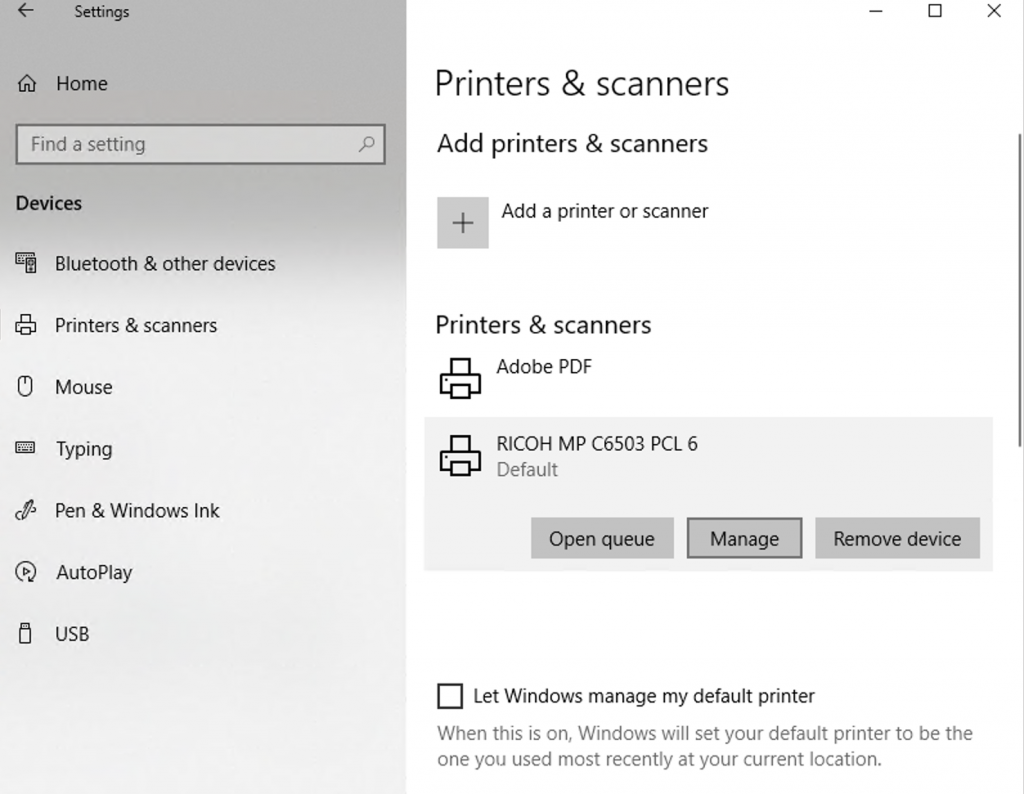
STEP 12: Select the Ricoh device and click ‘manage‘
If you DON’T see the Ricoh device listed here, something went wrong! email the helpdesk for assistance.
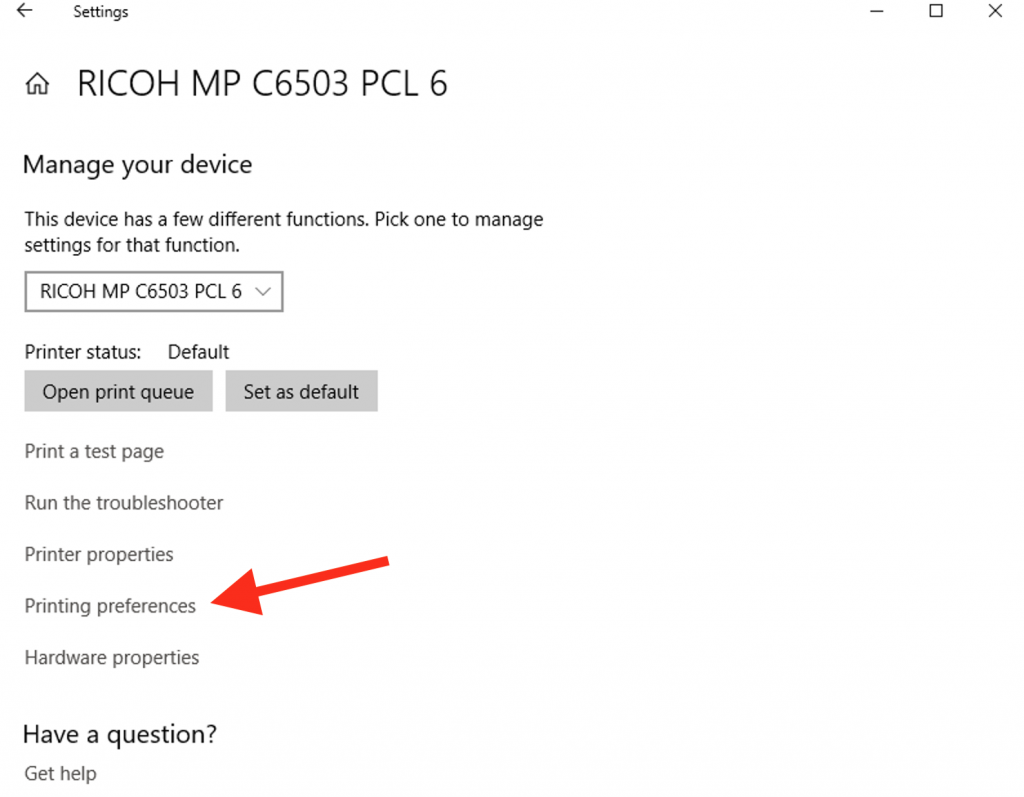
STEP 13: select “Printing Preferences”
using: RICOH MP C6503 PCL 6 Printer:
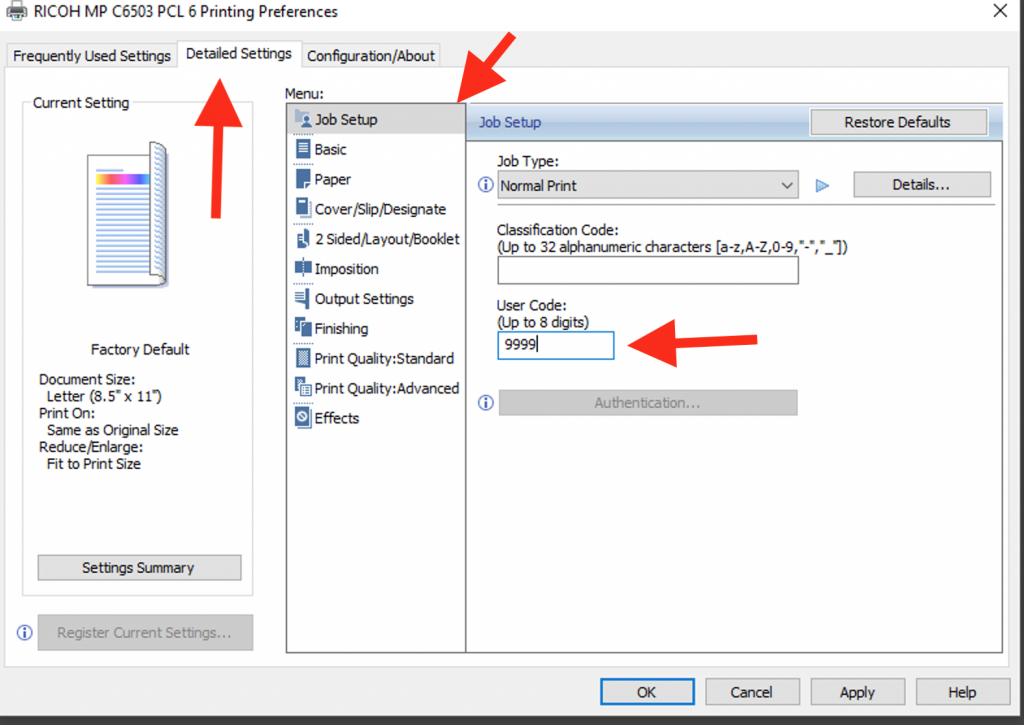
STEP 14: Navigate to the “Detailed Settings” tab, select the “Job Setup” menu from the vertical items in the center menu and fill out your personal user code in the “USER CODE” box.
Click Apply and you are finished!
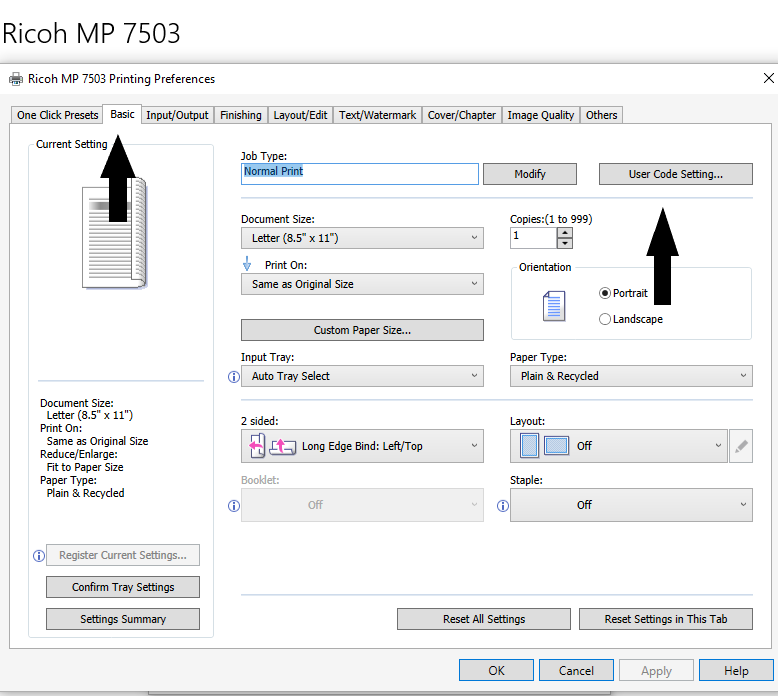
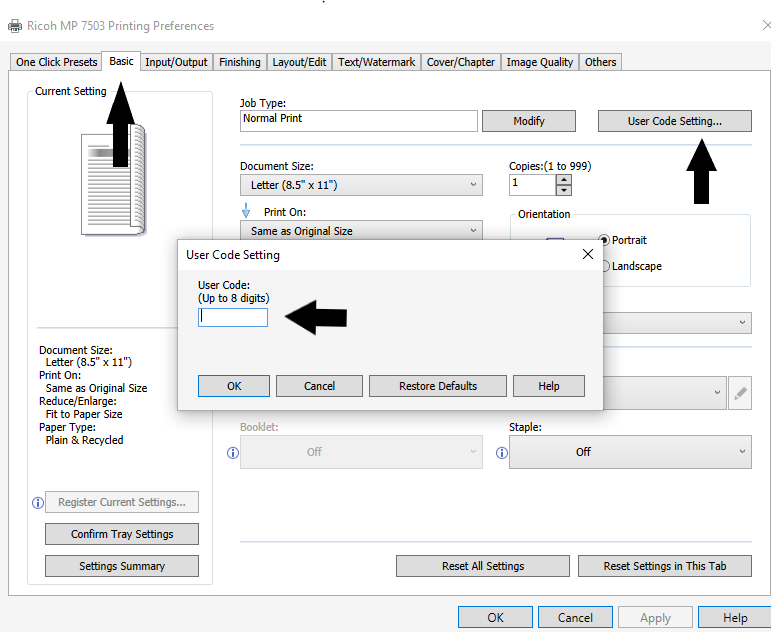
using: RICOH MP 7503 printer:
STEP 14a: Navigate to the “Basic Settings” tab, then click the “User Code Setting”.
STEP 14b: Fill out your personal job code in the “USER CODE” box.
Click OK then Apply then OK and you are finished!
If you have any problems, or even after this, you are unable to print, please email the helpdesk.
macOS Specific Instructions
You cannot print to these printers from Safari. Any other browser will work (Chrome, Firefox, Edge, etc.)
Open system preferences.
Select “printers and scanners“
to the left, in the window called printers, you will see a plus sign (+) at the bottom of the window. Click this to add a printer.
If you are connected to a wall jack on EPSS networks:
On the network you should see two Ricoh printers at the bottom of the list with “bonjour multi function” listed under ‘kind‘
select the printer you wish to add, then wait for the fields at the bottom of the screen to populate.
the field ‘use‘ will likely default to “secure air print” which you will have to change to the “Ricoh XXXXX” value.
If you are on Eduroam:
You will have to add the printers by IP address.
128.97.31.241 is the black and white printer
128.97.31.249 is the color c6503
To add an IP printer, at the top left of “printers and scanners” in system preferences is the ‘add‘ window, click the grey globe icon that says IP.
Enter the IP of the printer you wish to add.
You should see the fields on the bottom of this window populate, make sure that under ‘use‘ the proper printer is selected.
Under “job log“, you will see a box called “enable user code” and a field below to add you code. check the box and type your user code into this field.
To save this setting, and avoid having to enter the code for every print job, click on the “presets” dropdown menu, and select “save current settings as preset”
If you have any problems, or even after this, you are unable to print, please email the helpdesk.
Software
UCLA and EPSS have site licenses for a number of useful software tools.
Licenses for ArcGis, IDL/ENVI, Mathematica and more can be obtained for your use at a greatly reduced cost. Please email the helpdesk to inquire about obtaining a license to these software packages.
EPSS Computer labs have Windows 10, Linux (Ubuntu) and macOS machines available for student use.
Additionally, many popular software packages are available on Clicc laptops from the UCLA library, and the Clicc virtual desktop (use it anywhere/off campus)
Other Useful Tools
Geology
GEOSCI, a cool series of tools and resources for Geo scientists who are down with Open Source. http://geosci.xyz/
JOSS: the Journal of Open Source Software (which has cool things for research and publications): https://joss.theoj.org/
Don’t forget to Check out or own IDRE (Institute for Digital research and Education). IDRE puts on may workshops and demos over the course of year: https://idre.ucla.edu/calendar
Email and Accounts
How To Receive Your EPSS Email
EPSS Faculty, Researchers, Postdoctoral Scholars and Administrative and Technical Staff members are all eligible for an @epss.ucla.edu email address. This account is provided through Enterprise Messaging, a division of IT services, and the account is tied to the campus Microsoft 365 instance.
A UCLA logon ID, used for accessing resources such as BruinLearn, MyUCLA, Google Apps(G-suite), Box, and your EPSS email account, and many other campus services and applications.
How do I get a UCLA Logon ID?
This page will allow you to request one, or to edit your existing UCLA ID.
EPSS Account
What is an EPSS Account used for?
EPSS department members all have an EPSS account. This account is used to access many department specific services and computers. These services are listed below.
accessing the computer labs in the Geology building