Printing
EPSS provides two Ricoh MFD high capacity printers for use in the department. These are located in Geology 3807 (across from the Main Office). The use of these printers is open to all department members, but requires a user code to be used.
Using the Printer
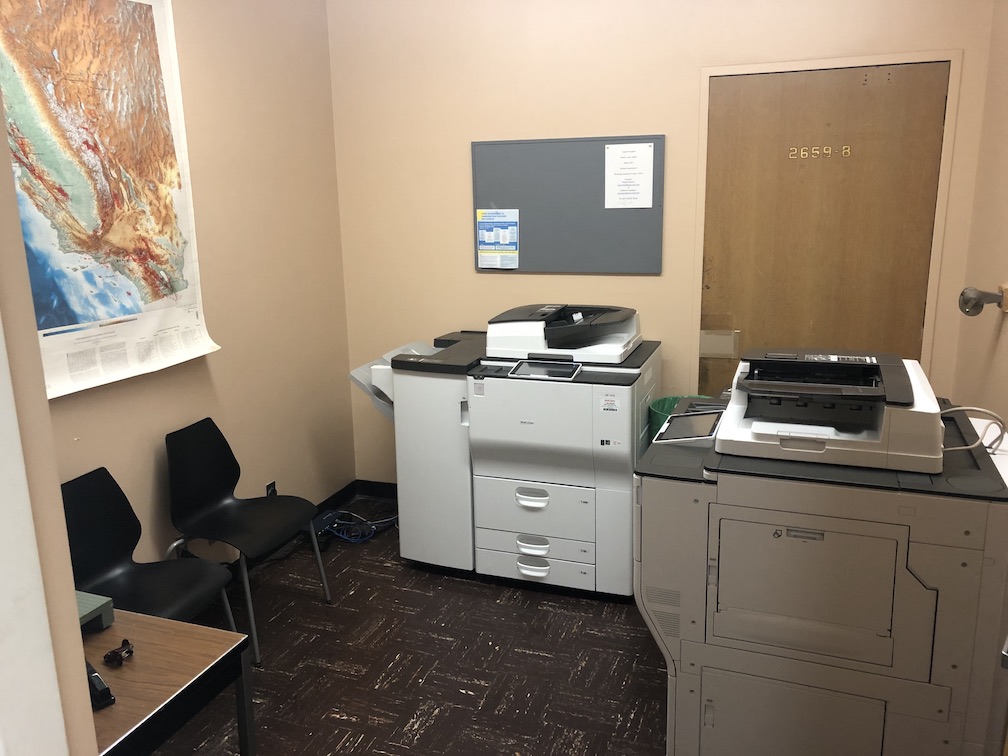
The copiers are located in Geology 3807 (picture of room shown below), and require a job code to use. To obtain a job code for personal use, contact the helpdesk.
If you are a TA for an EPS-SCI course, printing exams, labs, or other materials for a course, you will use a special code which can be obtained from either your TA coordinator or from the helpdesk.
Printer Functionality
- Print Black and White
- Print Full Color
- Scan Documents (Email or store in USB drive)
- Print files from USB drive (PDF & IMG only)
Installing and Using the Printer
*If you are printing from Linux or do not have a user code, please email the helpdesk
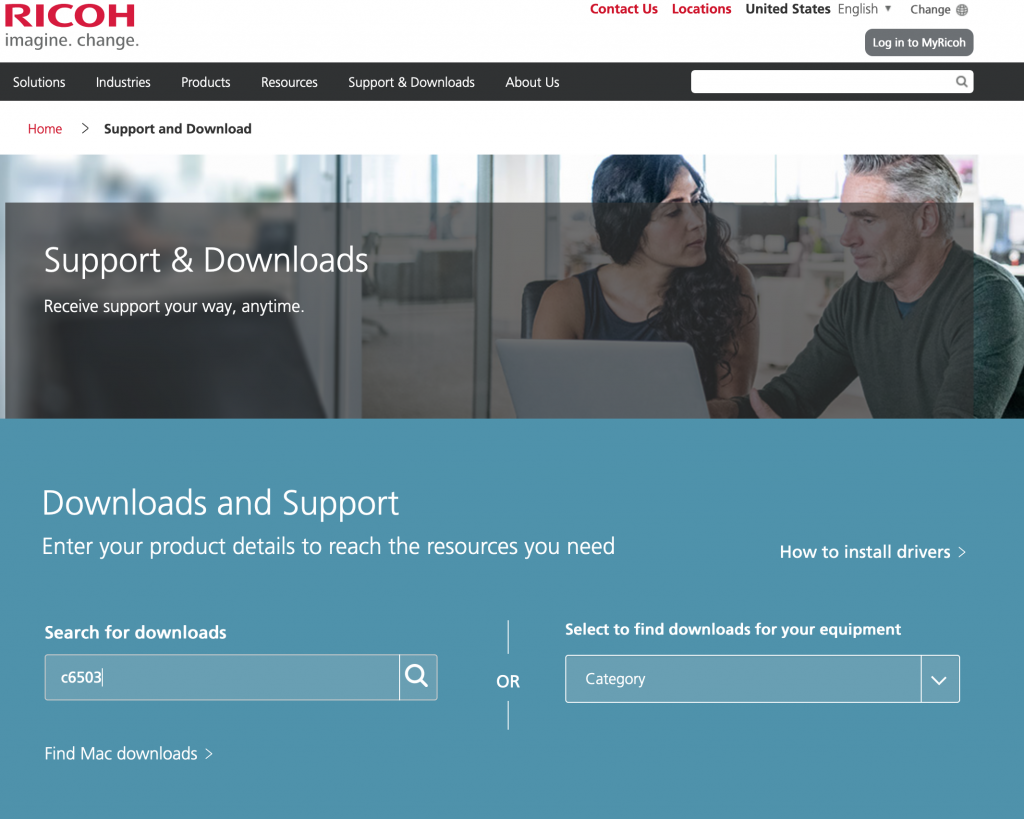
STEP 1:
Go to https://ricoh-usa.com and click on support and downloads. Then in the bottom right search box type “c6503”
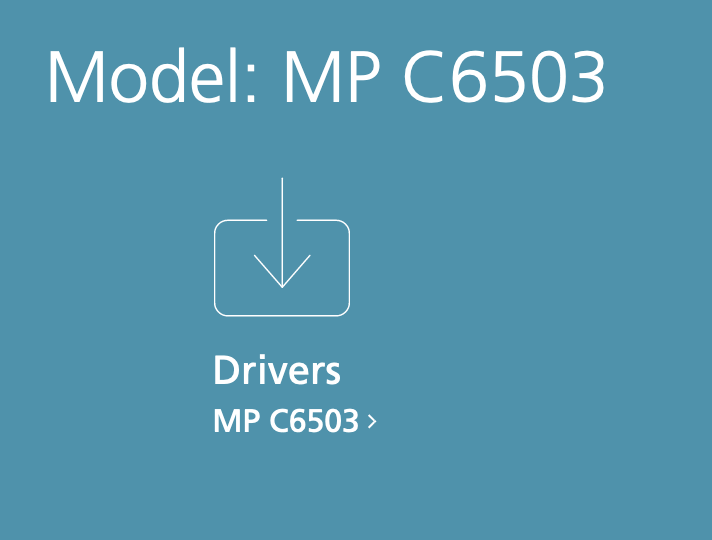
STEP 2:
Click on the name “MP c6503” under the drivers icon to navigate to the download page. You will be asked to agree to the Ricoh terms of service, please click yes.
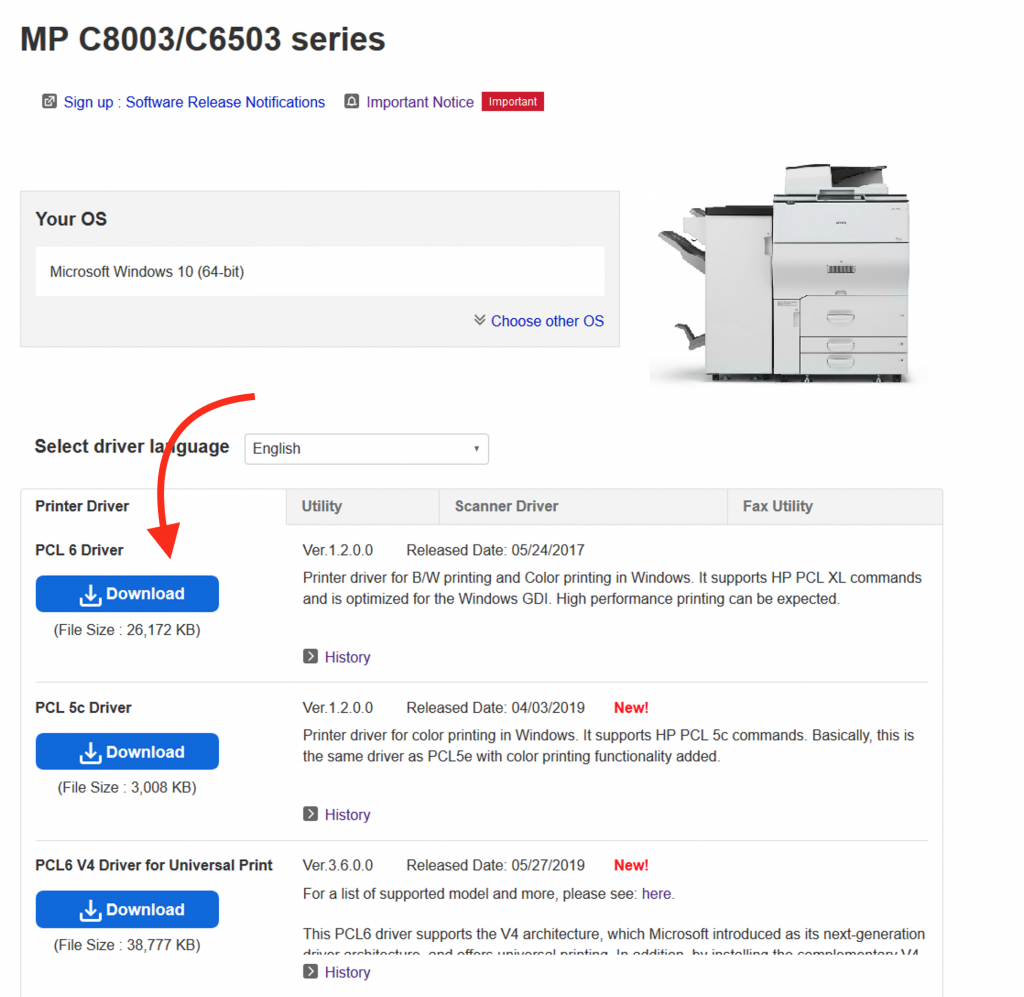
MacOS computers: select the one PS driver option.
Windows machines: select the PCL6 driver, once this has downloaded, install the driver.
Further Instructions
For Windows Specific Instructions, click here.
For macOS Specific Instructions, click here.
Windows Specific Instructions
*To add the printers to your computer, you will need to be connected to EPSS ethernet network, (wall jacks) or connected to EduRoam (wireless), in the Geology/Slichter building. If you have trouble, email the helpdesk for assistance.
STEP 3:
Download the driver as above, but for the windows 10 machines, select the PCL 6 driver.
STEP 4:
Download the driver installer. (if you are given a security warning, its ok to continue)
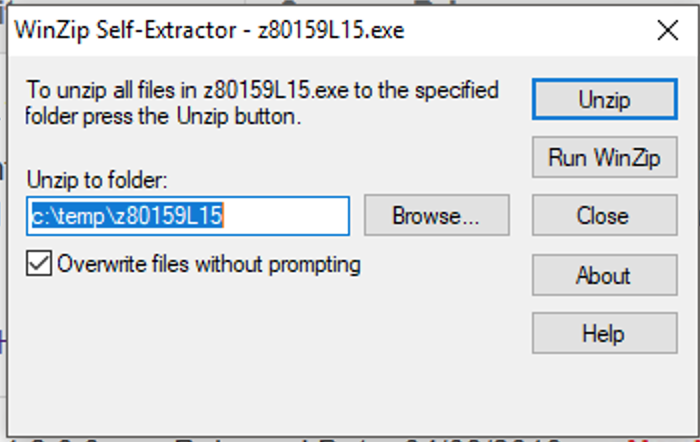
Click unzip, and when the process is complete, copy the highlighted text from the box and paste into a file browser.
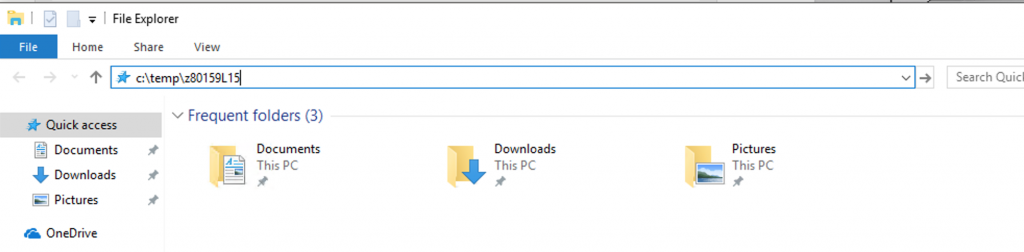
STEP 5:
In this example, we would copy “c:/temp/z80159L15” into the file browser, then hit enter to navigate to the folder
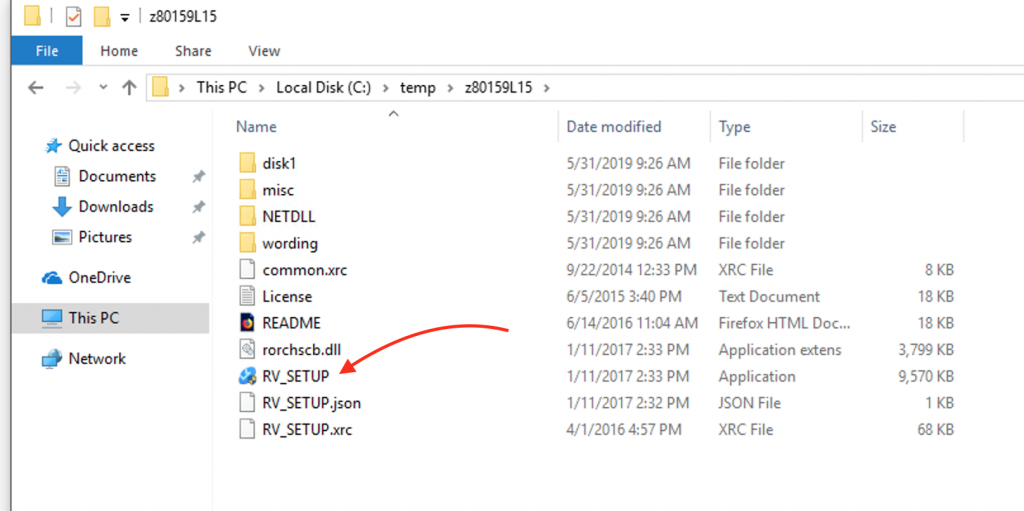
STEP 6:
This should bring you to the temp folder, click on “RV Setup” to launch the driver installer.
STEP 7:
When the dialog box appears to ask if you want to allow the program to make changes click ‘yes‘. You will be prompted to answer a few questions by the installer, answer ‘yes‘ to the first question and then select ‘network‘. The installer will try to find the printer on its own. If you see the Ricoh printer in the list, please select it and continue to “STEP 10” below.
If you get this error message, click ‘OK‘
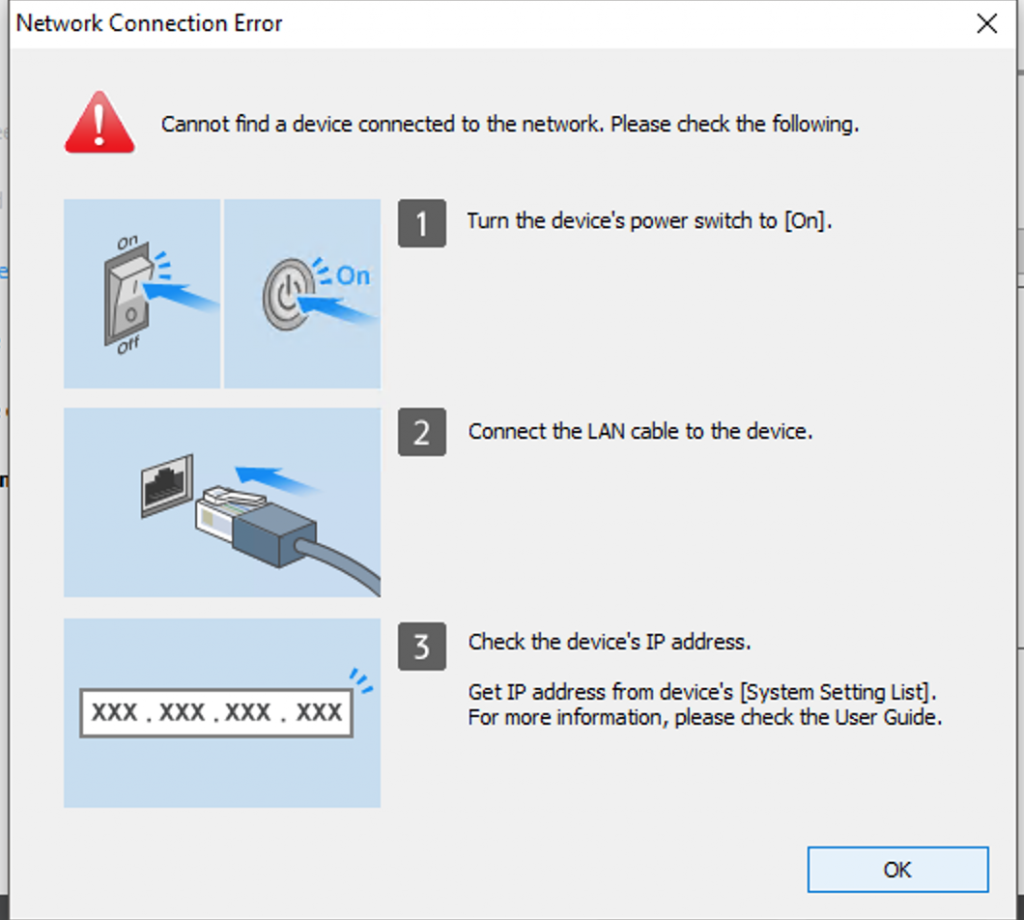
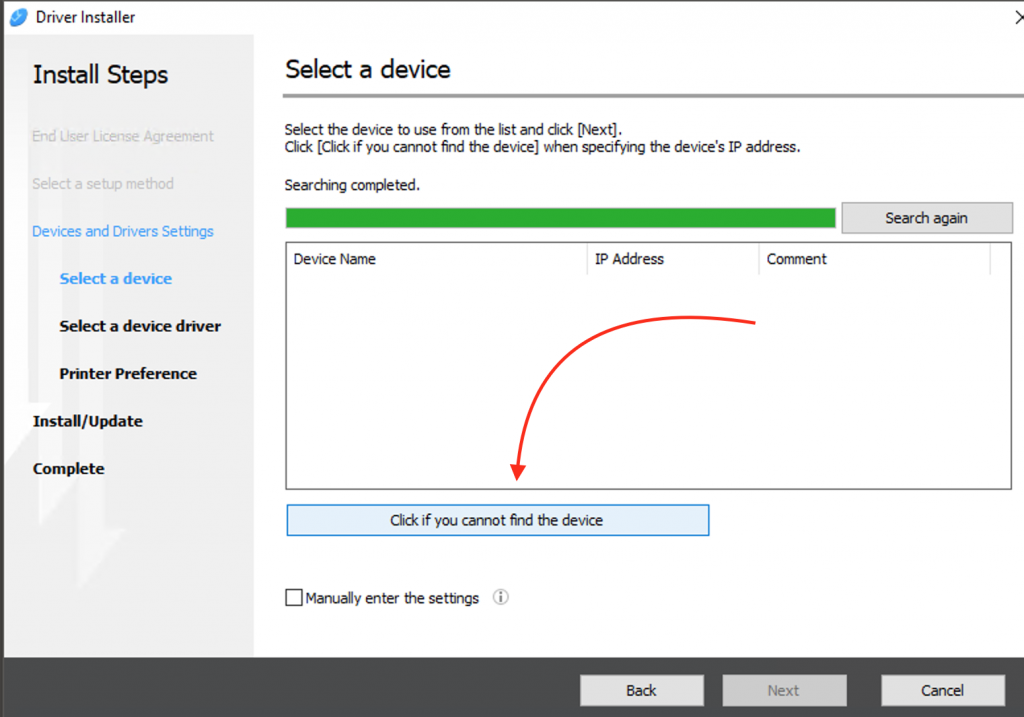
STEP 8a:
Click on the “Click if you cannot find the device” button.

STEP 8b:
Click on the “Specify device IP address” button. Then click on the “Next” button.
STEP 9:
Now you can enter the IP of the printer manually.
- If you are installing the c6503 driver for the color printer you must use 128.97.31.249 as the IP address.
- For the MP 7503 black and white printer, use 128.97.31.241
If everything goes correctly, you should see the printer in the list, and can install it!
STEP 10:
Once you have installed the printer, you need to add your job code to the printer dialog, otherwise your jobs will all be discarded by the printer.
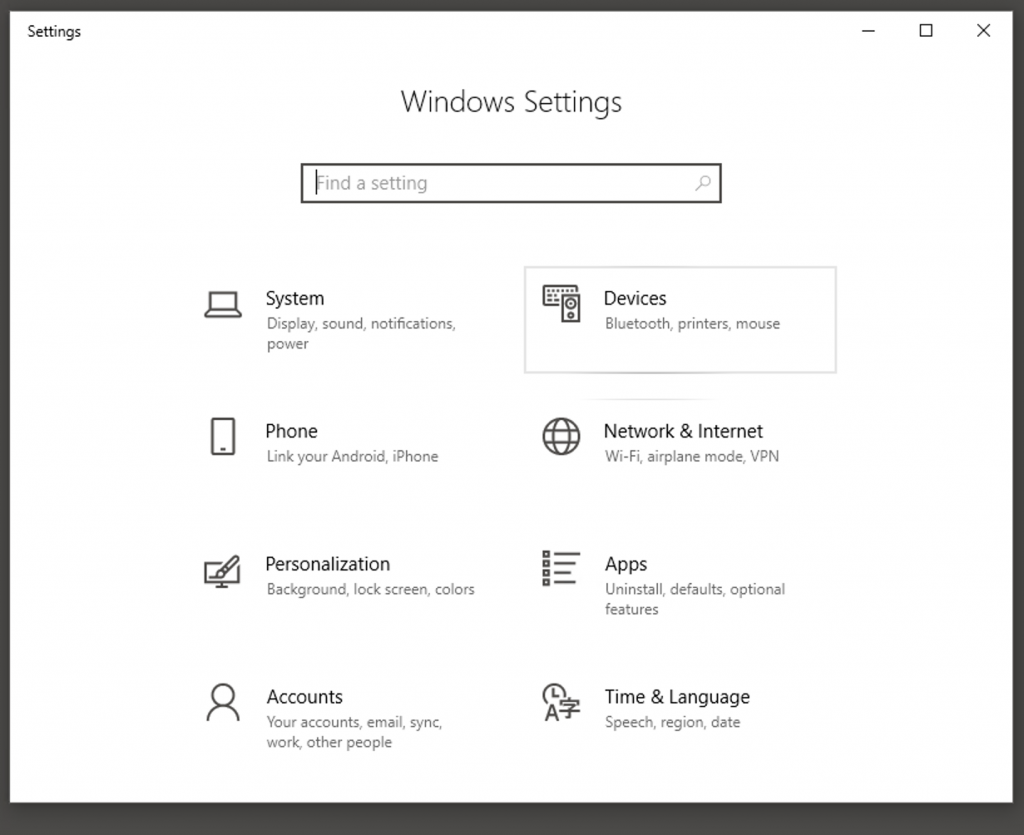
Go to: Start menu >> Settings >> Devices >> Printers and Scanners
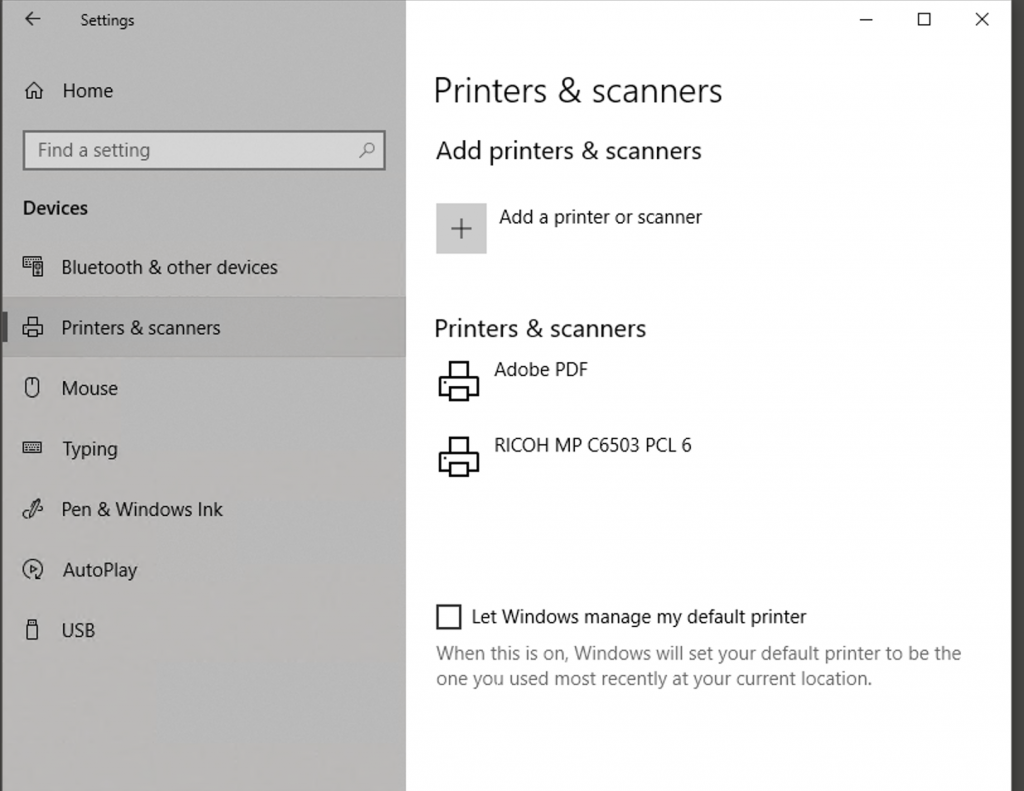
STEP 11:
After STEP 10 you should end up on this page
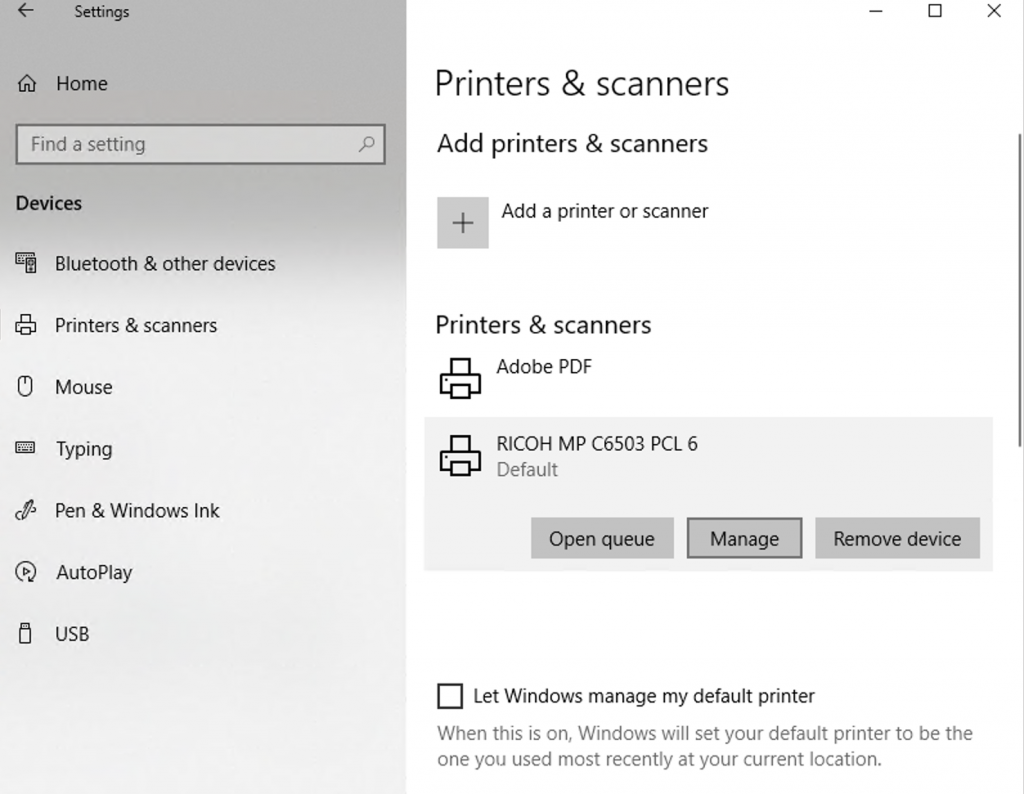
STEP 12:
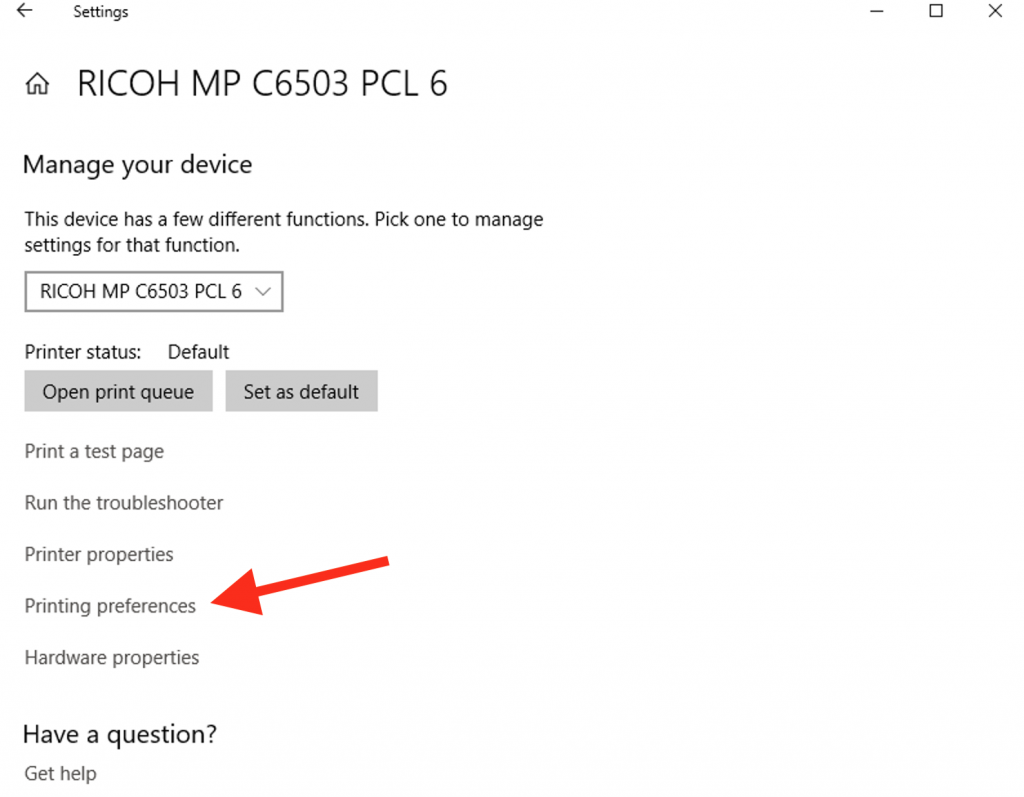
Select the Ricoh device and click ‘manage‘
If you DON’T see the Ricoh device listed here, something went wrong! email the helpdesk for assistance.
STEP 13:
select “Printing Preferences”
using: RICOH MP C6503 PCL 6 Printer:
STEP 14:
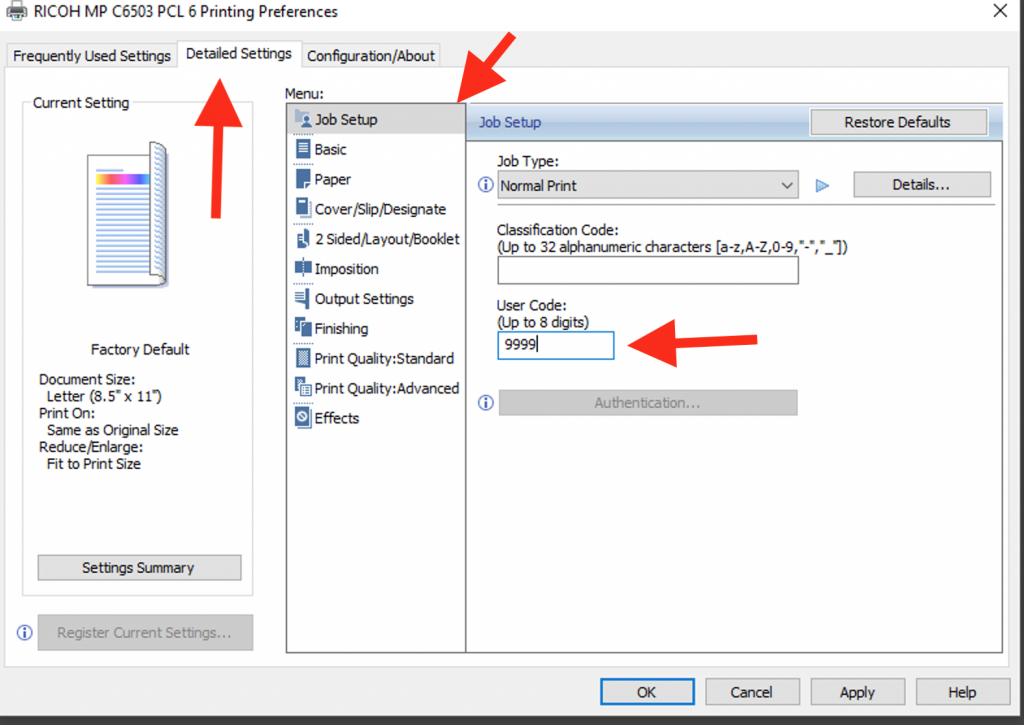
Navigate to the “Detailed Settings” tab, select the “Job Setup” menu from the vertical items in the center menu and fill out your personal user code in the “USER CODE” box.
Click Apply and you are finished!
using: RICOH MP 7503 printer:
STEP 14a:
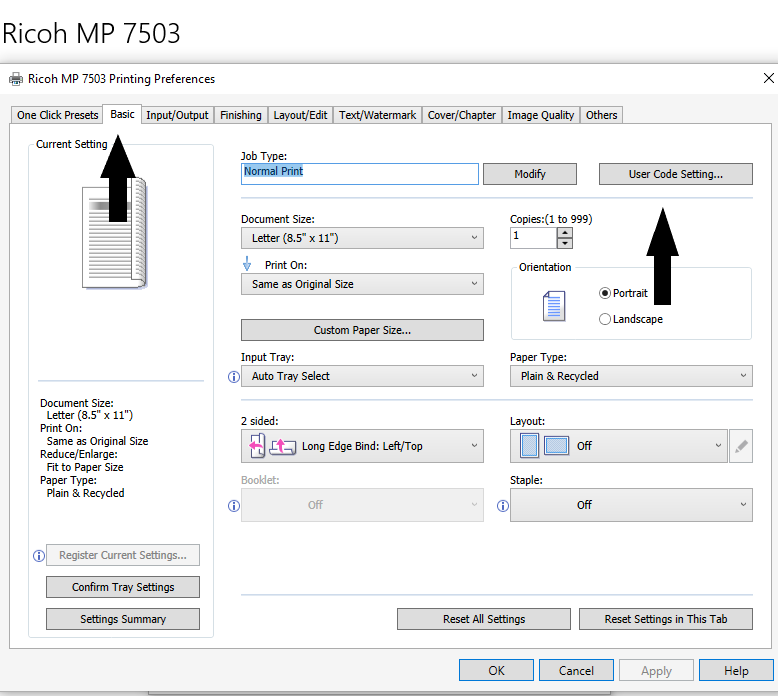
Navigate to the “Basic Settings” tab, then click the “User Code Setting”.
STEP 14b:
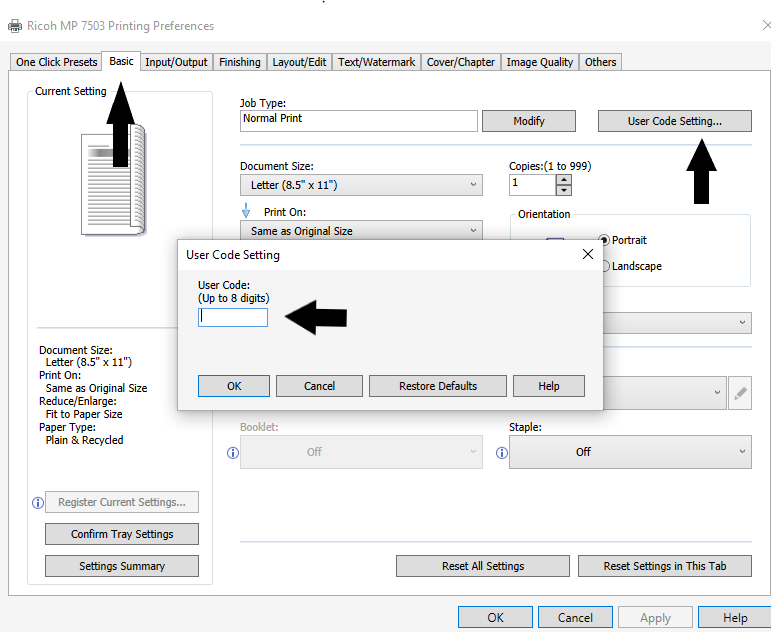
Fill out your personal job code in the “USER CODE” box.
Click OK then Apply then OK and you are finished!
If you have any problems, or even after this, you are unable to print, please email the helpdesk.
macOS Specific Instructions
You cannot print to these printers from Safari. Any other browser will work (Chrome, Firefox, Edge, etc.)
- Open system preferences.
- Select “printers and scanners“
- to the left, in the window called printers, you will see a plus sign (+) at the bottom of the window. Click this to add a printer.
- If you are connected to a wall jack on EPSS networks:
- On the network you should see two Ricoh printers at the bottom of the list with “bonjour multi function” listed under ‘kind‘
- select the printer you wish to add, then wait for the fields at the bottom of the screen to populate.
- the field ‘use‘ will likely default to “secure air print” which you will have to change to the “Ricoh XXXXX” value.
- If you are on Eduroam:
- You will have to add the printers by IP address.
- 128.97.31.241 is the black and white printer
- 128.97.31.249 is the color c6503
- To add an IP printer, at the top left of “printers and scanners” in system preferences is the ‘add‘ window, click the grey globe icon that says IP.
- Enter the IP of the printer you wish to add.
- You should see the fields on the bottom of this window populate, make sure that under ‘use‘ the proper printer is selected.
- continue to the “adding job code“ steps below this list.
- You will have to add the printers by IP address.
Adding Job Code on macOS
To add a job code on macOS, you will have to use a print dialog from an application, such as MS Word, PowerPoint, or a Web Browser other than Safari.
In this example, we will use MS word.
- Open any word document.
- Open a print dialog (file>>print)
- Select the Ricoh printer you want to use
- Under the “presets” menu you should see a dialog dropdown called “copies & pages“, click this and select “job log”
- if “job log” is not showing, its possible you need to reboot to fully add the printers, or there was a problem in adding the printers in earlier steps
- Under “job log“, you will see a box called “enable user code” and a field below to add you code. check the box and type your user code into this field.
- To save this setting, and avoid having to enter the code for every print job, click on the “presets” dropdown menu, and select “save current settings as preset”
If you have any problems, or even after this, you are unable to print, please email the helpdesk.