Your EPSS account is synced with the website and orders app. If you have trouble logging in please read through the following instructions.
Resetting your EPSS Account
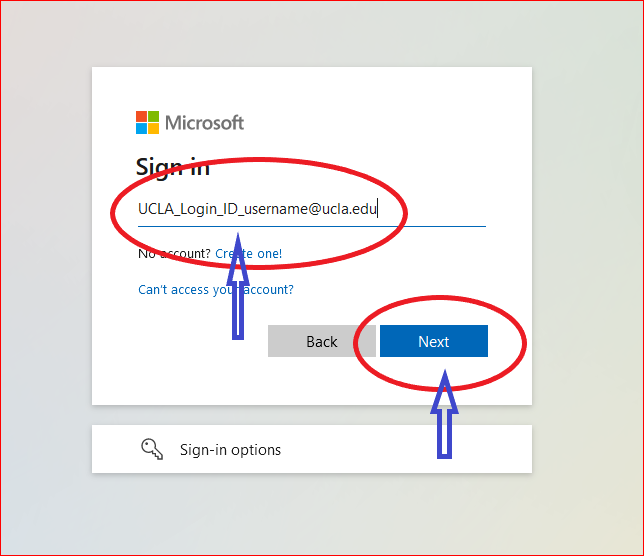
STEP 1: Please request a temporary password from IT by emailing help@epss.ucla.edu (if you do not remember your username, please request it at this time)
STEP 2:
Once you have a temporary password, connect to VPN if you are not on campus. ?
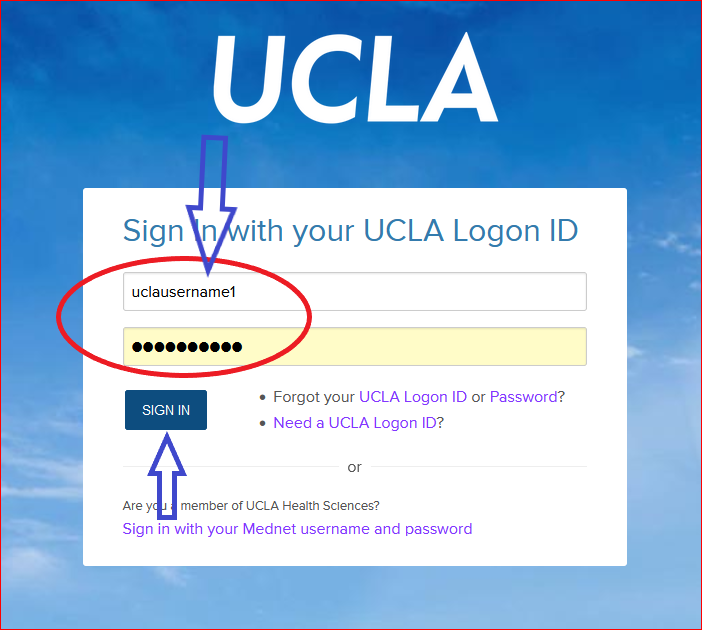
For the password please enter your UCLA logon password
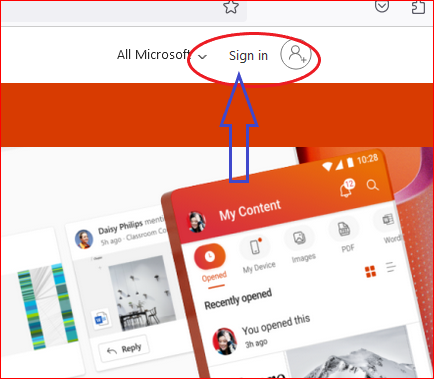
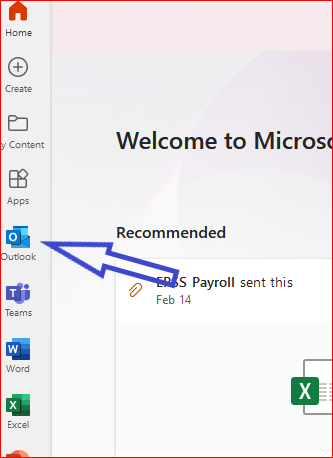
STEP 5: After you login in, click outlook icon at the left
How to access and use EOP (spam filter) for your department email account.
This article will show you how to access the EOP tool on office.com, and how to allow and block specific addresses. EOP (Exchange Online Protection) is the new spam filter replacing the Barracuda appliance as the spam filter for All EPSS department email accounts. (both epss.ucla.edu and igpp.ucla.edu*)
*igpp.ucla.edu accounts that have not migrated off of the legacy Zimbra server will continue to use the barracuda appliance until the account is migrated to Enterprise messaging. If you have questions, please email helpdesk@epss.ucla.edu.
Access EOP.
The EOP tool is available in the Microsoft outlook desktop client application, and online through office365. this guide will cover using the tool via the web interface, as this method will work for all users in EPSS.
Sign into your department email account online via office 365, using these instructions.
Sign into your department email account online via office 365, using these instructions.
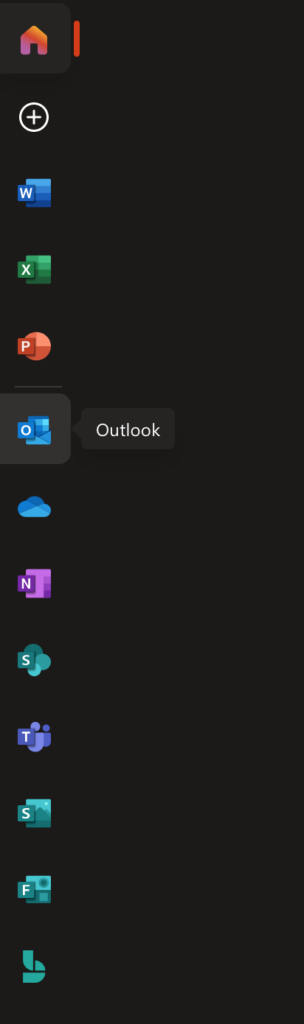
Once you have signed in to office 365, please open the outlook application, from the left side menu:
the outlook icon in the left side menu.
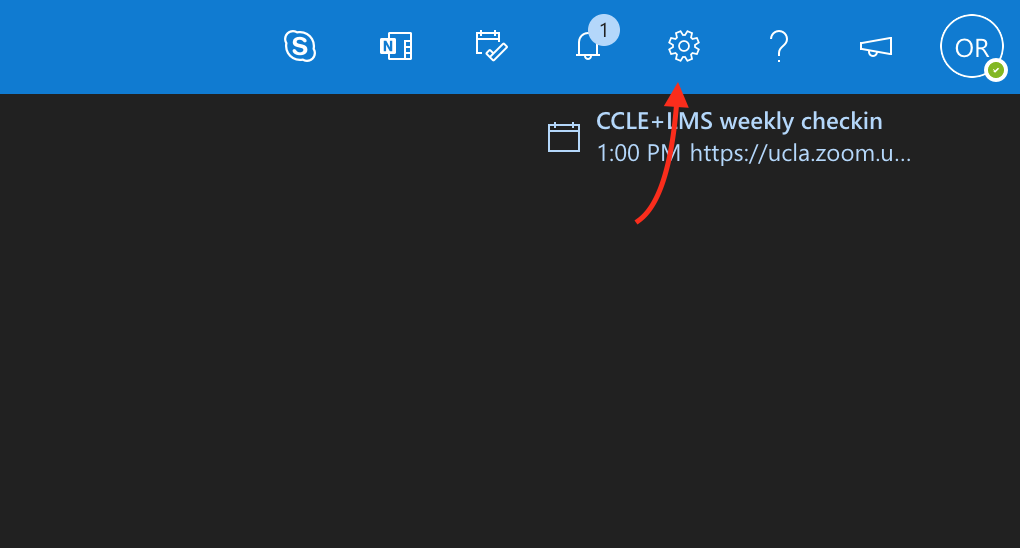
3. click on the settings icon in the upper right corner of the screen (shaped like a gear).
settings icon in upper right corner of screen
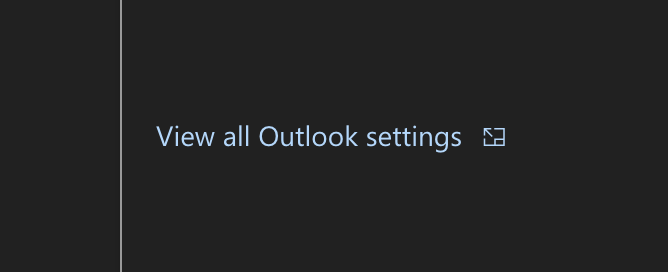
4. Click on this icon, and at the bottom of the side menu that opens, choose “View all outlook settings”.
click the “view all outlook settings link to open the full settings”
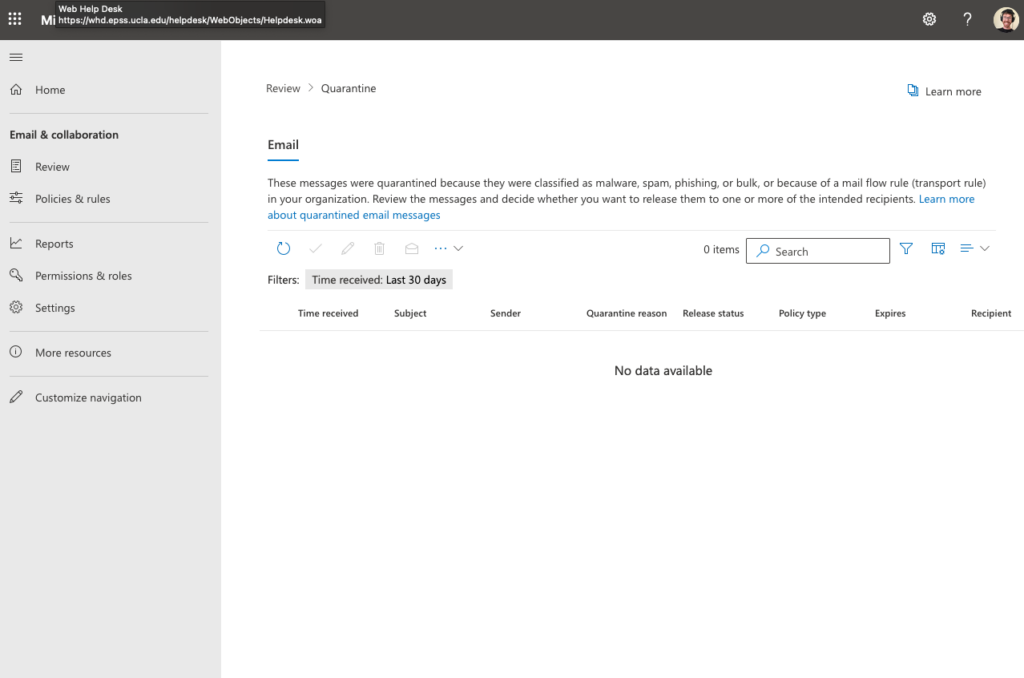
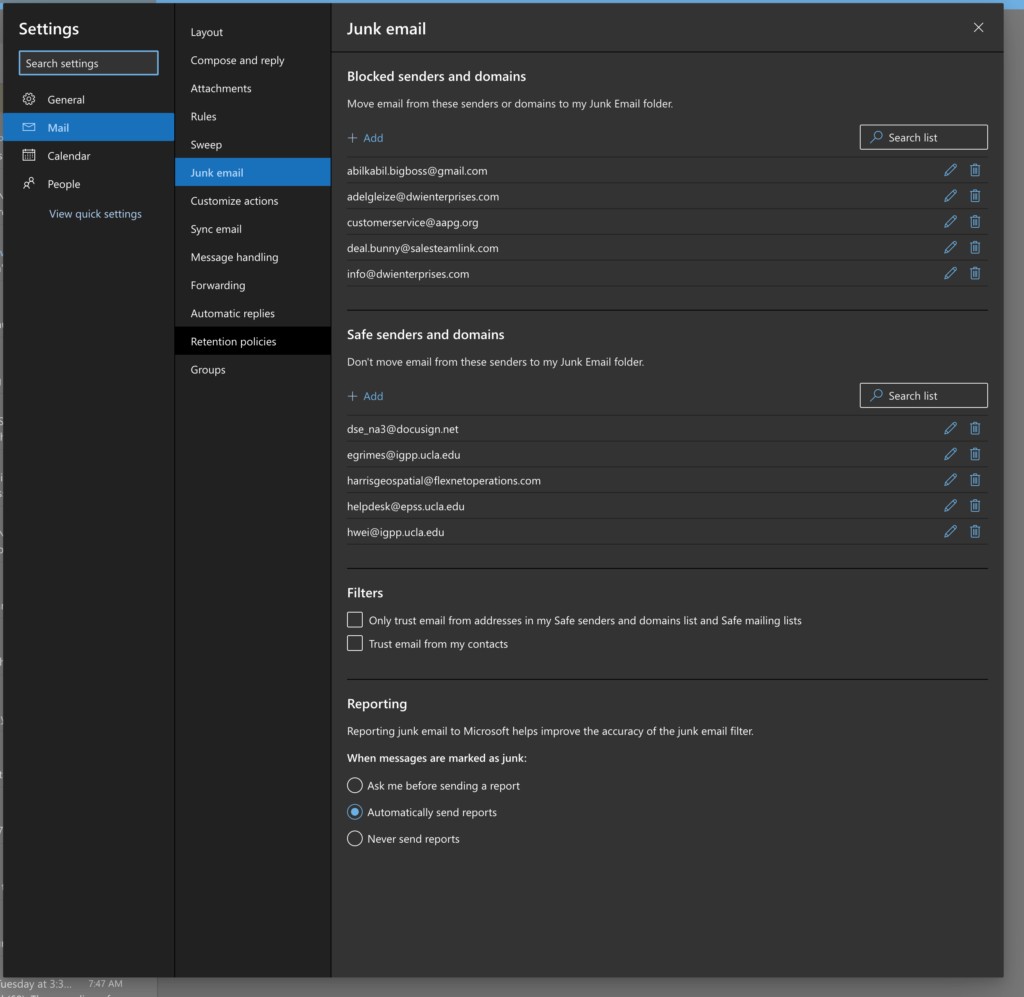
5. Click on “mail” > “junk email” to edit and view EOP settings.
view of the settings menu, and EOP options
6. From this view, you can click to add individual accounts to either the allow or block lists. accounts listed under “safe senders and domains” will not be marked as spam. YOU CAN ONLY ADD INDIVIDUAL ACCOUNTS TO THESE LISTS, NOT ENTIRE DOMAINS. If you need to allow all mail from a specific domain, please email the helpdesk (helpdesk@epss.ucla.edu) to request this, and EPSS IT will work with campus to create the entry. (an example: if emails from @physics.ucla.edu are regularly getting marked as spam)
Please Make sure that you have the option under “reporting” set to “automatically send reports” to make sure you know when messages are being flagged, and to be sure you don’t miss any important communications.
If you have questions, or problems using this system, please report the issue with as much detail as possible to helpdesk@epss.ucla.edu and the EPSS IT staff will do our best to resolve the problems.
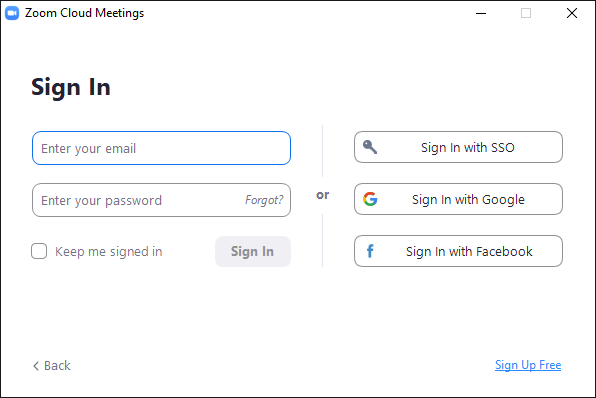
Once installed: Go to your Start menu, and open Zoom. If you aren’t logged in, it’ll look like:
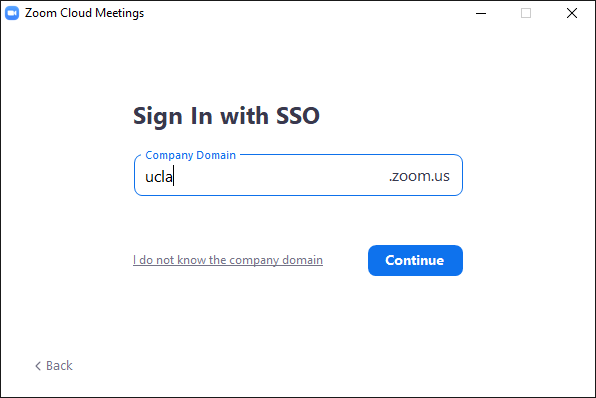
Click Sign in with SSO. It will ask for a domain. Use ucla.zoom.us
You’ll be taken to the standard UCLA SSO login page, proceed as normal. You’ll be asked to open Zoom Meetings. If not, click the “Launch Zoom” on the page where you just logged in.
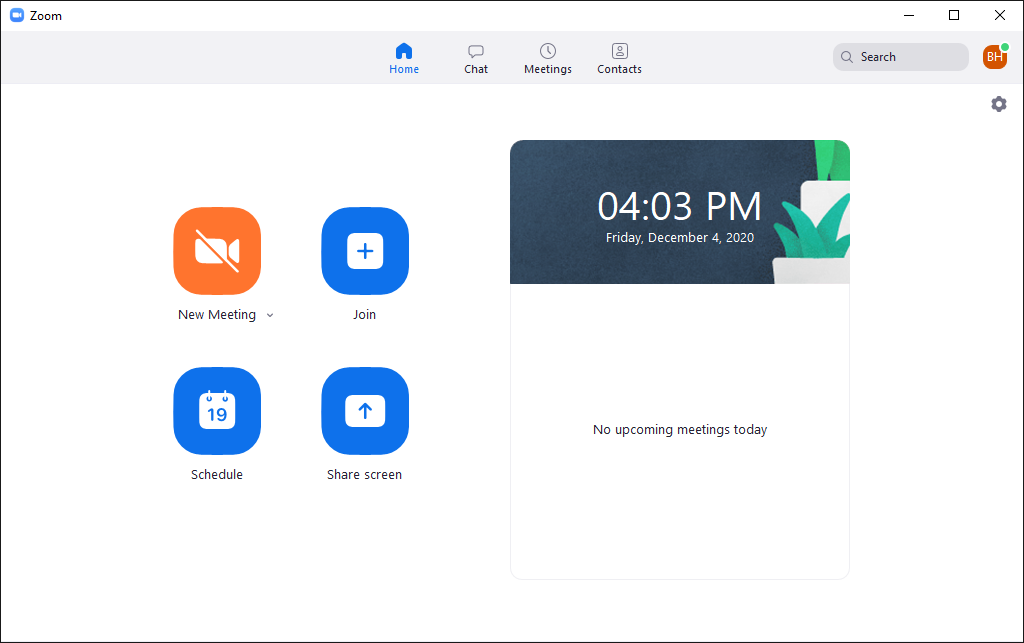
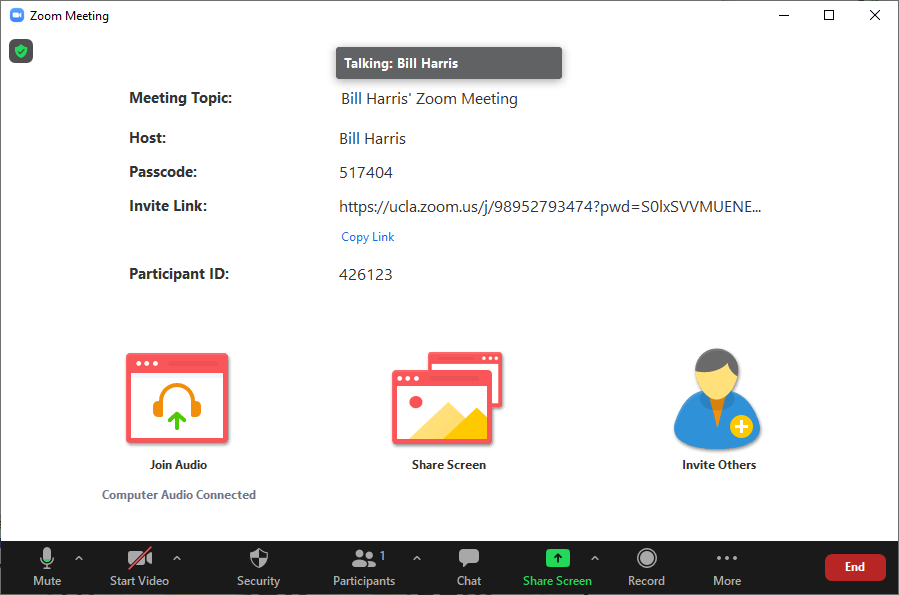
Zoom app interface:
To Create a meeting: Click New Meeting. A new meeting page will open, you’ll be asked if you want to connect with video or audio. Now you can see the meeting details.
This has all the information others will need to connect. Most importantly “Copy Link” so you can just paste the link to your meeting into a chat or e-mail.
To join previous recuring meetings: The “Join” button leads to a short list of past meeting links, no need to go find a lengthy URL to rejoin a meeting.
Useful Features
Audio options: Next to the “Mute” symbol is a “^” that has more options. You can select which speakers and microphone to use. There is also a test function, which will verify that the Zoom app is connected properly to the audio devices.
Video options: The video “^” allows you to choose which camera to use. There are also virtual background and video filter features. Virtual backgrounds will work better with a green screen, but it’s not required. A video can also be used as a background. There is a “+” button where you can upload your own picture or video.
Security: The host of the meeting can control what participants can do, chat, share screen, unmute themselves, etc.
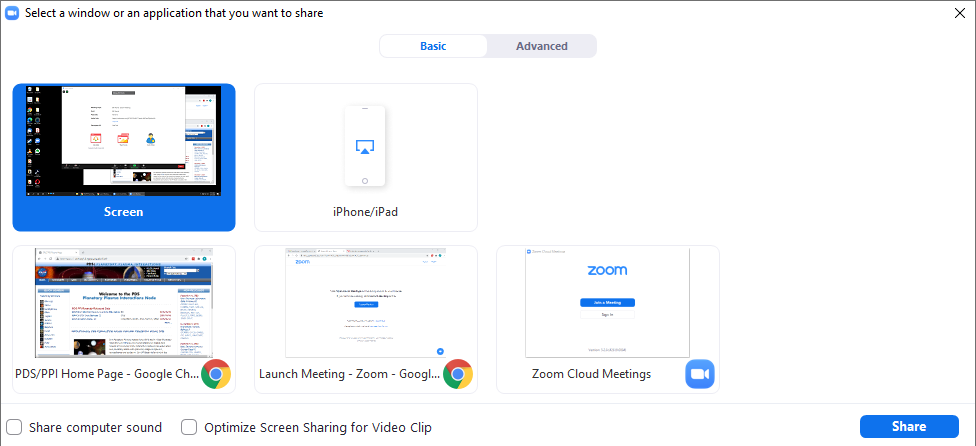
Screen sharing: You can choose a physical display to share, or a specific window. You can also share the audio output (bottom left corner). This will share all audio output from your computer, not just the window you are sharing. When doing this, headphones are strongly recommended.
You can also allow for more than 1 user to share their screen at the same time. In “Advanced sharing options” you have the option of using a Powerpoint as a background or use a second camera. The second camera will be placed Picture-in-Picture style.
How to Use Zoom Meetings
Zoom is UCLA’s choice for video and web conferencing. Through a system-wide license agreement, the University of California has negotiated a significant discount off the regular price of a Zoom Pro license. You can read more about Zoom here.
Click the button below for instructions on how to handle Zoom meetings
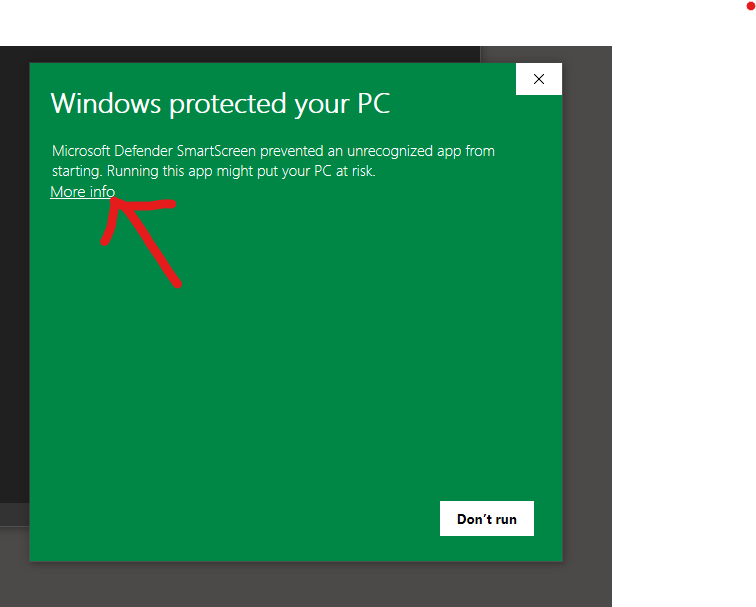
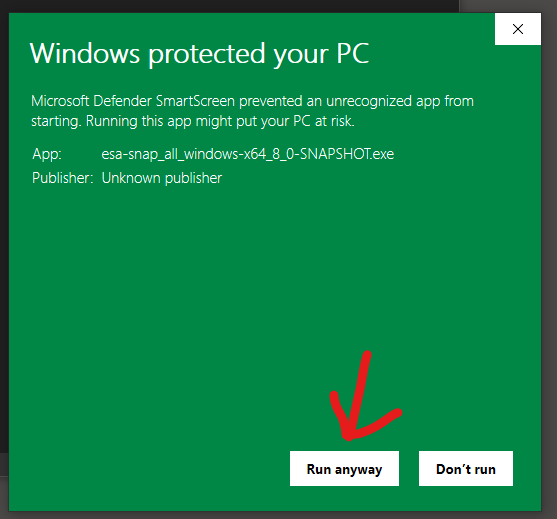
This will download an .exe file, which you can click to launch. Because this is a development release of the software, you will have to allow windows to open the installer. My screen is green in this example, but yours may be a different color.
You will then be asked to confirm this installation by a windows utility called “User Account Control”. Please click yes/accept/ok on this prompt.
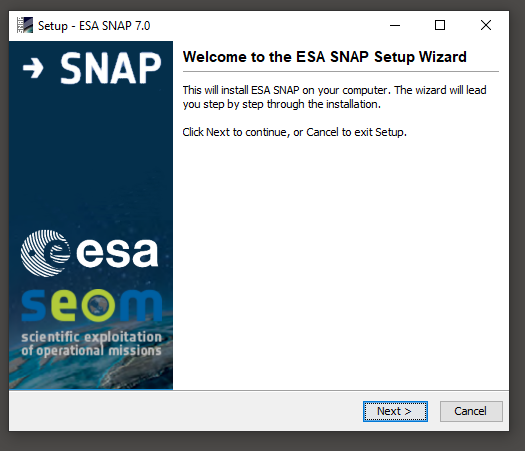
You should now see this window:
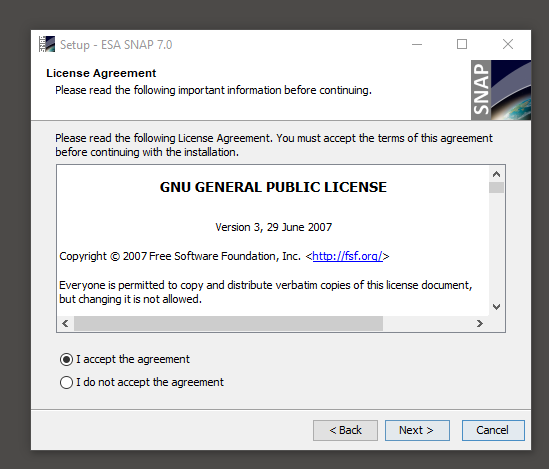
click “next” and accept the license agreement.
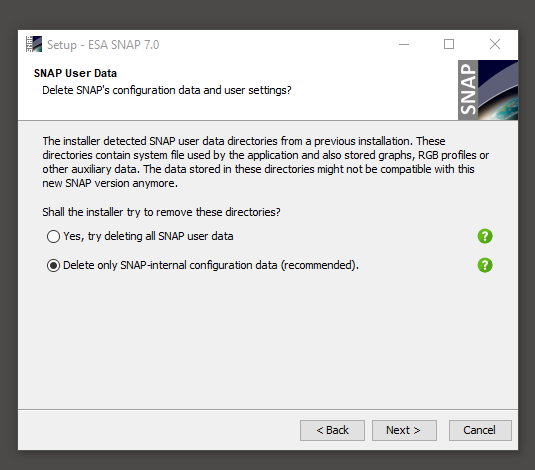
After this you will be asked to delete any existing snap data, please choose the default option “Delete only SNAP-internal configuration data (recommended)”
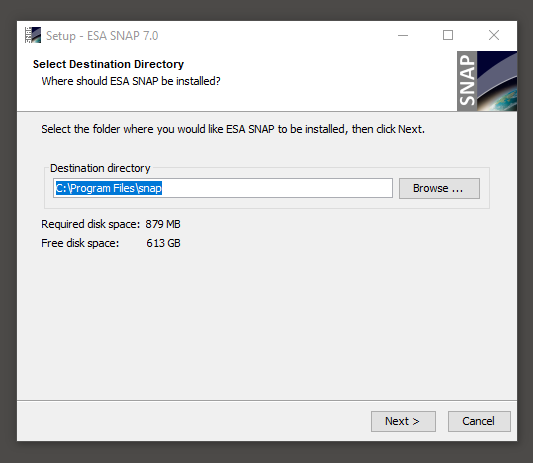
The next screen prompts for an installation directory. Leave this at the default value.
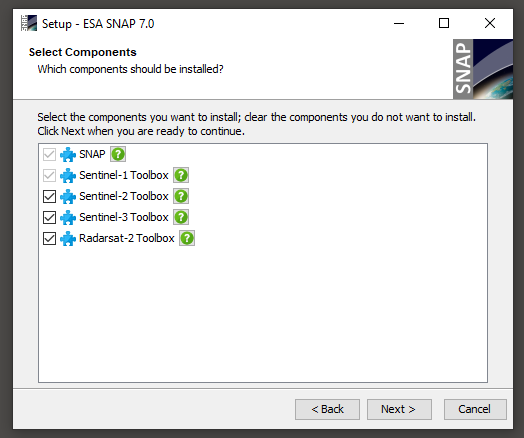
On the next screen make sure all the toolboxes are checked to install
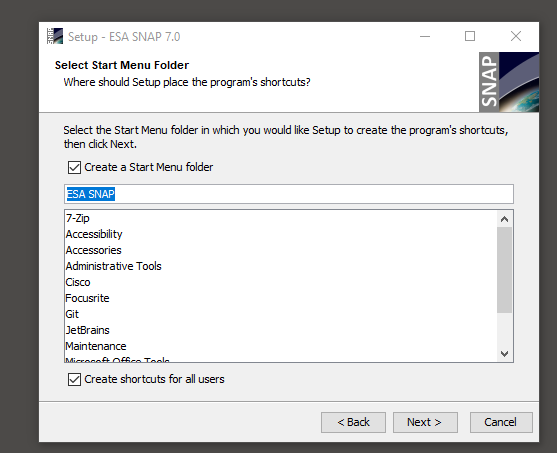
You then will be asked if you want to create shortcuts, and add snap to the start menu. You can leave this with the default settings as well.
the final screen asks about if you want to configure snap to work with python. for now, skip integrating python.
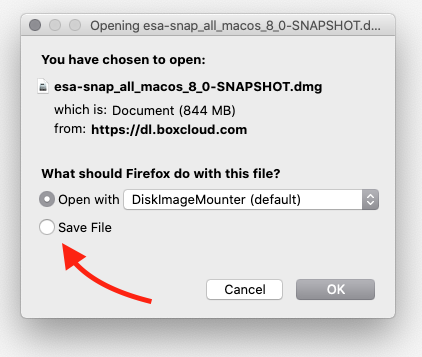
This will download a .dmg file, which you can click to mount on macOS. For this tutorial we are using macOS Catalina (10.15.7) , but the process should be the same for most older versions.
Make sure you select “Save File” instead of “Open With”.
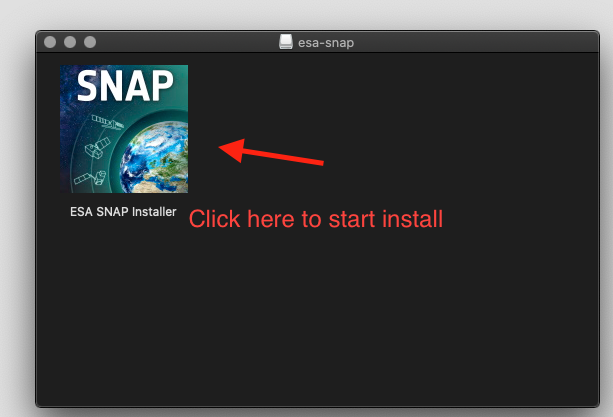
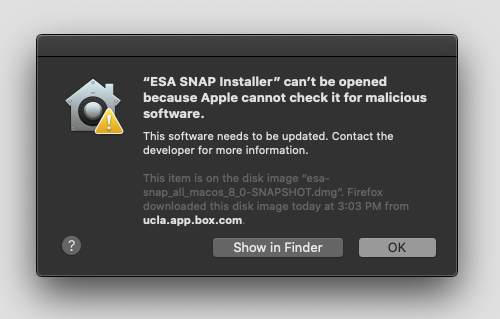
Once the file is downloaded, double click on it to open the installer.
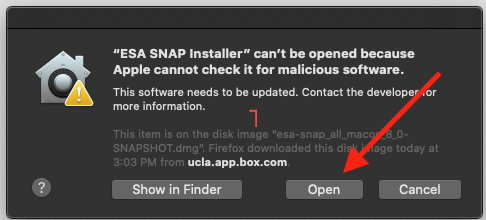
You will encounter a message that says this installer cannot be opened because Apple cannot check if it is malicious software. This is OK, so click ok.
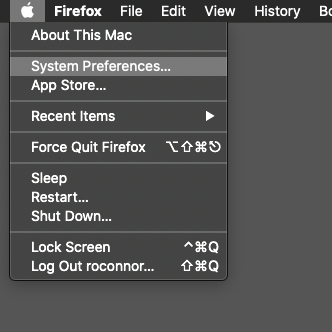
You’ll need to open System Preferences, which you can find by goign to the apple icon in the upper left corner of the screen and selecting “System Preferences”.
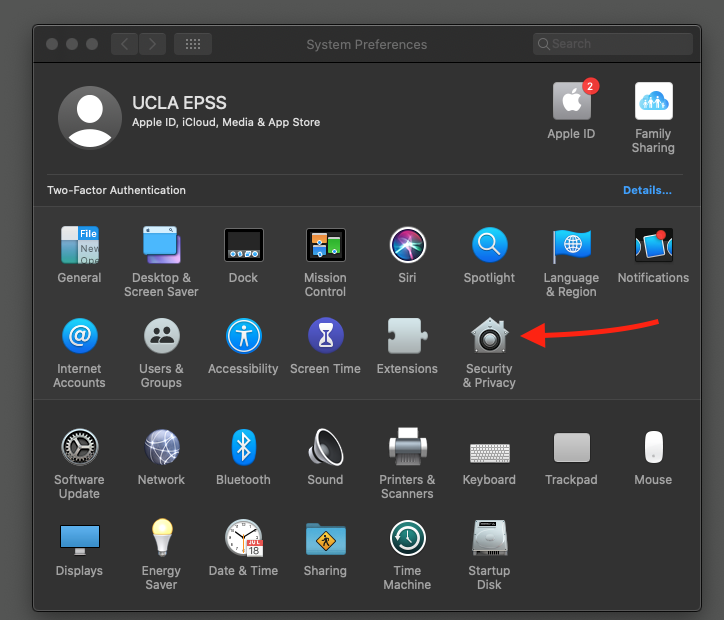
Once you have System Preferences open, click on “Security and Privacy”
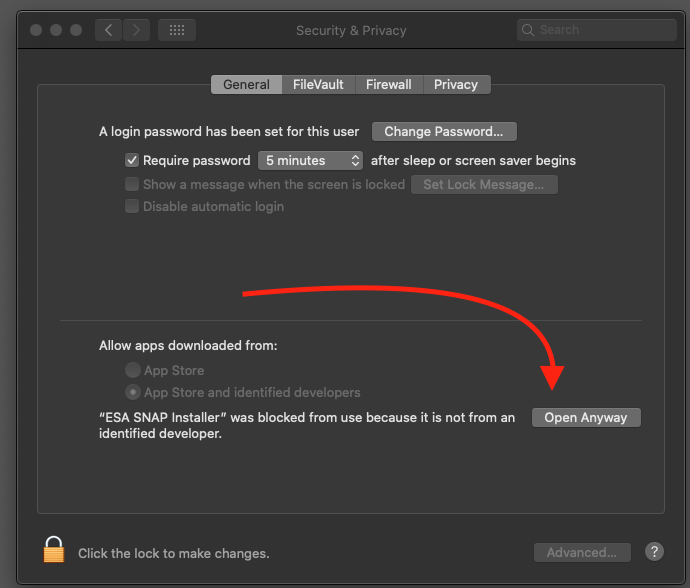
You should see the message at the bottom of this screen (be sure you are on the “general” tab) and please select “open anyway”
Almost there! you will see another popup which again says the file cannot be opened. Click “open” on this window.
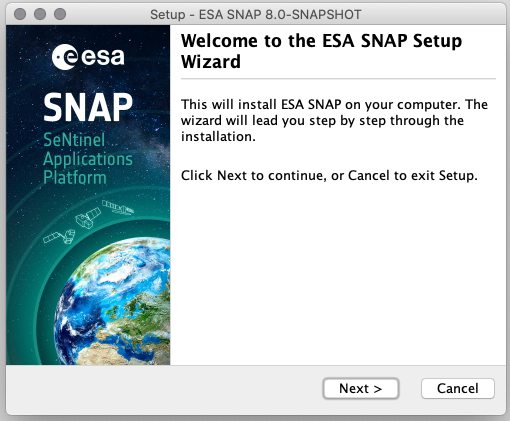
Now you are ready to start the installer (whew) !
You should see this:
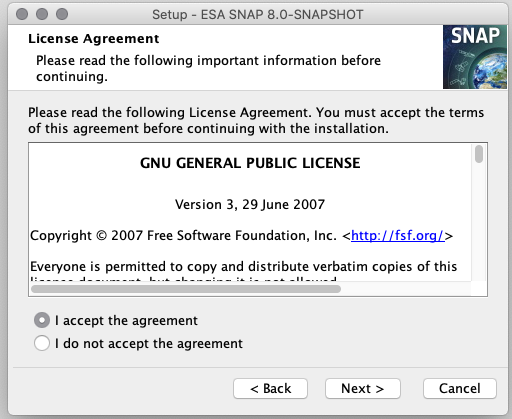
Click “next”, and on the next screen accept the license agreement.
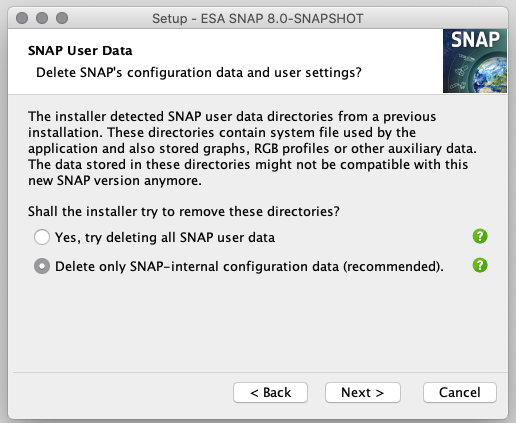
you will then be asked to select an option to delete SNAP user Data. Select the recommended option.
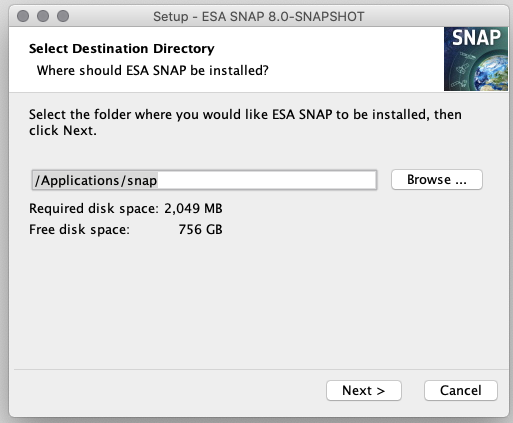
Now you are prompted to pick an installation destination. Leave this as the default value as well.
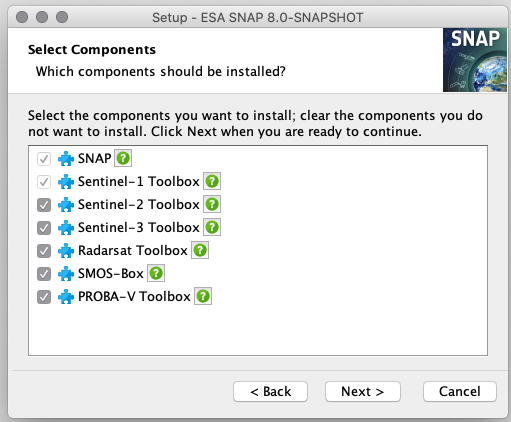
the next screen will ask you to select which components are going to be installed, check all the boxes
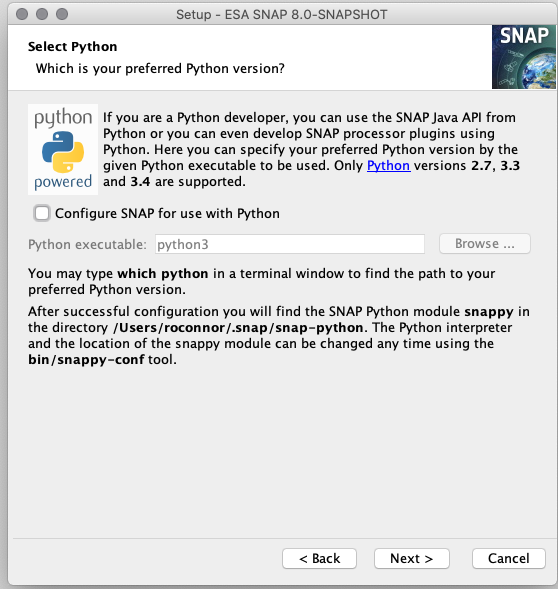
the following screen will ask if you want to configure SNAP to use Python. For now, leave this unchecked.
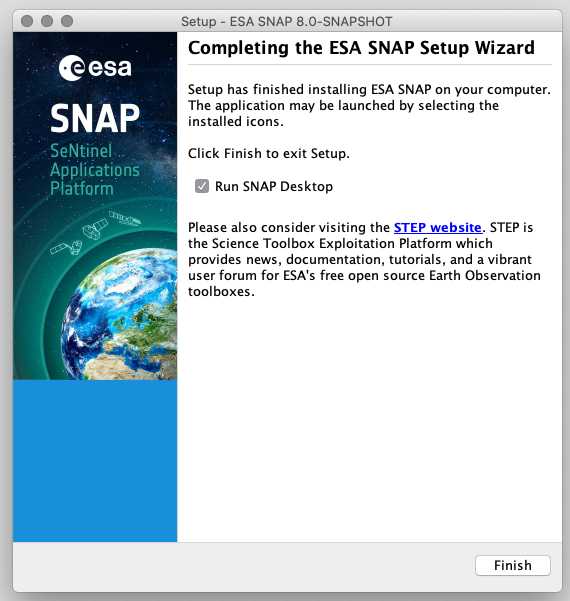
The Installer will now install SNAP, and when done prompt you to launch SNAP, which you should do.
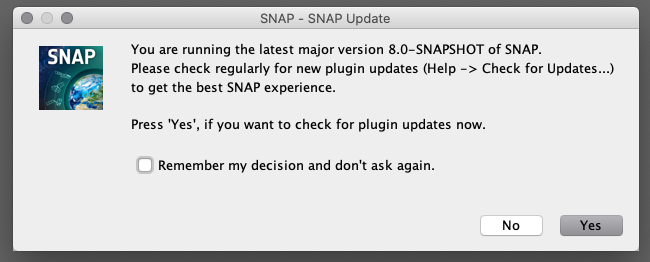
Snap should ask you to install updates to plugins. You should choose yes.
Congratulations, you are done!
Welcome to EPSS!
Welcome
EPSS IT Helpdesk staff are here to help with your IT/Computing needs.
We support many services in EPSS, including websites, networking, computer labs, mailing lists and more. If we are unable help with your problem or question we will do our best to direct you to someone who can help.
Creating a Ticket
Please email help@epss.ucla.edu for help with EPSS departmental IT related issues.
For urgent/time-sensitive issues, please add “URGENT” to the subject line of your email.
Sending an email will automatically create a ticket on our system.
IT Support Center
For inquiries on the topics shown below, check out the IT Support Center.
If you have any further questions, feel free to contact us at help@epss.ucla.edu.
Information for New Department Members
Internet Access
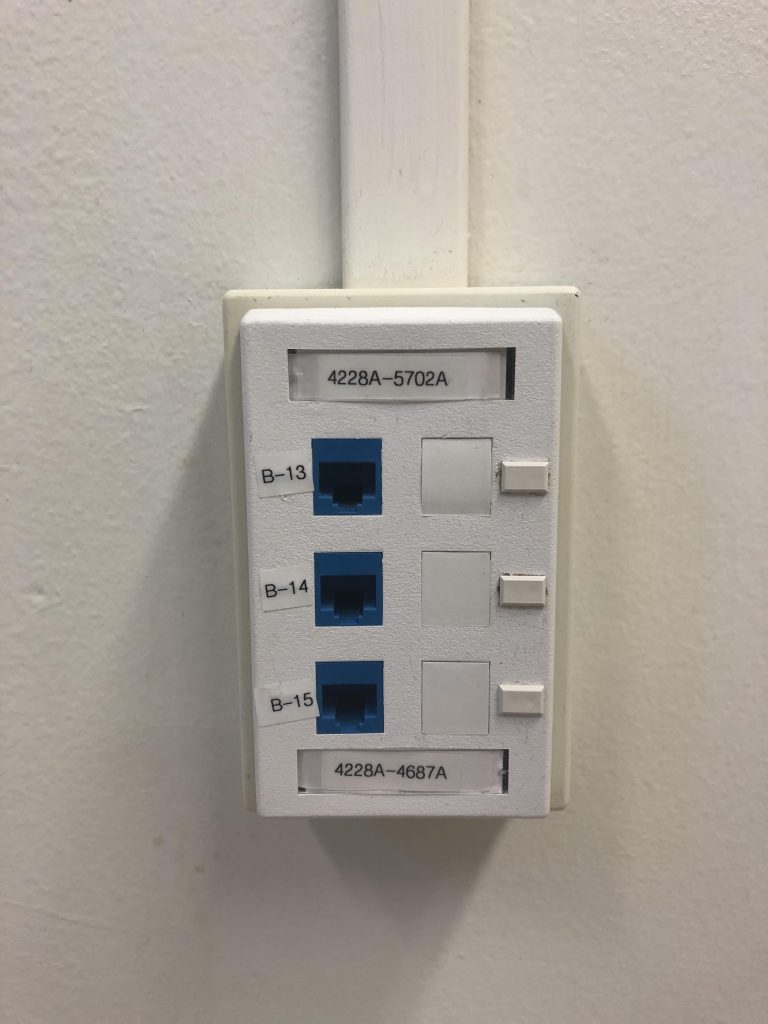
To get connected to the outside world, you can use either a hardwired Ethernet connection, or WiFi. Offices the building have Ethernet ports which look like this:
Ethernet Jack from Geology
The Easiest way to get connection is to email a photo of this box to help@epss.ucla.edu, and tell us which port you are going to be using. We can then remotely configure the ports to connect. You can also email us without a photo, and we can setup a time to come examine your office and help get you connected!
Wifi
UCLA and EPSS have many different WiFi networks, and your Lab, or research group may also have their own WiFi network. For official department business, we recommend that you use EDUROAM, which you can read more about here: https://www.it.ucla.edu/news/eduroam-wireless-network . For many tasks, such as printing to the department printers , this is the only wireless network that is supported.
Email
You may already have a UCLA email through google apps. If you have not yet, please contact Bruin Online for help setting one up.
Some EPSS Members are eligible for departmental email addresses, [<username>@epss.ucla.edu] In gerneral, these accounts are for faculty, staff and research appointments and not students. for more information, click on the “email” tab under “resources” in the top menu. To request an account: just click here and fill out the relevant information!
Printing:
The department offers free (within reason!) printing to all members. You can read more about setting up the connection yourself here or you can email us to help you. You will need a printer code to use these devices, please email helpdesk@epss.ucla.edu to request one.
TA’s will also be given a separate code to use for class related materials.
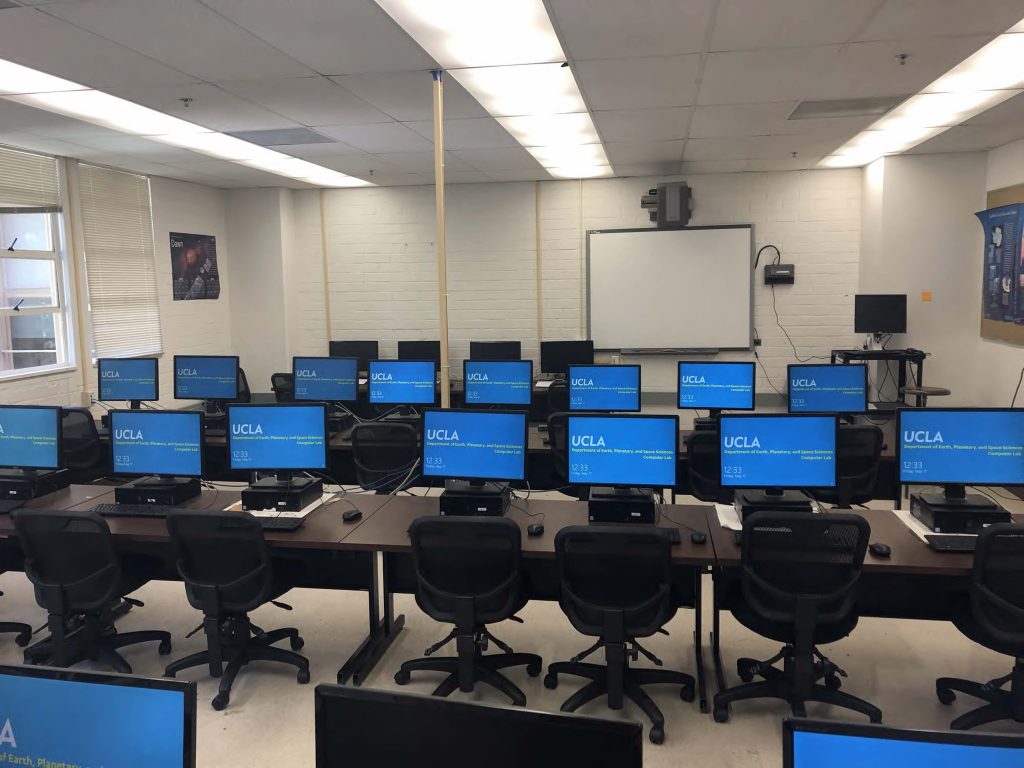
Computer labs
EPSS has two student computer labs, one in Geology 4691 and Geology b707. Any Student is welcome to use the labs, which have a combination lock. If you have a class scheduled in the labs, you can ask your TA, or professor for the access code, which changes quarterly. The code can be obtained from the helpdesk if you have forgotten it.
Software:
EPSS licenses some software for use in the computer labs in the department including:
Matlab
ArcGis Advanced
Microsoft Office Pro Plus
Adobe Creative Cloud (including Acrobat pro)
and More!
Students are all covered for Windows 10, Office Pro plus, and Adobe Acrobat pro. Please email the help desk if you need to install any of these, which are available for free to students in the department. We can install this on your personal devices as well. When in doubt, ask us!
Using Zoom Meetings
Zoom is UCLA’s choice for video and web conferencing. Through a system-wide license agreement, the University of California has negotiated a significant discount off the regular price of a Zoom Pro license. You can read more about Zoom here.
Click the button below for instructions on how to handle Zoom meetings
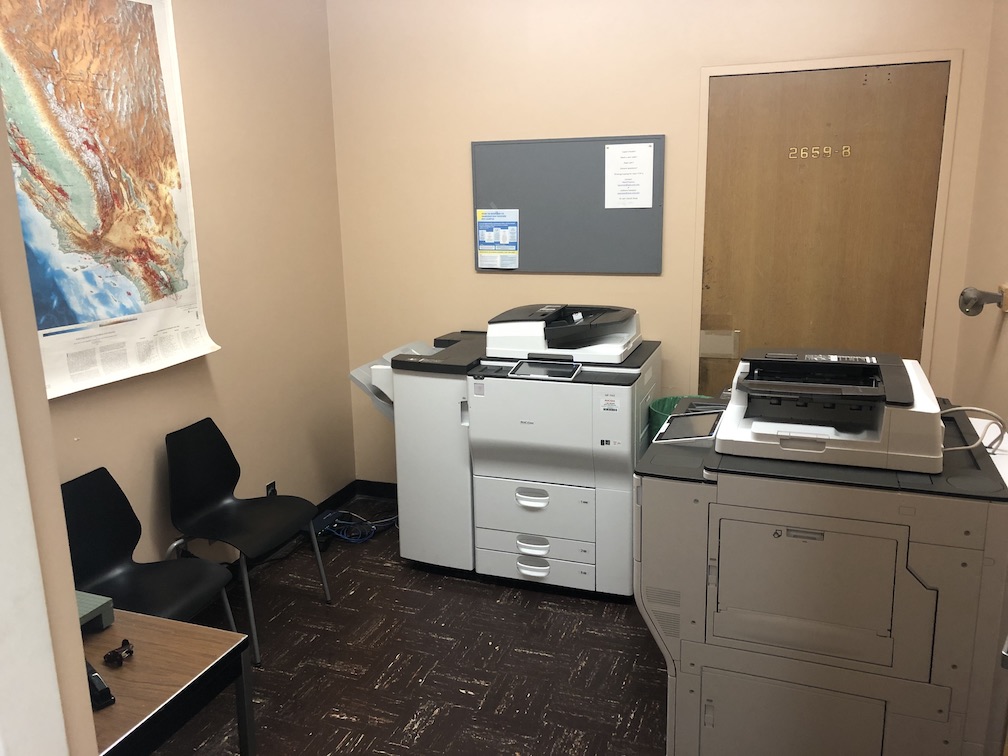
EPSS provides two Ricoh MFD high capacity printers for use in the department. These are located in Geology 3807 (across from the Main Office). The use of these printers is open to all department members, but requires a user code to be used. You can obtain a code by emailing helpdesk@epss.ucla.edu with your name, affiliation (what lab/group) and your status (faculty, student, researcher postdoc ect)
Large classes such as EpsSci 8, 9, 10 ect. are issued their own codes, since the printing requirements for these classes is very large. If you are a TA for one of these courses, you can contact the TA coordinator, or email the helpdesk to obtain the user code for those classes.
These devices can print black and white or full color, and can also scan documents and email them to you. A USB flash drive, (must be FAT formatted to be read) can be used as well to both provide documents for printing (PDF and IMG formats only) or to store scanned files, if you do not want them emailed.
Once you have a user code, or if you have one already, follow these steps to install and use the printer. the instructions are different for macOS and Windows machines (printing from Linux is possible, but not supported at this time, if you need this function, please email the helpdesk)
For both platforms
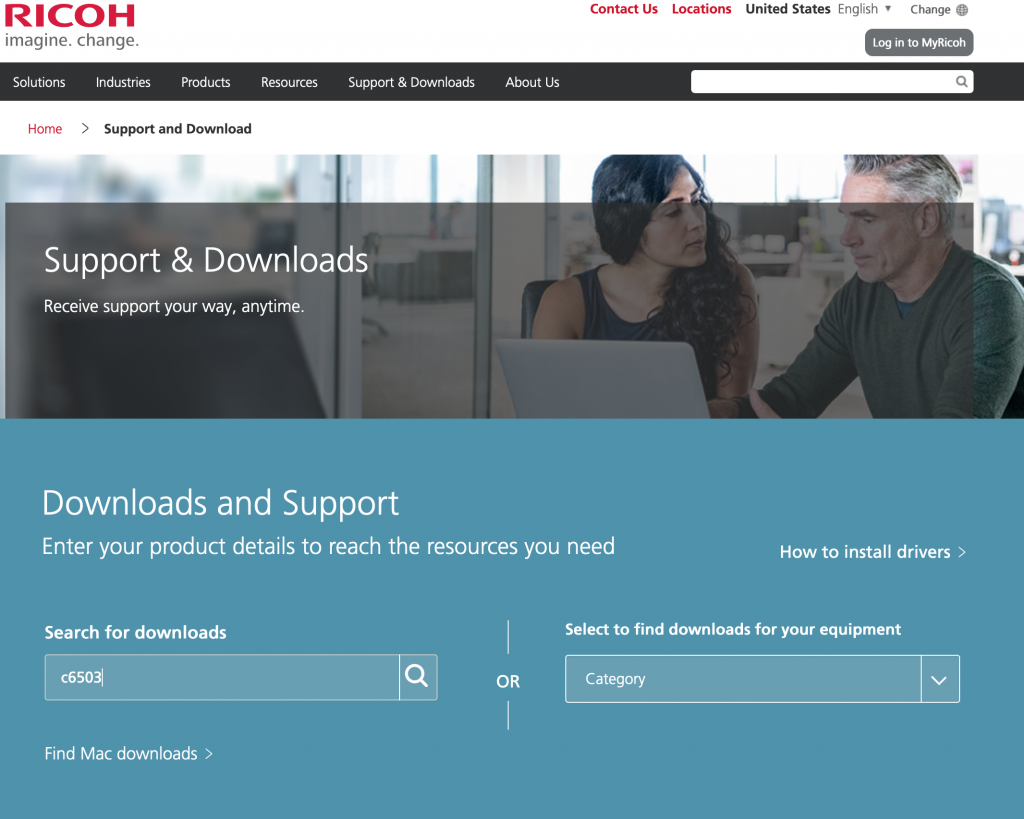
Go to https://ricoh-usa.com and click on support and downloads. Then in the search box type “c6503”
Screenshot of ricoh website with string filled in search box.
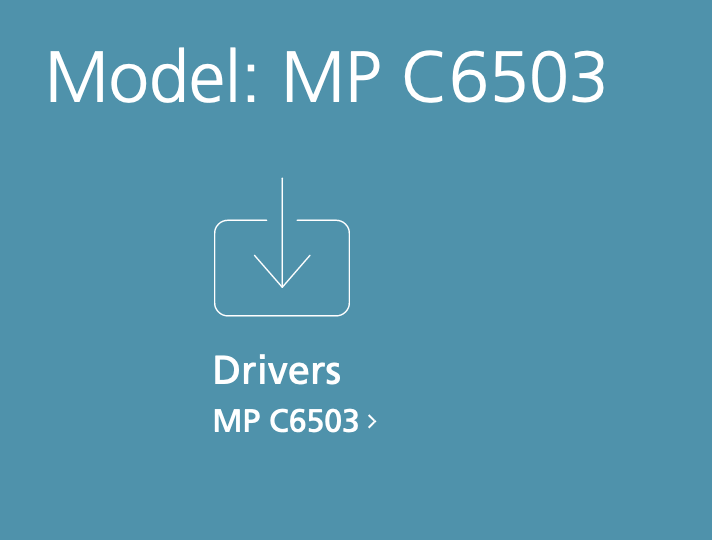
then click on the name “MP c6503” under the drivers icon to navigate to the download page. you will be asked to agree to the Ricoh terms of service, please click yes.
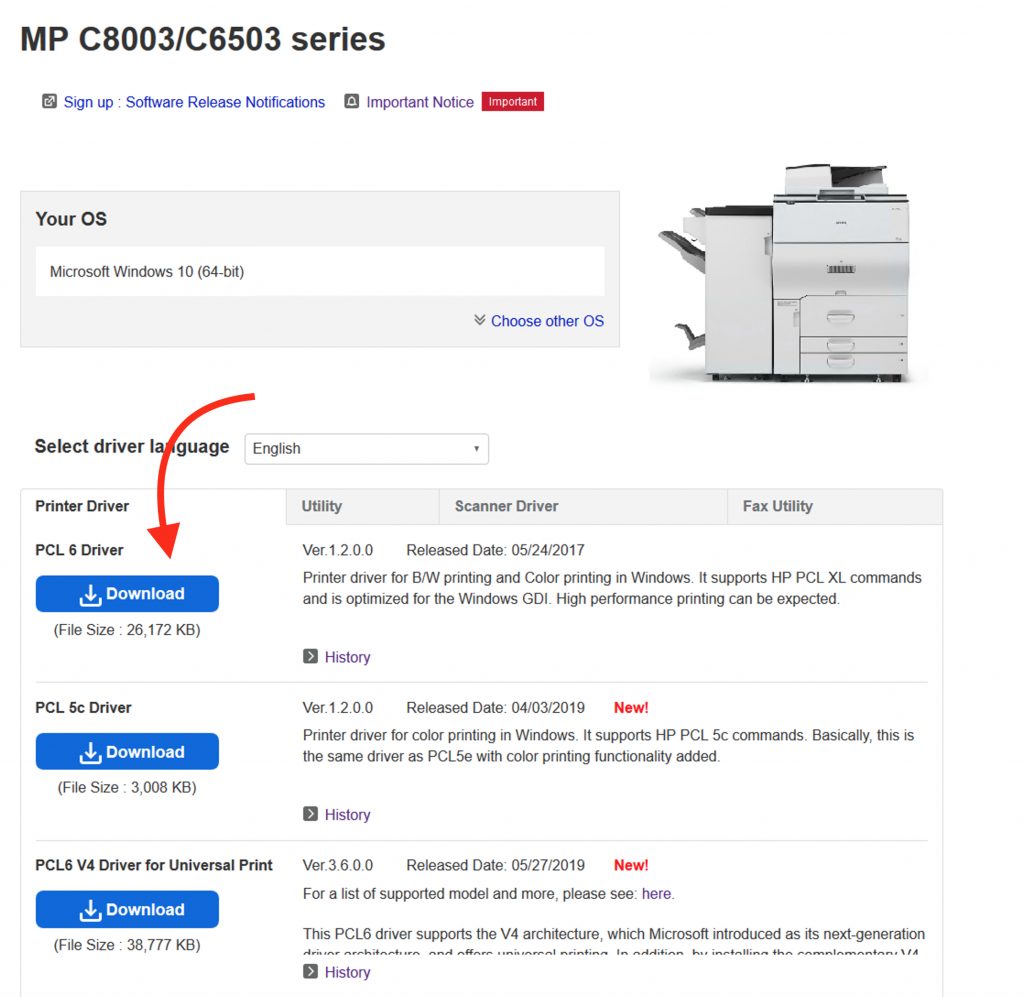
The website should automatically select your operating system. for macOS computers there should be one PS driver option. For windows machines, please select the PCL6 driver once this has downloaded, please install the driver.
Windows specific instructions:
To add the printers to your computer, you will need to be connected to EPSS ethernet network, (wall jacks) or connected to EduRoam (wireless), in the Geology/Slichter building. You may encounter difficulty if you are connected your lab/group’s own wireless or switch. PhySciOpen will also not work. If you have trouble, just email the helpdesk and we can assist you.
Once you have downloaded the driver as listed above, the process is the same for both machines (color and black and white). For this tutorial, we will focus on the MP C6503, color copier. Download the driver as above, but for the windows 10 machines, select the PCL 6 driver.
arrow showing the correct driver version to install.
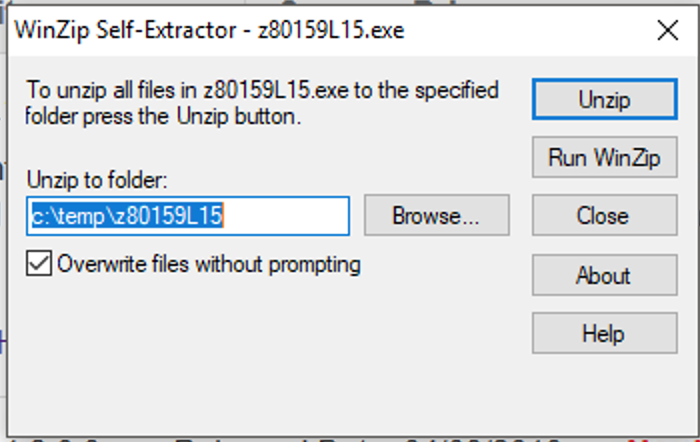
Download the driver installer, then you will be given the option to unzip the contents of the driver. (if you are given a security warning, its ok to continue) when you see the dialog below, click unzip, and when the process is complete, copy the highlited text from the box and paste into a file browser.
win zip window
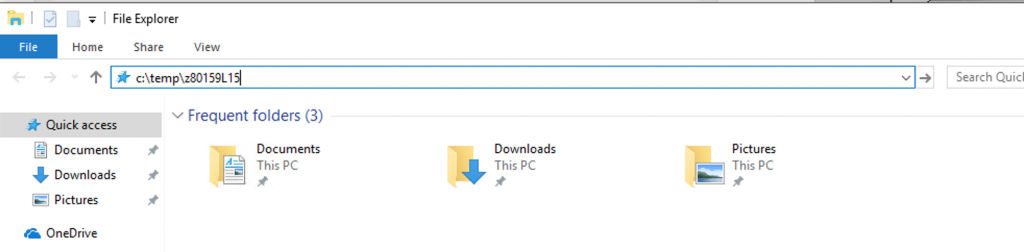
So, in this example, we would copy “c:/temp/z80159L15” into the file browser, then hit enter to navigate to the folder, like so:
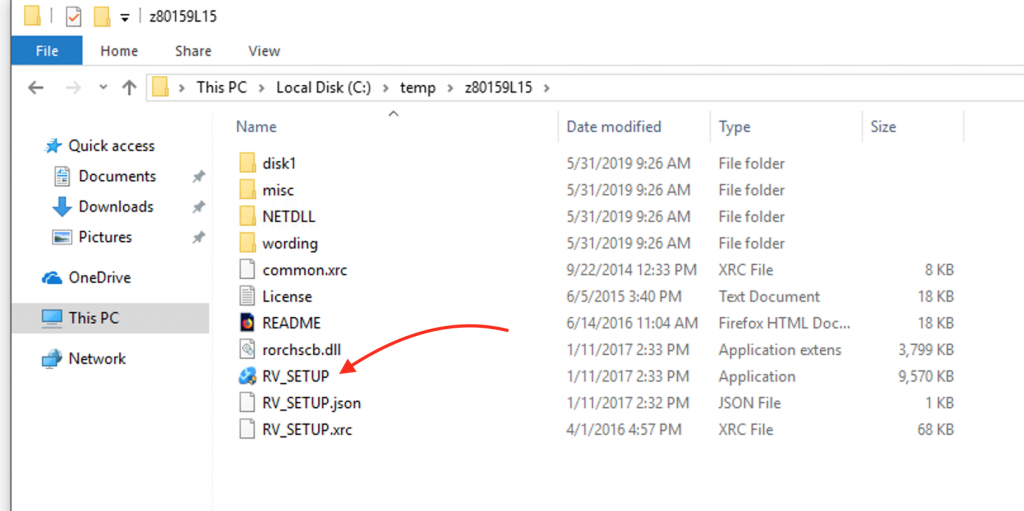
Which will bring you to the temp folder. click on “RV Setup” to launch the driver installer.
open RV_SETUP.
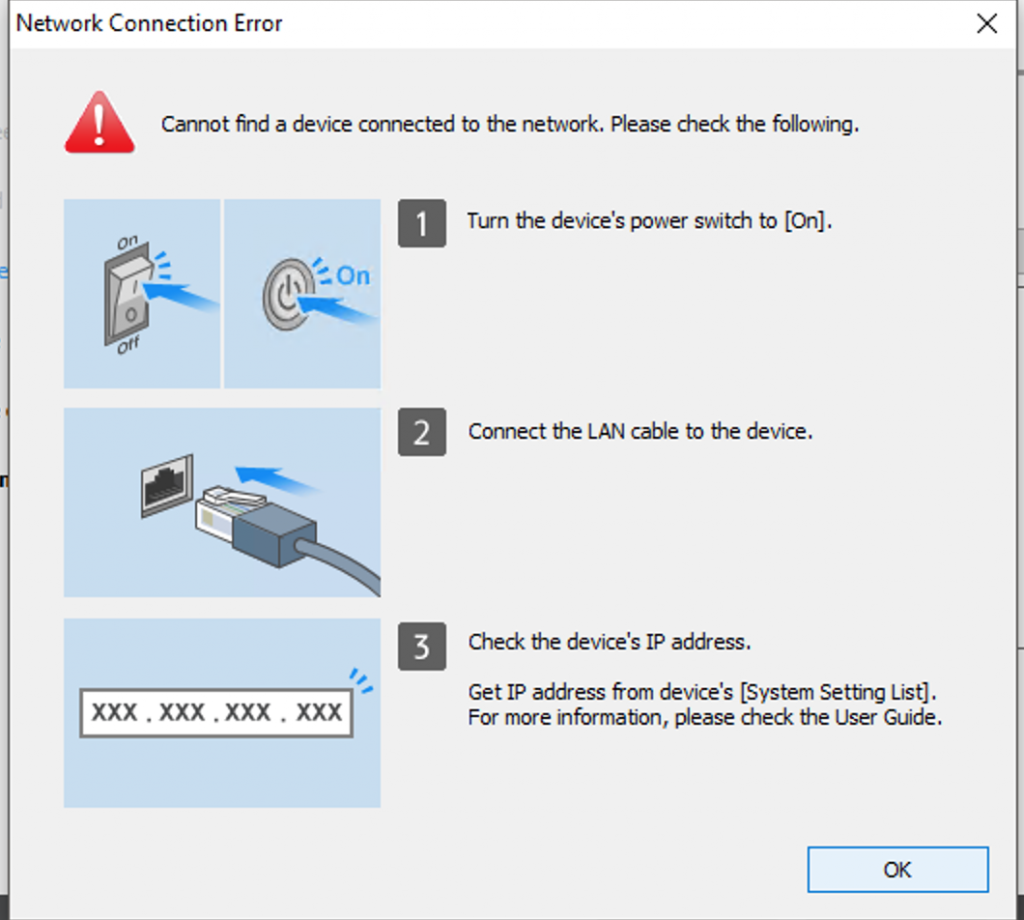
When the dialog box appears to ask if you want to allow the program to make changes click ‘yes’. You will be prompted to answer a few questions by the installer, answer ‘yes’ to the first question and then select ‘network’. The installer will try to find the printer on its own. If you see the Ricoh printer in the list, please select it and continue to “FINAL STEP” below.
Otherwise, if you see this message:
error
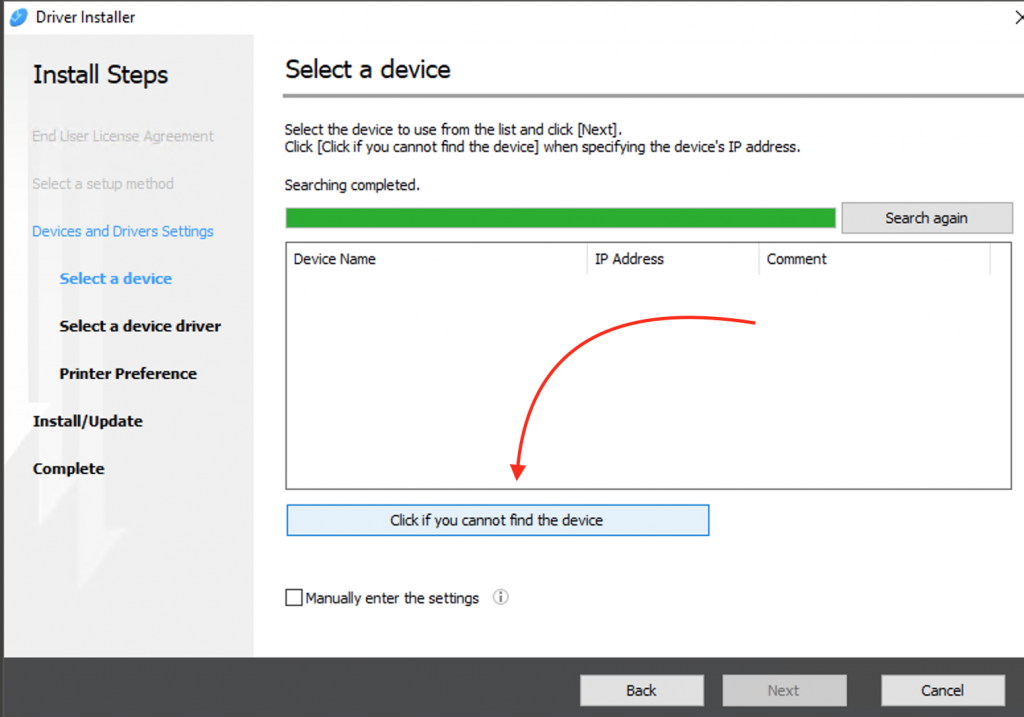
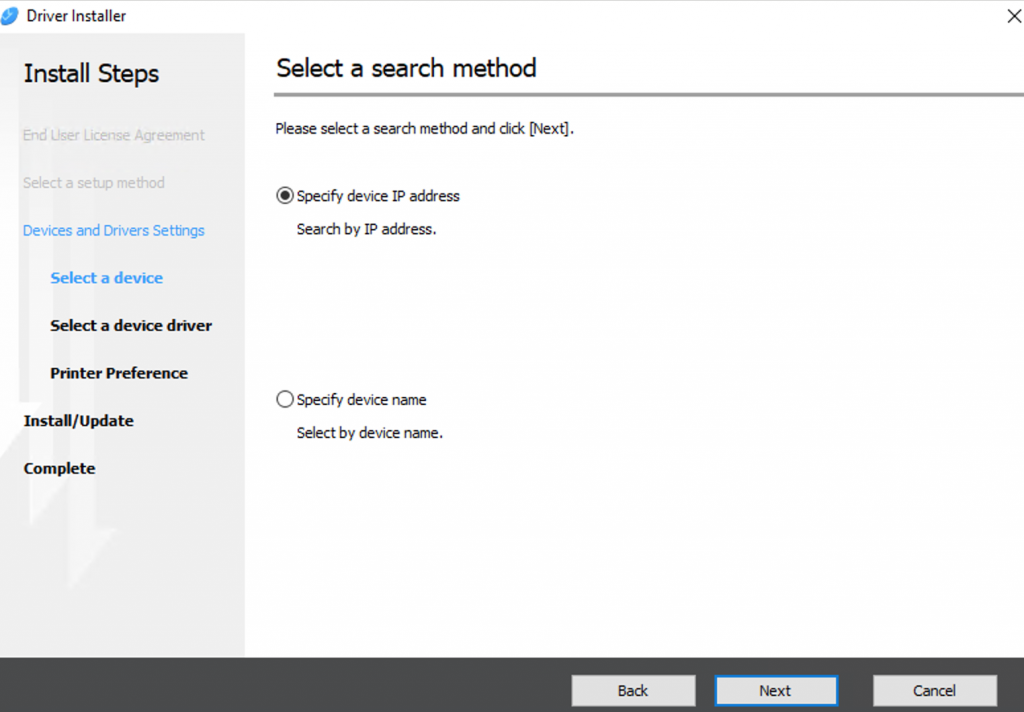
You should click ok and then click on the “click if you cannot find the device” button, then “specify device ip address” button.
cant find device buttonspecify ip address screen.
Now you can enter the IP of the printer manually.
If you are installing the c6503 driver for the color printer you must use 128.97.31.249 as the ip address.
For the MP 7503 black and white printer, use 128.97.31.241
If everything goes correctly, you should see the printer in the list, and can install it!
FINAL STEP!
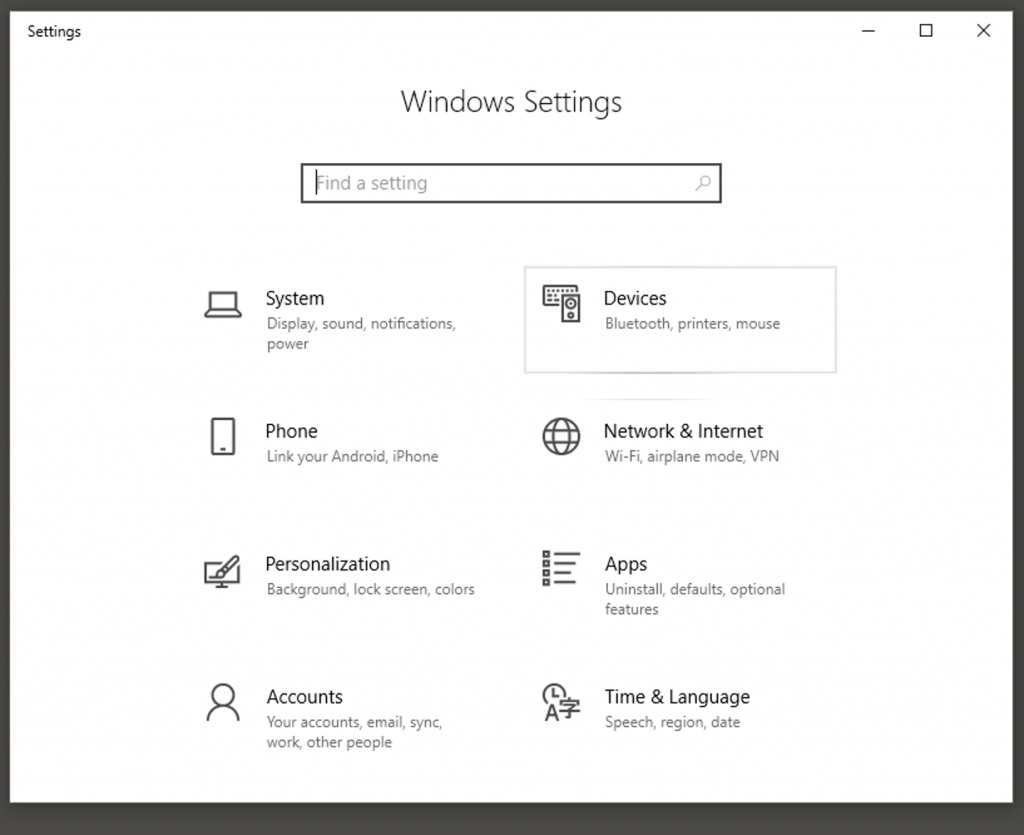
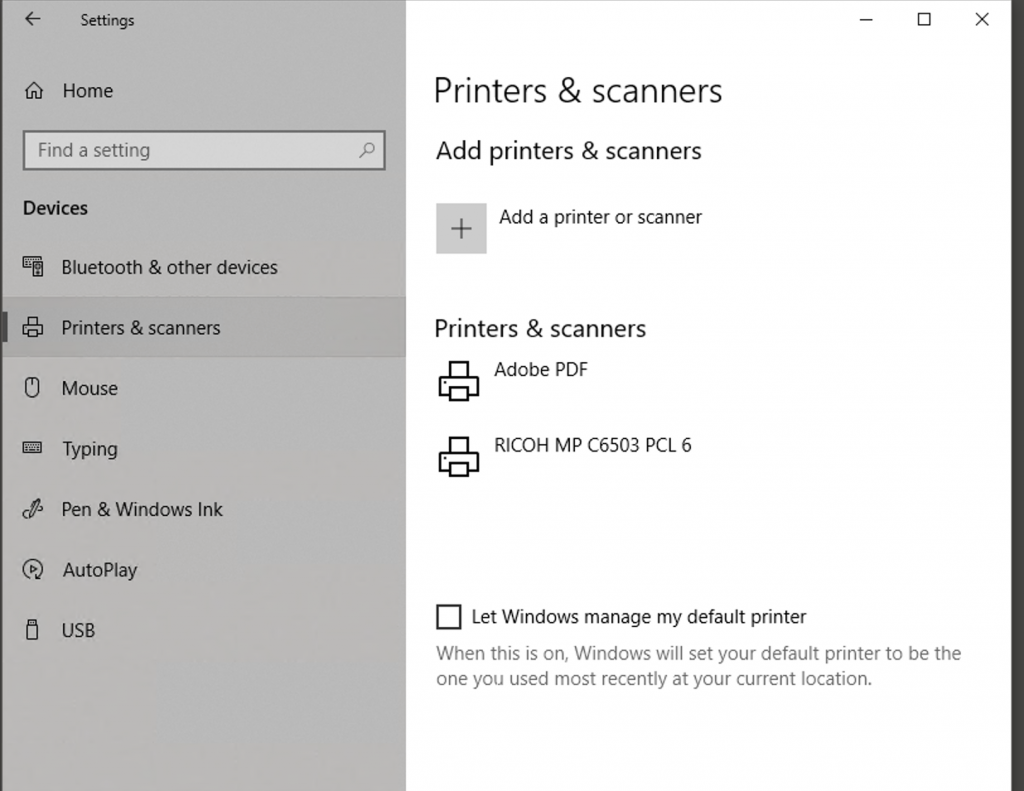
Once you have installed the printer, you need to add your job code to the printer dialog, otherwise your jobs will all be discarded by the printer. Go to: Start menu >> Settings >> Devices >> Printers and Scanners.
devices settingsprinters and scanners
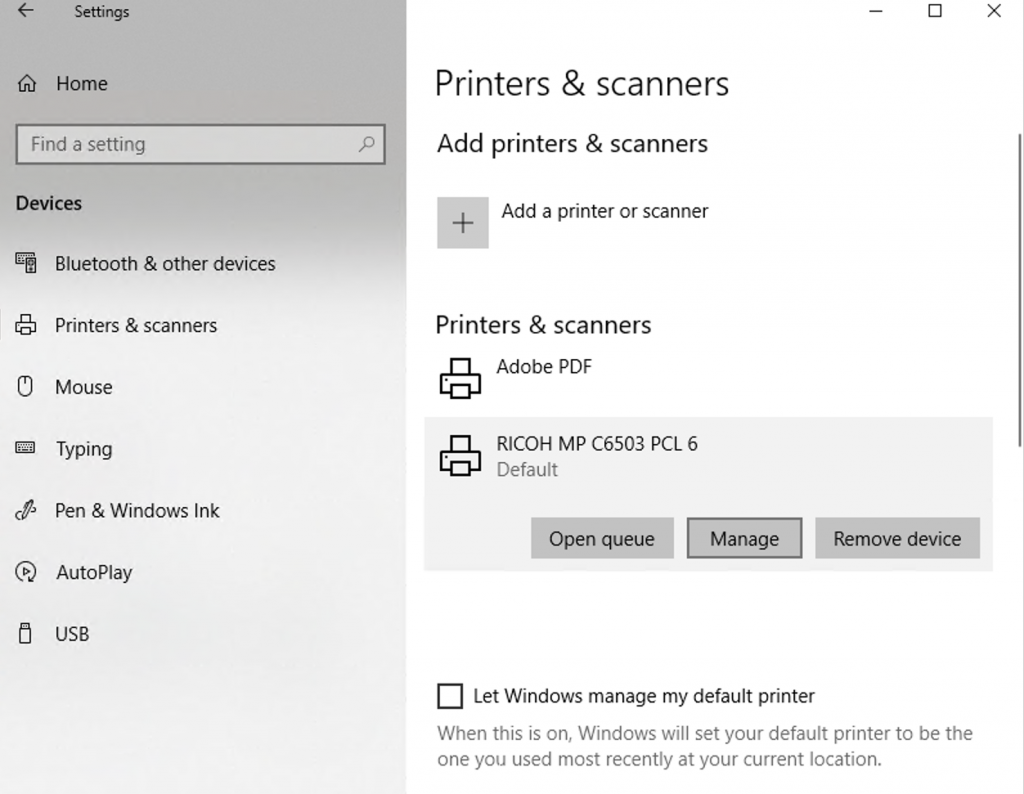
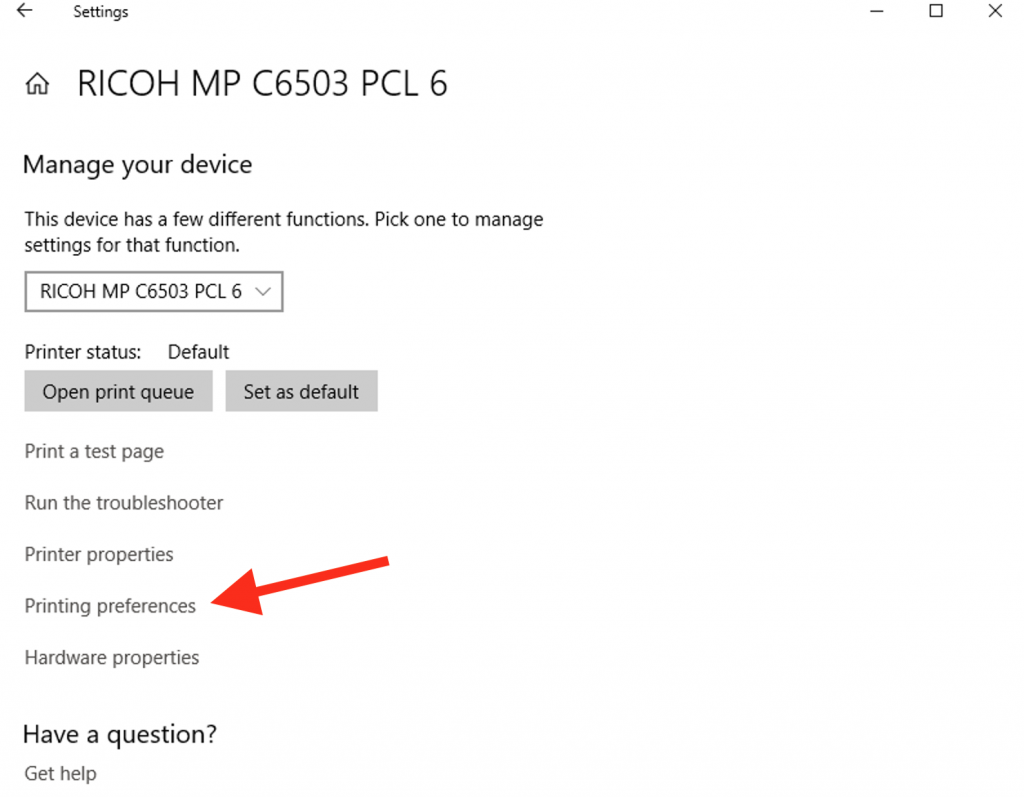
If you DON’T see the Ricoh device listed here, something went wrong! (dont worry, just email us!) . Otherwise, select the Ricoh device and click “manage.”
manage button.
Then select “Printing Preferences.”
select printing preferences.
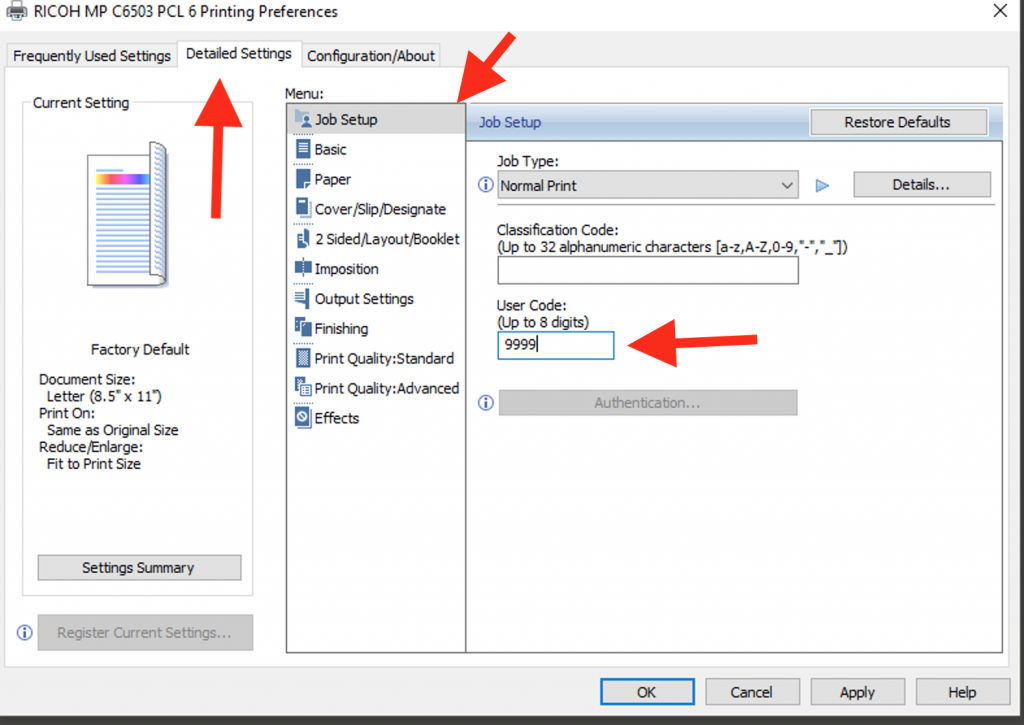
a) RICOH MP C6503 PCL 6 Printer:
And navigate to the Detailed settings tab, select the “job setup ” menu from the vertical items in the center menu and fill out your personal Job code in the “USER CODE box. Click apply and YOU ARE DONE!
setup screen.
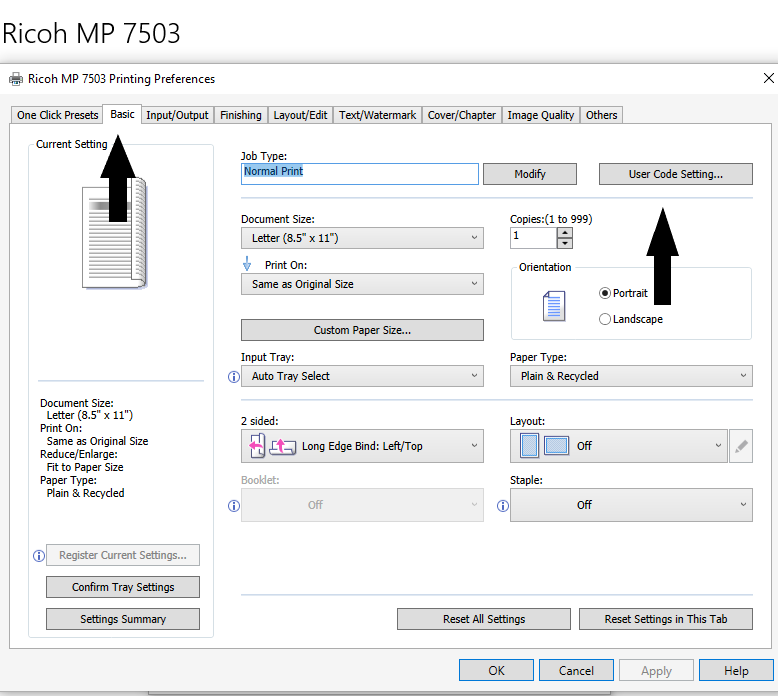
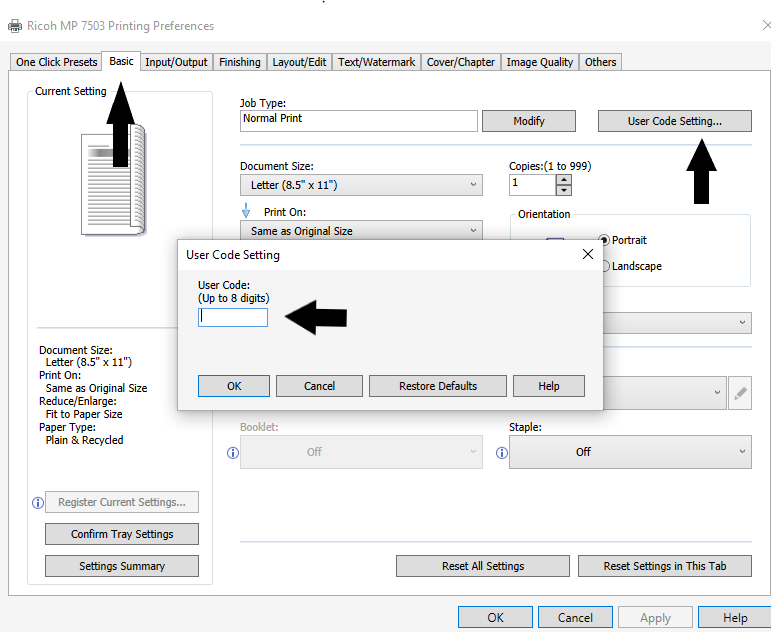
b) Ricoh MP 7503 printer:
And navigate to the Basic settings tab, then click the “User Code Setting” and fill out your personal job code in the “USER CODE box. Click ok then click apply and ok and YOU ARE DONE!
If you have any problems, or even after this, you are unable to print, please reach out to us!
Instructions for macOS
On macOS, the setup of these printers takes two extra steps. Another important caveat is that unfortunately you cannot print to these printers from Safari. We have been in contact with Ricoh about this issue, and it seems it rests with how Safari implements their print drivers and settings. Any other browser will work (chrome, Firefox, edge ect).
Open system preferences.
Select “printers and scanners”
to the left, in the window called printers, you will see a plus sign (+) at the bottom of the window. click this to add a printer.
If you are connected to a wall jack on EPSS networks:
On the network you should see two Ricoh printers at the bottom of the list with “bonjour multi function” listed under ‘kind’
select the printer you wish to add, then wait for the fields at the bottom of the screen to populate.
the field ‘use’ will likely default to “secure air print” which you will have to change to the “Ricoh XXXXX” value.
If you are on Eduroam:
if you are on Eduroam, you will have to add the printers by IP address. 128.97.31.241 is the black and white printer, and 128.97.31.249 is the color c6503.
to add an IP printer, at the top left are of the ‘add’ window, you will see a grey globe icon that says IP. click on this icon.
then enter the ip of the printer you wish to add.
if this is successful, you should see the fields on the bottom of this window populate. be sure that under ‘use’ the proper printer model driver is selected.
continue to the “adding job code” steps below this list.
Adding job Code on MacOS
This step assumes that you have already installed the Ricoh drivers, and that you have added the printers to your system using the steps above. Other methods may work to add the printers, but they will fail silently. To add a job code on macOS, you will have to use a print dialog from an application, such as word, PowerPoint, or a web browser other than safari.
For this example, we will use MS word.
Open any word document.
Open a print dialog (file>>print)
Select the Ricoh printer you wish to use:
Under the “presets “menu you should see a dialog dropdown called “copies & pages”, click this and select “job log”
if ‘job log’ is not showing, its possible you need to reboot to fully add the printers, or there was a problem in adding the printers in earlier steps
Under job log, you will see a box called “enable user code” and a field below to add you code. check the box and type your code into this field.
Then, to save this setting, and avoid having to enter the code for every print job, click on the “presets” dropdown menu, and select “save current settings as preset”
How to use a Mac in the EPSS computer lab
Geology 4691 has 12 dual boot Mac mini’s, currently running windows 10 and macOS Mojave.
These computers can be used with your EPSS account.
The computers boot into the last OS that was selected by default, so to change OS, you should restart the computer, holding the option key, to launch bootcamp. (bootcamp is apple’s boot-loader, and allows you to tell the computer which OS to use when starting up.)
After you have booted into macOS, you will see a row of user accounts. if you do not see a gray circle named “other” you should wait a moment, the Mac needs to connect back to the account server.
Once it appears, click “other” and log in with your epss account credentials.
This will generate a local user account for you on that machine.
IMPORTANT:
On the Windows machines, your desktop, downloads, documents and other folders are automatically synchronized with the server when you log out. This DOES NOT HAPPEN on the Mac side.
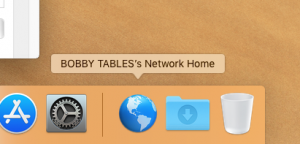
You will need to click the blue globe in the dock to access your network storage.
This is the same share that is listed as your U:/ Drive on the windows machines, and this is accessible across platforms.