EPSS provides two Ricoh MFD high-capacity printers in Geology 3807. All jobs require a user code.
Email help@epss.ucla.edu with your name, lab/group, and status to request a code. TAs use a separate course code from your coordinator or the helpdesk.
On this page
Overview
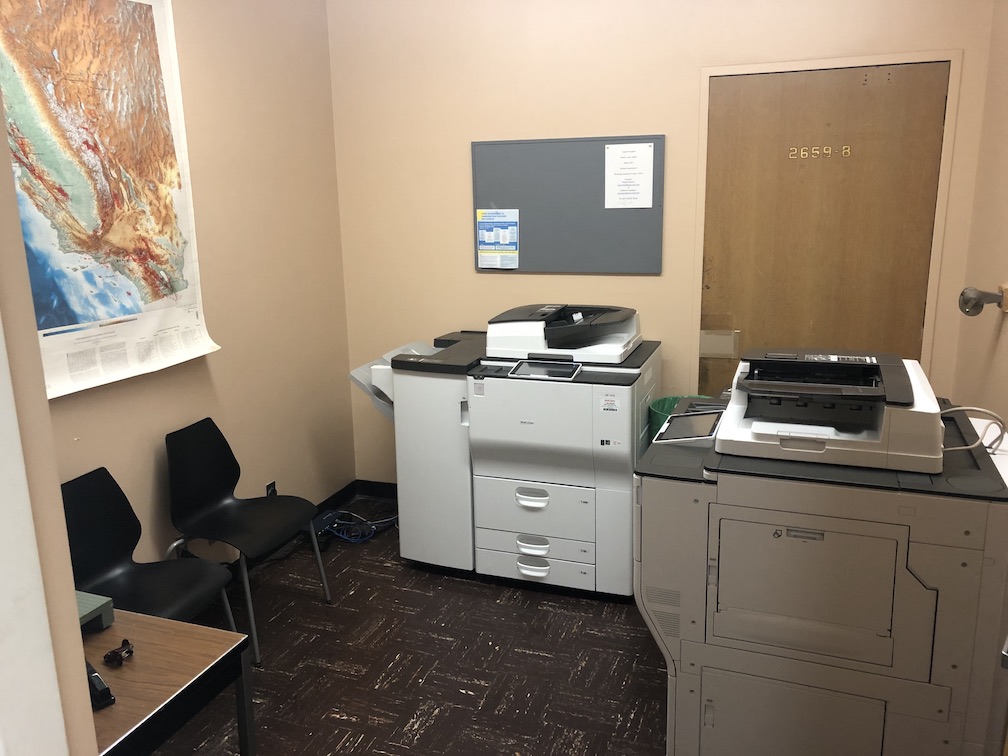
Printers support black-and-white and color printing, scanning (email or USB), and printing from USB (PDF/IMG only; FAT-formatted drives).
- Color: Ricoh MP C6503 — IP
128.97.31.249 - Black & white: Ricoh MP 7503 — IP
128.97.31.241
Network: Connect via EPSS ethernet or Eduroam in Geology/Slichter. Lab wireless and PhySciOpen will not work. Linux is possible but not officially supported.
macOS: Safari cannot print to these devices — use Chrome, Firefox, Edge, or another app.
Download the driver
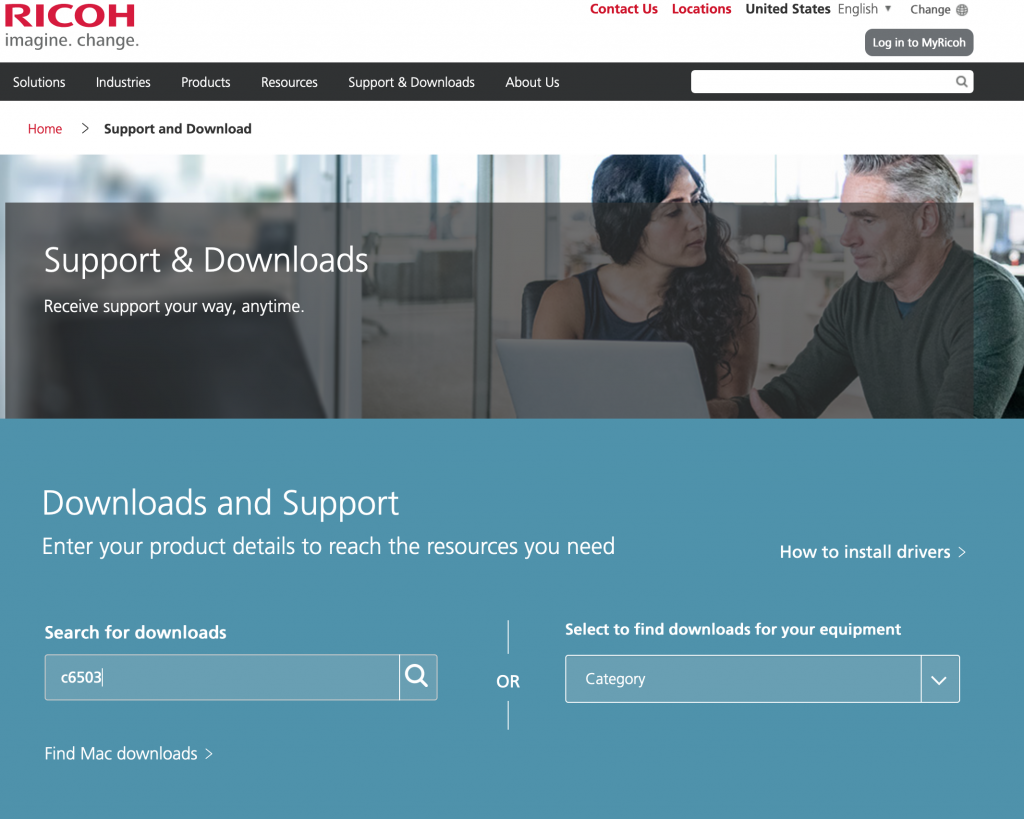
- Go to ricoh-usa.com (opens in a new tab) → Support and Downloads.
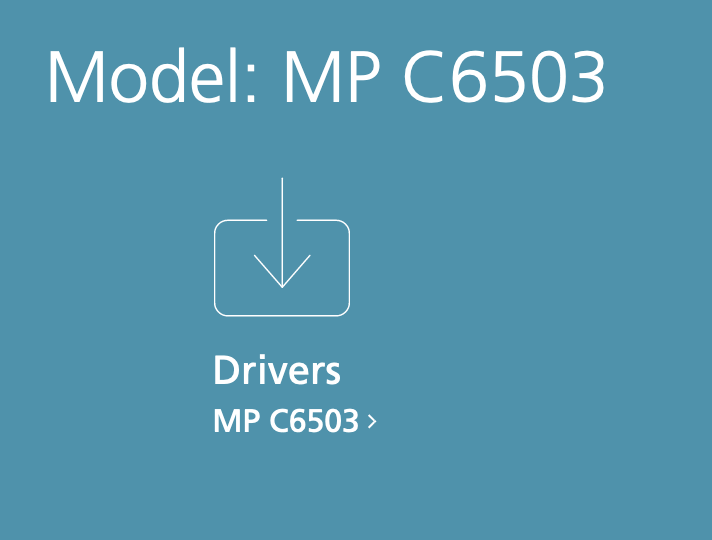
- Search for c6503 and select MP C6503 under Drivers.
- Accept the Ricoh terms of service.
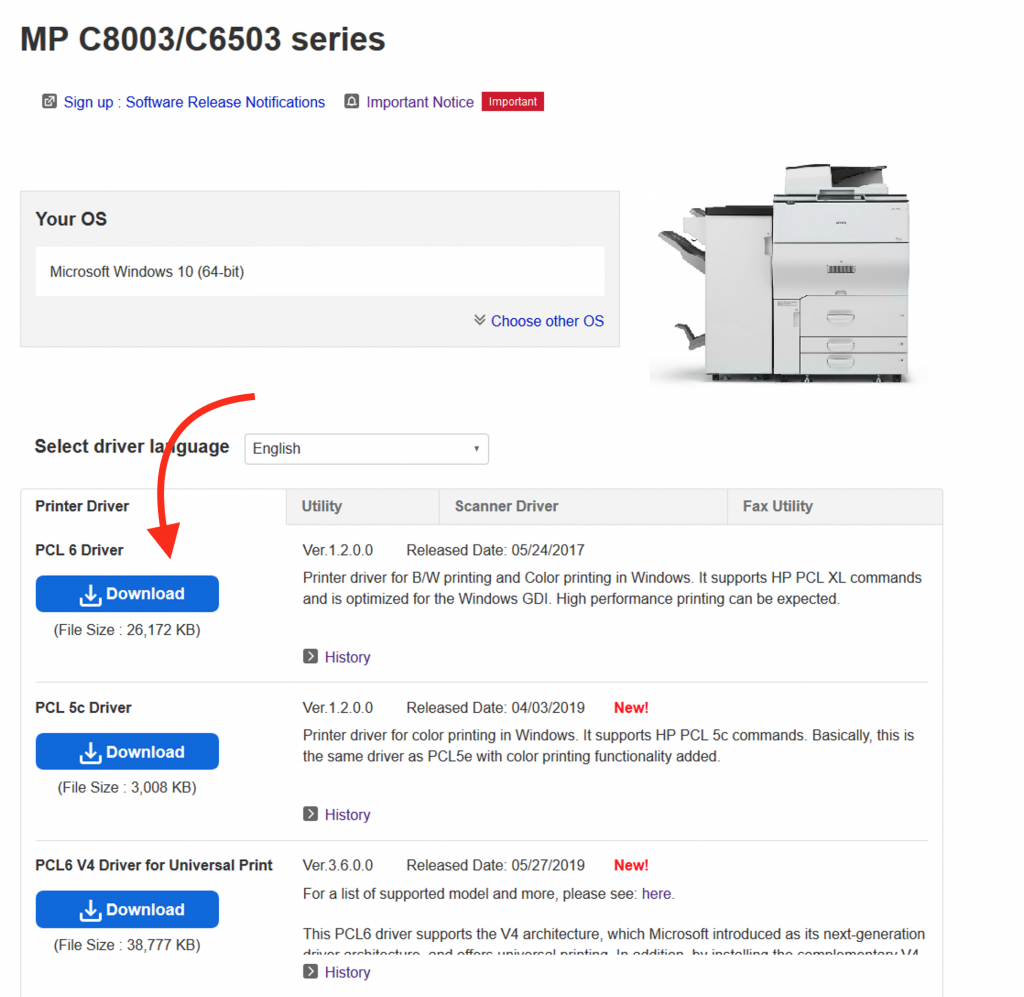
- macOS: download the PS driver.
- Windows: download and install the PCL6 driver.
Windows setup
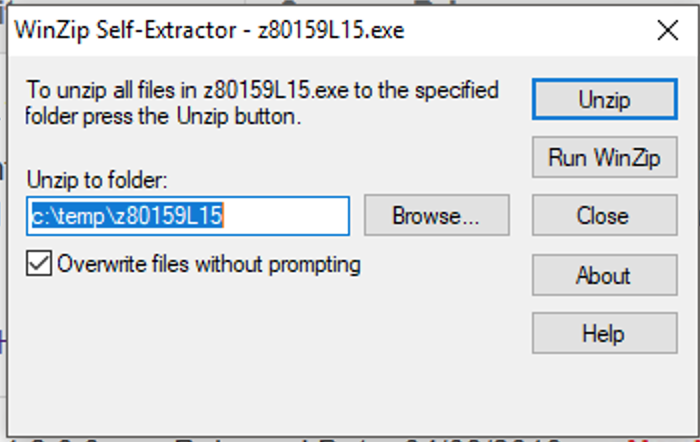
- Download the PCL6 driver and unzip when prompted (continue past any security warning).
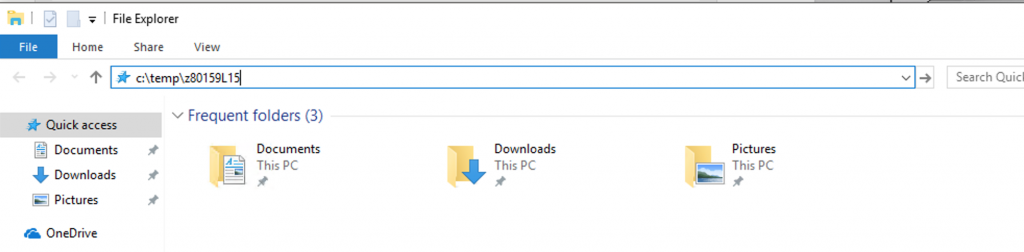
- Copy the highlighted path from the unzip dialog (e.g.
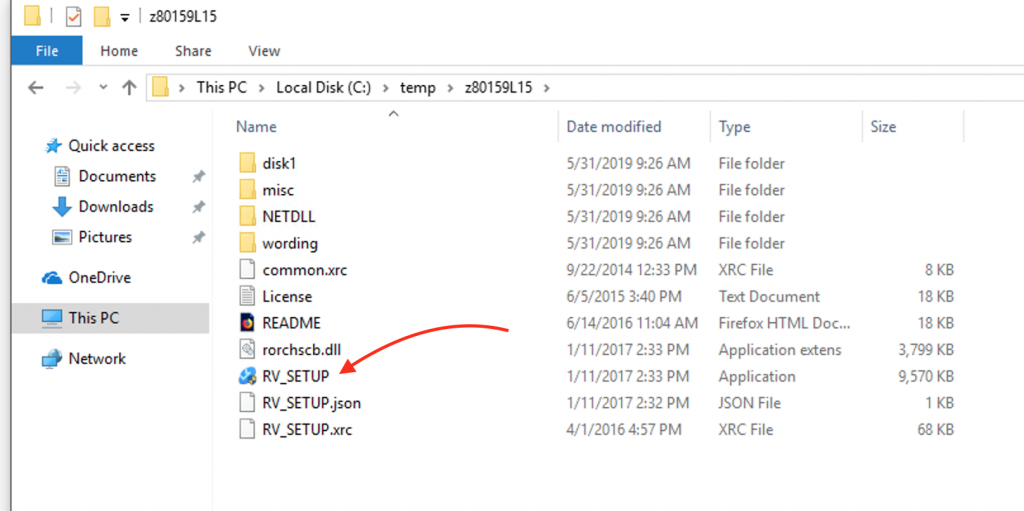
c:/temp/z80159L15) into File Explorer. - Run RV Setup from that folder.
- Allow changes, answer Yes, then select Network.
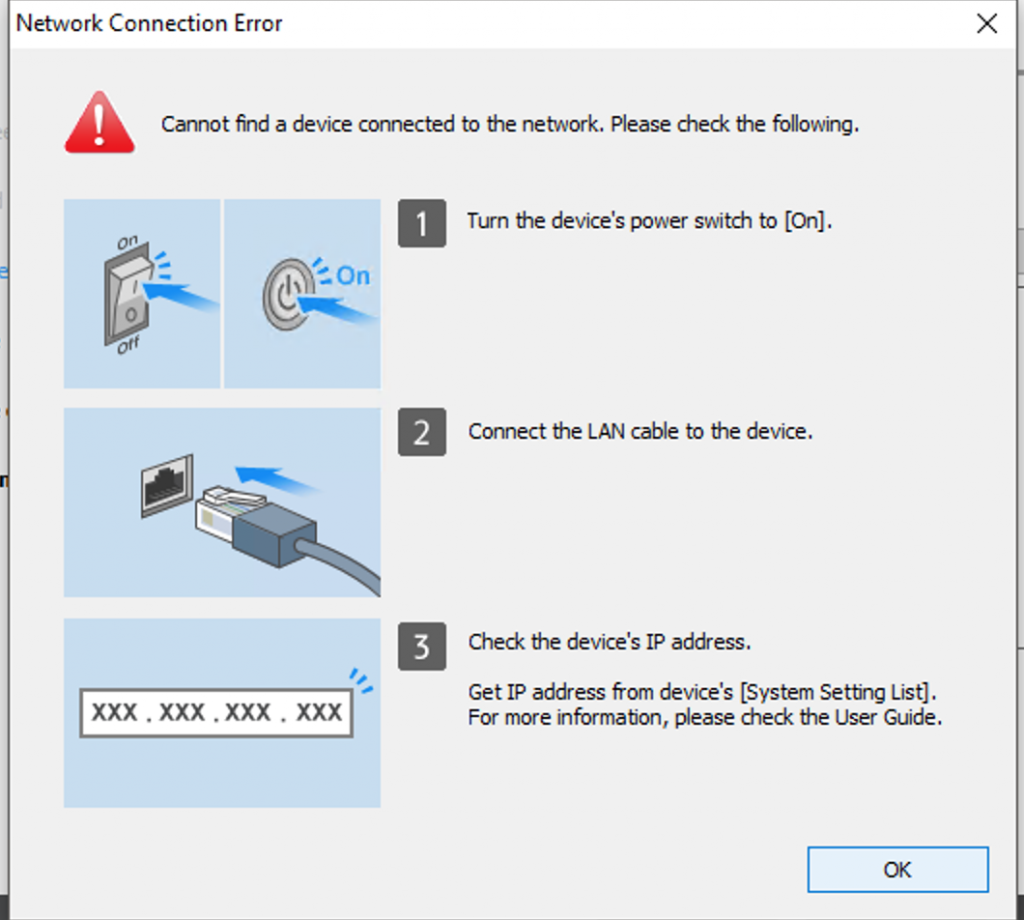
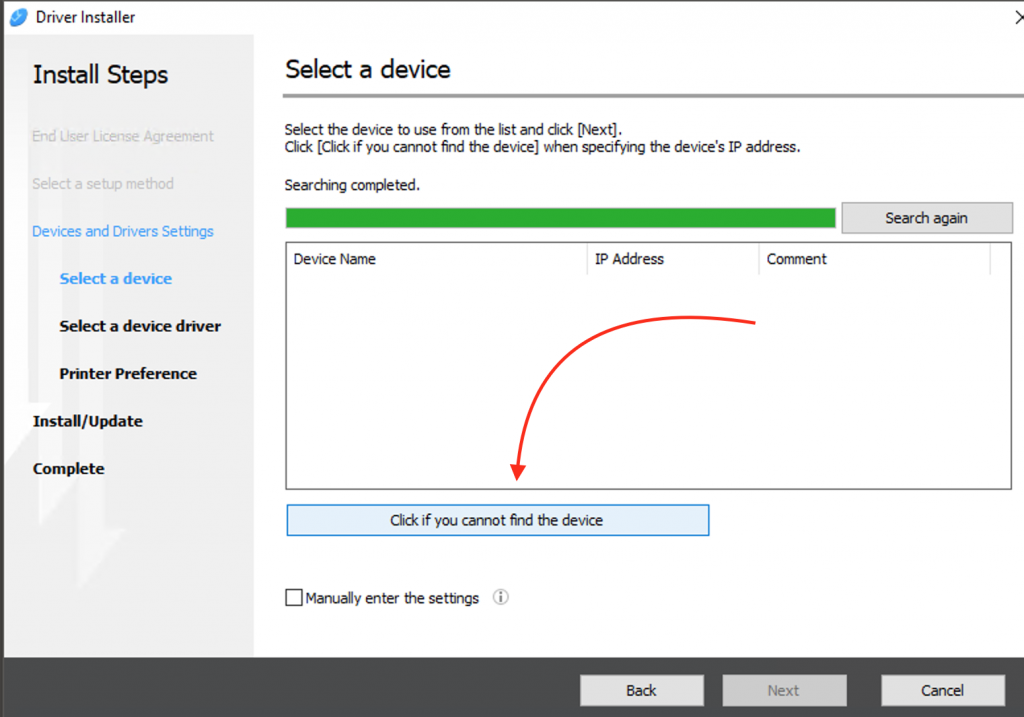
- If the printer is found, select it and skip to add user code.
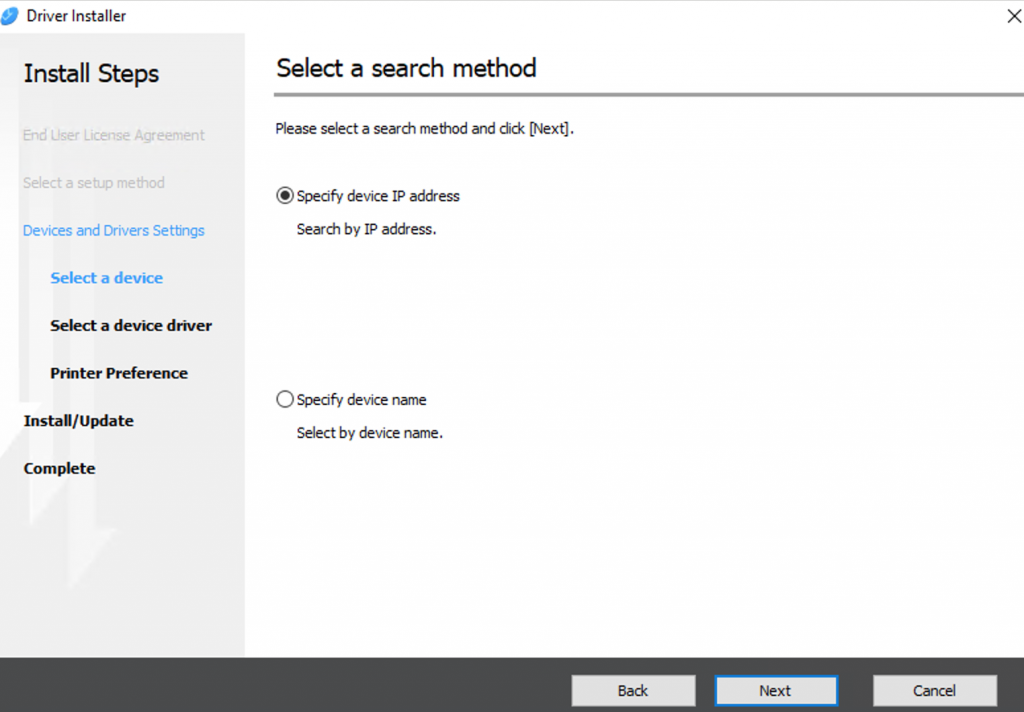
- If not found: click Click if you cannot find the device → Specify device IP address.
- Enter the printer IP (
128.97.31.249color or128.97.31.241B&W) and complete installation.
Windows: add user code
Without a user code, print jobs are discarded.
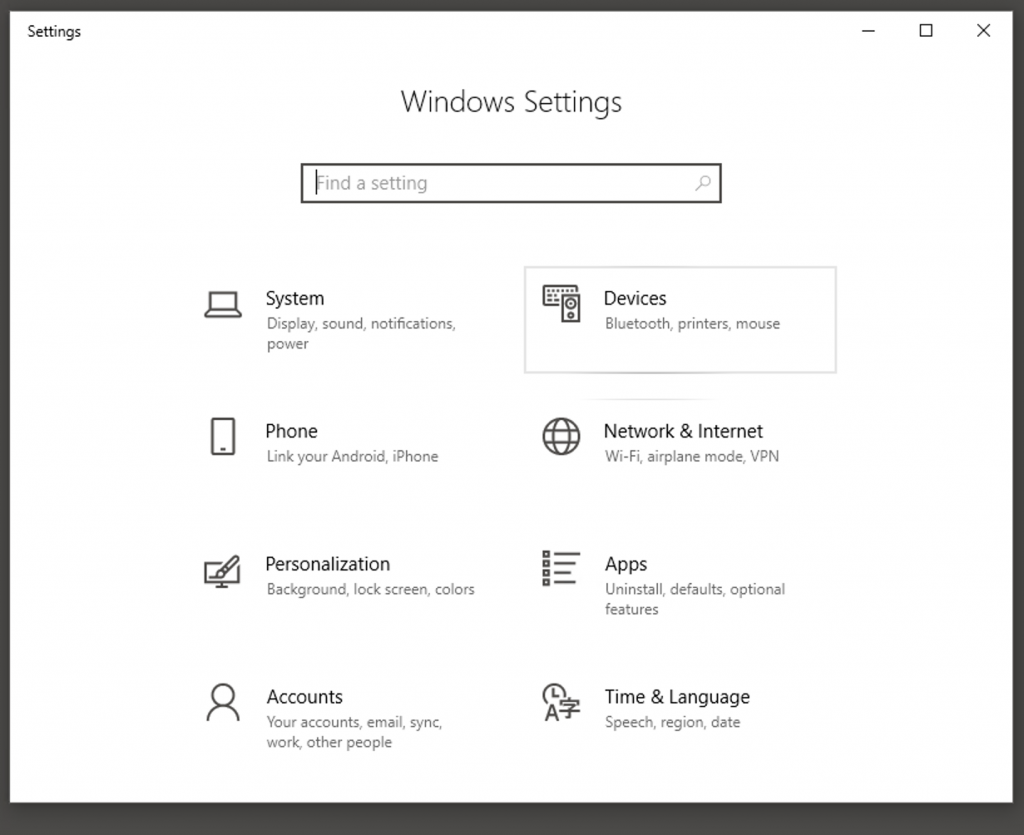
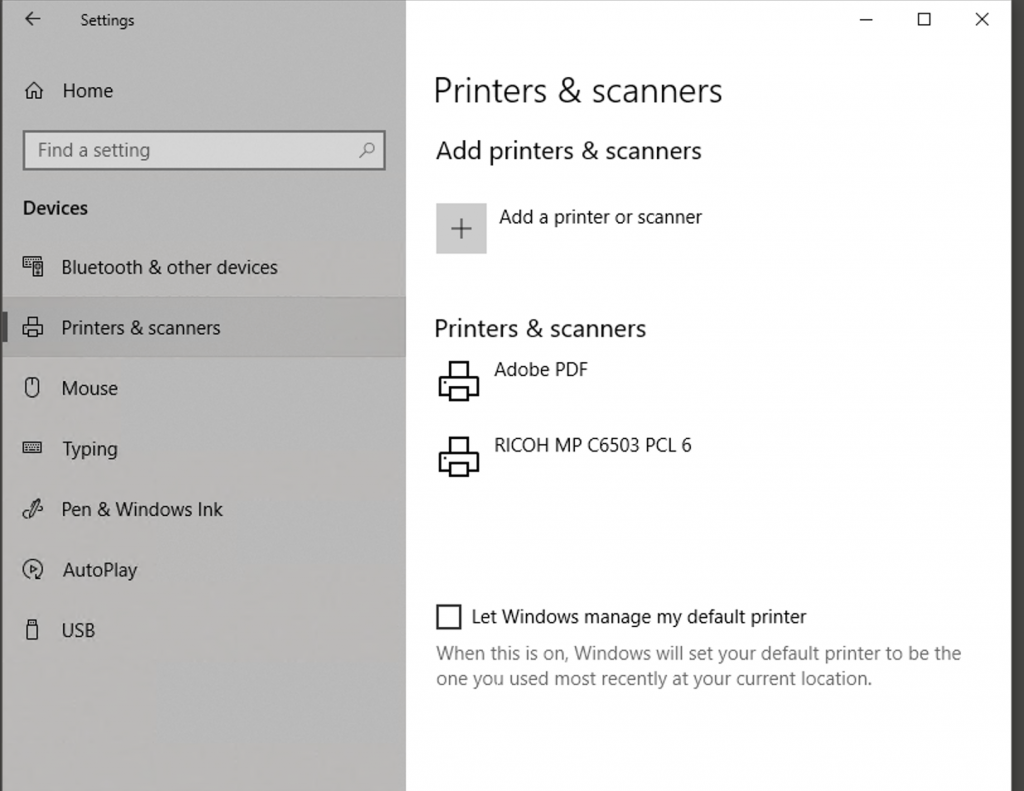
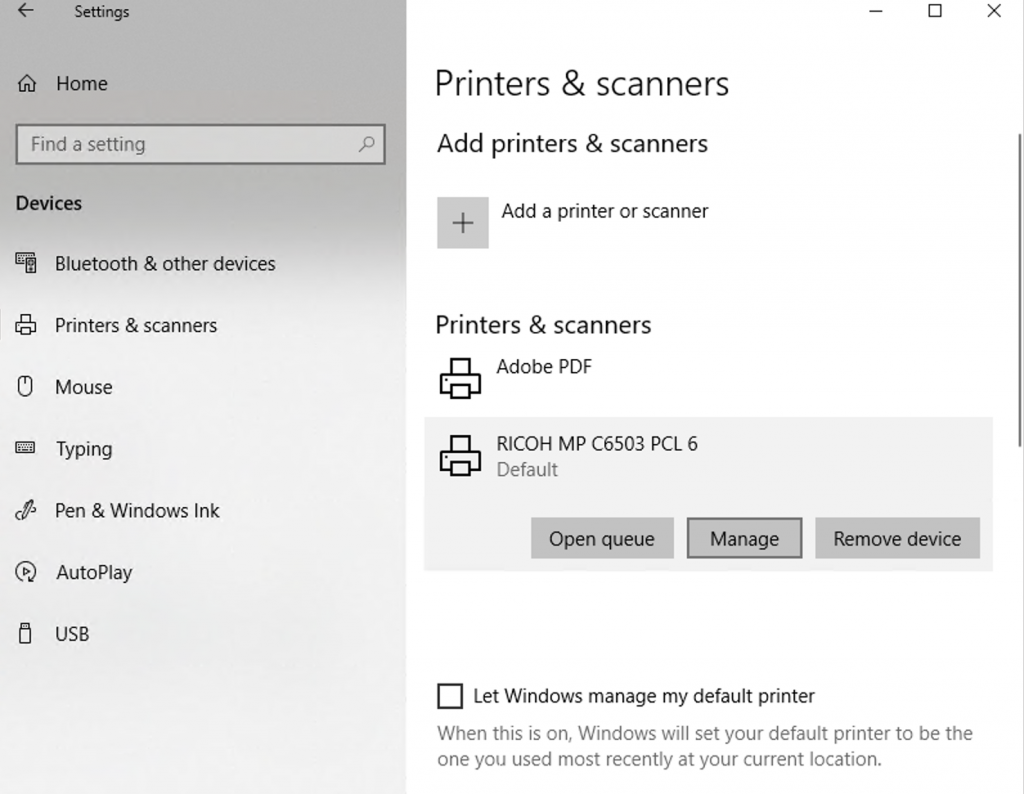
- Start → Settings → Devices → Printers & scanners.
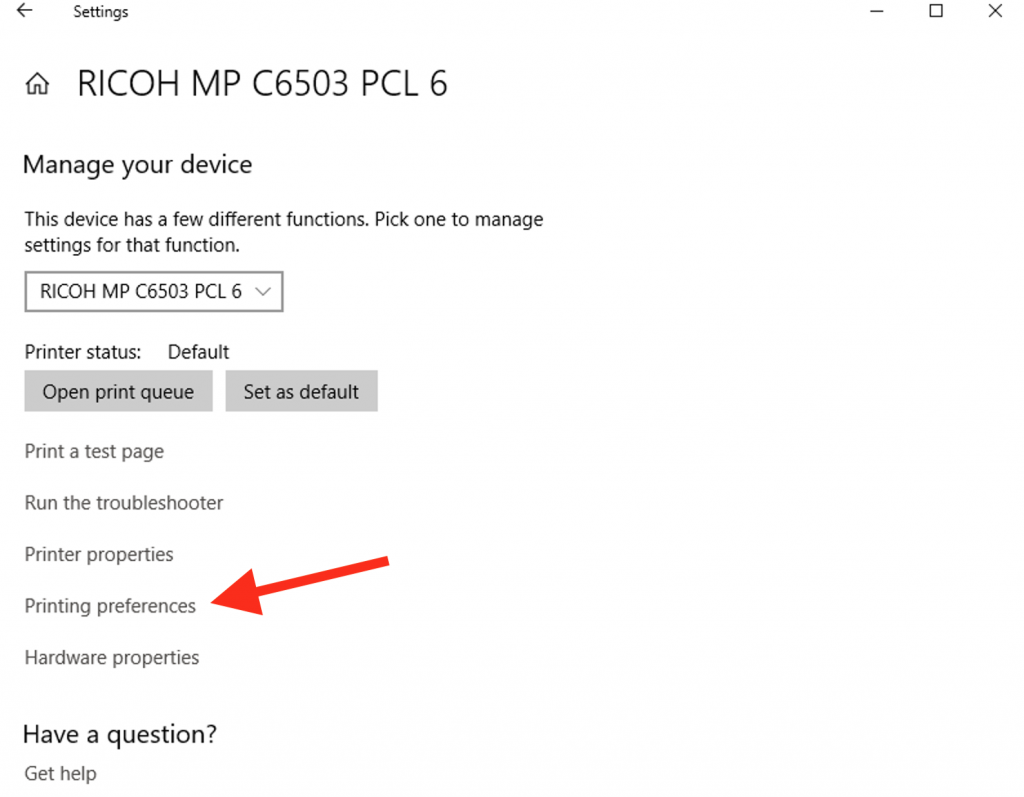
- Select the Ricoh printer → Manage → Printing preferences.
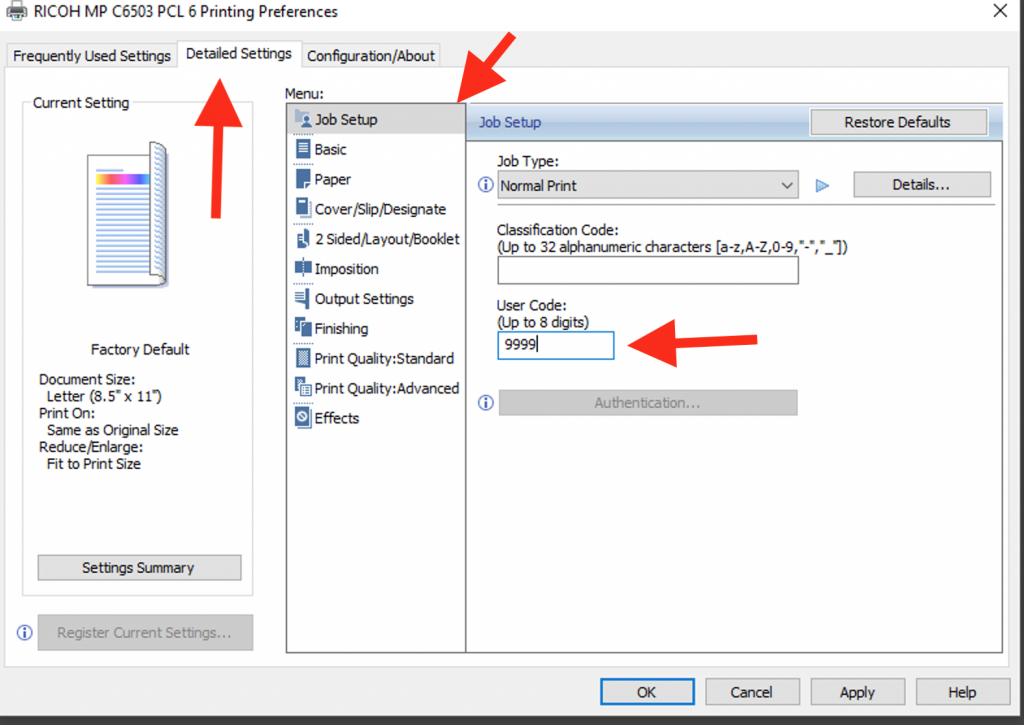
- MP C6503 (color): Detailed Settings → Job Setup → enter code in USER CODE → Apply.
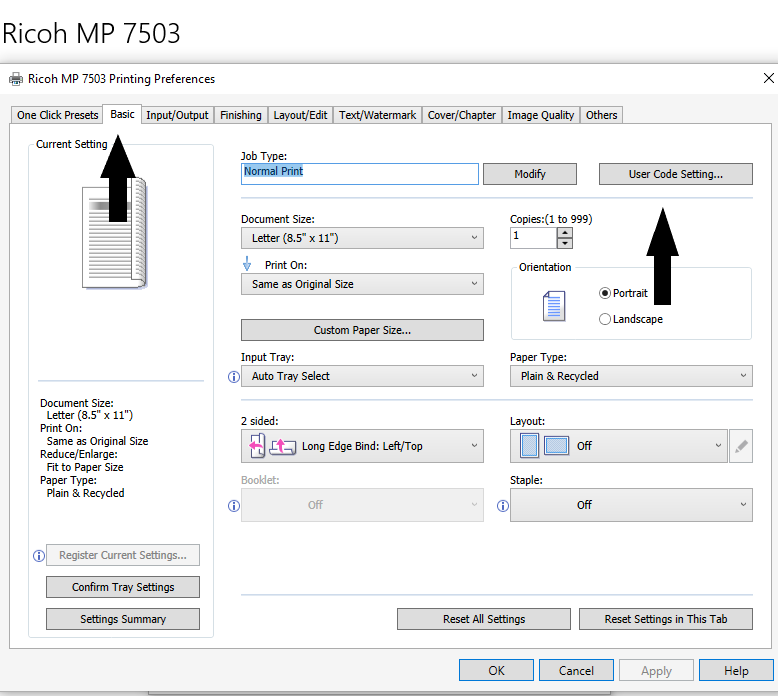
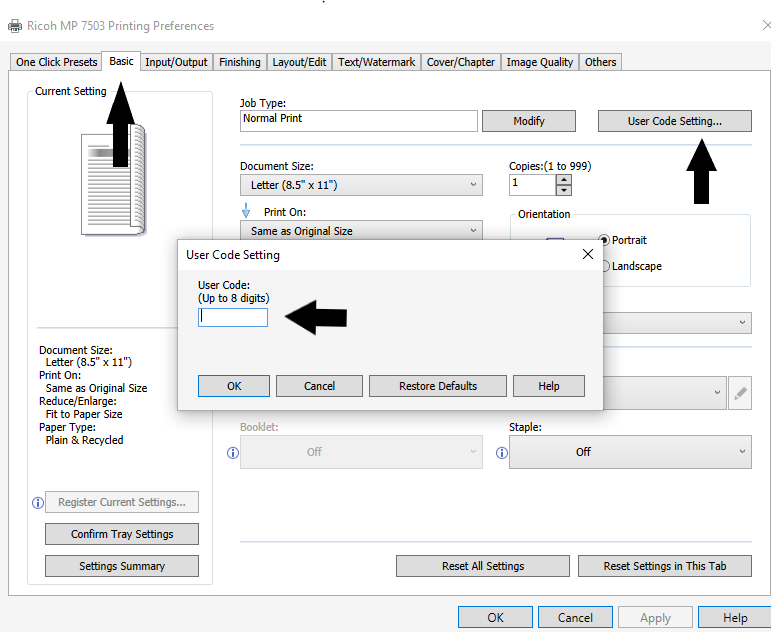
- MP 7503 (B&W): Basic Settings → User Code Setting → enter code → OK → Apply.
macOS setup
- Open System Settings (or System Preferences) → Printers & Scanners.
- Click + to add a printer.
- On EPSS ethernet: select a Ricoh printer with Bonjour multifunction under Kind. Change Use from Secure AirPrint to the Ricoh driver.
- On Eduroam: click the IP tab (globe icon). Enter
128.97.31.249(color) or128.97.31.241(B&W). Confirm the correct driver under Use.
Install Ricoh drivers first. Other add-printer methods may fail silently.
macOS: add user code
Use a print dialog from Word, PowerPoint, or a browser other than Safari.
- Open a document → File → Print.
- Select the Ricoh printer.
- Under Presets, change Copies & Pages to Job Log.
- Check Enable User Code and enter your code.
- Save as a preset (Save Current Settings as Preset) to avoid re-entering each time.
If Job Log does not appear, reboot or re-add the printer using the steps above.
Need help?
- Email help@epss.ucla.edu if the Ricoh does not appear or jobs still fail after adding your code.
- Hub page: Department printing