Skip to Main Content
UCLA Logo EPSS IT

How to use a Mac in the EPSS computer lab

Geology 4691 has 12 dual boot Mac mini’s, currently running windows 10 and macOS Mojave.

These computers can be used with your EPSS account.

The computers boot into the last OS that was selected by default, so to change OS, you should restart the computer, holding the option key, to launch bootcamp. (bootcamp is apple’s boot-loader, and allows you to tell the computer which OS to use when starting up.)

After you have booted into macOS, you will see a row of user accounts. if you do not see a gray circle named “other” you should wait a moment, the Mac needs to connect back to the account server.

Once it appears, click “other” and log in with your epss account credentials.

This will generate a local user account for you on that machine.

IMPORTANT:

On the Windows machines, your desktop, downloads, documents and other folders are automatically synchronized with the server when you log out. This DOES NOT HAPPEN on the Mac side.

You will need to click the blue globe in the dock to access your network storage.

screenshot of the blue globe with caption, "Bobby tables network home"

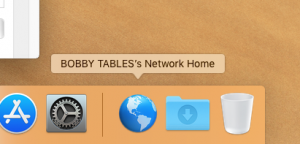
This is the same share that is listed as your U:/ Drive on the windows machines, and this is accessible across platforms.

Downloading and installing Microsoft Office desktop apps from office 365

This tutorial is for Individuals with @epss.ucla.edu email accounts. If you are a student and would like to install office apps, please email the helpdesk. If you do not have an @epss.ucla.edu email address, this will not work for you. This will work for both macOS and Windows machines.

The following steps assume you have accessed the web portal at https://portal.office.com prior to this point and know your password and EM login. If you need help with these items, email the helpdesk

  1. Log in to the web interface for office apps using your EM login (username@ad.ucla.edu format) . It should look like this:
    portal login window
  2. One you have logged in, you should see a screen that has a row of Office apps, including Word, Power Point and Outlook like this:
  3. In the upper right hand corner of the screen, you should see a drop down menu that says “Install Office Apps”. Click this drop down and select “Office 2016” from the list.
  4. You will be prompted to download the installer, and an orange window with a link to installation instructions help will appear. If you need help installing from this installer, click the link at the bottom of the orange window.
  5. Once installation is complete, you will have to sign in with your EM credentials, (username@ad.ucla.edu) to activate the applicaitons. If you have any other trouble after this point, please email the helpdesk.
  6. Happy Computing!